Showing posts with label Cuttlebug - Tiny Bubbles. Show all posts

Saturday, August 17, 2024

Hello Friend 😊

Hi, there! It's been a while! I haven't stamped for a couple of years. I was a bit rusty making this card, but it's all starting to come back to me. The thing about stamping is it's a very expensive hobby to get into. But the stuff you buy lasts a good, long time - most of it, anyway. I have so many lovely older stamp sets, papers, dies, etc. to play with. I still even have my Stamp-a-ma-jig! Anyone else still using theirs? I mean why buy the 10-times-better newest gadgets when the old stuff still works just fine, right? 

I hope to be sharing more on here in the near future. Not sure if I'll be the only one visiting my old stamping blog at this pointπŸ˜„, but if you came by for a visit to see if I was here, thanks so much and please leave a comment to let me know!

Take care!

Recipe:

Stamps: Stampin' Up! Unfroggetable, Stampin' Up! Amazing to Zany

CS: Prima Doodle Deux decorative papers, White, Black

Ink: Memento Tuxedo Black,

Copics: BG11, BG13, E41, W1

Other: Cuttlebug Tiny Bubbles embossing folder, Taylored Expressions Chevron Border die, Sizzix Architectural Accents die, paper piercer, sponge mat, Stamp-a-ma-jig, googly eyes, Stickles Fruit Punch and Frosted Lace glitter glues, black gingham ribbon, foam tape

Tuesday, May 25, 2021

Silly Whale Birthday

Hello! Another sea-themed card. This time I'm using my old Stampin' Up! Silly Sealife set. The card sketch I'm using is Mojo Monday 560


I chose two papers from the Basic Grey Archaic collection because they are "wavy" like the sea. And one of them has a "bubbly" look that made me think of being under water. The one behind the sentiment wasn't "wavy" or "bubbly", but I liked how it went with the other two. 

I thought the Stampin' Up! Cheery Chat birthday greeting would go very well with the whole look on the front, and I used the matching birthday saying inside. I love the whimsy of the font.

I used the Nestabilities Labels Three die to frame the sentiment, but I'm not sure it was the best choice. Maybe a tad too wide for the look? I dunno.

And, of course, I gave in to using my Tiny Bubbles embossing folder because this card has a water theme...and...bubbles.


My happy little whale is spouting glittery water. 


It's probably hard to see, but I used the D'Vine Swirls embossing folder to create "waves" on the lower bubbly-looking paper. 

And here's the inside. Aren't those sea creatures adorable? This is such a versatile stamp set, I tell ya!


Close-up of the inside.


So, yet another sea card. I think that's my last one for awhile though. Hope you're having a good week! Take care and thanks for coming by!

Stamps: SU Silly Sealife, SU Cheery Chat

CS: Black, Ivory, SU Chocolate Chip, Basic Grey Archaic designer paper

Inks: Memento Tuxedo Black, Versafine Onyx Black

Copic Markers for whale: B0000, B00, B21, BG11, E11, E13, E15

Other: Cuttlebug Tiny Bubbles and D'Vine Swirls embossing folders, Nestabilities Standard Circle Large and Labels Three dies, hole punching tool, foam tape, large brown eyelets, Frosted Lace Stickles glitter gel

Saturday, May 22, 2021

Snappy Birthday - Seaside/Beach Theme

Happy Saturday! This card is a bit old school. I actually stamped everything on it (no relying on digital images or designer paper), and no use of Copic markers. I used actual ink pads and regular Stampin' Up! markers like in the olden days. It was a lot of fun. And I'm sorry, but I couldn't help myself and used the Cuttlebug Tiny Bubbles embossing folder AGAIN. I love that thing too much, I'm afraid. Maybe I should try doing some cards without relying on my embossing folders for once? I just love the textures they create. It's an addiction. A very hard habit to break.


So this card used the retired Stampin' Up! Crab & Company set which I purchased awhile back on eBay, but had never used. I saw some really cute cards made with it on Pinterest which made me want to own it. Such a fun set! I also used another old Stampin' Up! set called Beautiful Batik. Anyone remember that one? I hardly ever used it, but I thought it would go well with my seaside/beach theme, especially using beachy colors. I colored the stamps with SU markers and then huffed on the stamps to moisten the ink and stamped different images from the set all over the white cardstock. I also used some of the smaller images from Crab & Company here and there around them. And last, but not least, I took one of the splatter stamps from ye olde SU Itty Bitty Backgrounds and stamped it here and there to fill in.

I used no die cuts either. Rebel me! I just did what I used to do (before die-cutting took the stamping world by storm) and cut the rectangles with my paper trimmer. I did use a hole punch to get the oval shape around the outside sentiment.


I have to say that I enjoyed doing things mostly old school for a change. I don't own any die cuts that have the dotted borders. Someday I'll get around to buying some. Until then I'll just punch my own holes, uneven though they may be. It's actually very therapeutic doing it by hand and is one of my favorite ways to embellish my cards. 

One last stamp set I used was Stampendous Sushi Bowl Party. I stamped the tiny swimming fish stamps from the set using Versamark clear embossing ink on the turquoise background to imitate them swimming in the ocean in schools. They're so cute!


Inside, I used a sentiment from an old The Angel Company set that I don't know the name of. You can get a better look at the cardstock I used on the front of the card inside where nothing is laying over it.


This was a fun card to make using so many old school ways. I do need to lay off the embossing folders a bit, I think. I have so many of them that I don't even use. I keep grabbing my favorites. This must change.

Thanks for coming by for a look! Have a great day!

Stamps: SU Crab & Company, SU Beautiful Batik, SU Itty Bitty Backgrounds, Stampendous Sushi Bowl Party, inside sentiment by The Angel Company

CS: SU Tempting Turquoise, SU Yoyo Yellow, White, Black

Inks: SU Tempting Turquoise pad and marker, SU Yoyo Yellow pad and marker, SU Glorious Green marker, SU Certainly Celery pad and marker, Versamark clear embossing ink, Versafine Onyx Black

Other: Cuttlebug Tiny Bubbles embossing folder, water brush, yellow zigzag ribbon, turquoise gems, foam tape, jumbo oval punch, hole punching tool, googly eyes

Saturday, May 01, 2021

Under the Bonnet Masculine Birthday Card MM#558

Hello there! Happy Saturday!

My grown son's birthday is coming up soon and he loves to work on cars. When he was a teenager he would buy an old car, fix it up and make it pretty. Then he'd sell it and buy another one. The driveway looked like a used car lot at times! Now he's married with a child and finds he has less free time to tinker. But he really does enjoy it when he can.

I wanted to use a stamp that was car-related that I hadn't already used before, and I found the cutest digital stamp by Lili of the Valley called Under the Bonnet. I found the shop on Etsy and I love their stamps! So adorable! This stamp fit perfectly for the theme I was going for. 

And I just noticed that all throughout May they are running a 50% off sale! Oh my! That's dangerous! 

I also needed some serious stamping mojo. So I went with Julee Tilman's Mojo Monday Sketch Challenge #558. Her sketches always motivate me. 

(Btw, everything on this card except the digital stamp is likely retired by now. I don't buy much new these days. Part of my attempt at being more "minimalish".) 


I chose some Basic Grey Cupcake designer papers from my stash, and an olive green background for the cardstock. I stamped on the olive green edges with a Stampin' Up! Making Tracks wheel. Although you can't really tell, it's the image of tire tracks. 😜

To oomph up the car I used large silver eyelets for the body of the headlights, and I put small clear gems behind them to mimic real glass lamps. I also used tiny clear gems for the lowlights.


You can kind of see the shine I put on the red part of the car and the window. I used Inkssentials clear Glossy Accents for that.


I made the designer cardstock pop by using the Cuttlebug Spots and Dots embossing folder for the biggest piece and the Tiny Bubbles folder for the middle-sized piece.

All coloring was done with Copic markers. 

Well, I hope you enjoyed this card I made for my son, and I thank you for coming by for a visit! Take care!

P.S. I redid the original pics because I had forgotten to put the sentiment on the card. 

Stamp: Lili of the Valley digital stamp "Under the Bonnet", Stampin' Up! Making Tracks wheel (for background edges), Savvy Stamps Happy Birthday image

CS: olive green cardstock by Papertrey Ink , Basic Grey Cupcake designer paper, Black

Inks: Copic markers, VersaMark clear embossing ink

Other: Cuttlebug Spots and Dots and Tiny Bubbles embossing folders, Nestabilities Large Pinking Circles, and Standard Circles Large, corner punch, small oval punch, medium oval punch, paper piecing tool, foam tape, large silver eyelets, tiny clear gems for behind eyelet headlights and lowlights, Inkssentials Glossy Accents clear dimensional medium to add shine to car

Wednesday, February 27, 2019

Patriotic Invitation

Just a simple invitation I made for my daughter's AHG Stars & Stripes Award Ceremony. She colored the flag image on each one. I think she did a lovely job. Please excuse the imperfect parts of the card that I did. These were done in a bit of a hurry.


Stamps: Stampin' Up! Canvas, God Bless America by Our Daily Bread Designs, saying printed off computer

CS: SU Night of Navy, Papertrey Ink Pure Poppy, Papertrey Ink Stamper's Select White

Inks: Versamark, Versafine Onyx Black, black printer ink

Other: Park Lane Star and Cuttlebug Tiny Bubbles embossing folders, Nestabilities Large Pinking Circles die, Nestabilities Classic Circles Small die, Copic markers, red & white ribbon, foam tape

Thursday, May 10, 2018

You're a Classic

My son is an avid classic car guy. He owns 2 old pickup trucks that he is restoring. So for his birthday I thought I'd pull out the old Stampin' Up! set Classic Pickups to make his card.


I sponged different inks on the tags before stamping the truck image. I also stamped the saying before dry-embossing the paper:


I did a double version of the truck image to pop it out. And I popped out the tags as well (all with foam tape).


I did a pitiful job on setting the big eyelets inside the card. Even with the Crop-o-Dile it's hard for me. I'm probably not using it properly. Maybe I should use my trusty old eyelet setter.


Thanks for looking! Have a great day!

Stamps: SU! Classic Pickups, SU! Birthday Greetings, The Angel Company (inside center saying)

CS: Black, White, Basic Grey Granola papers, white tags

Inks: Tim Holtz Distress Inks in Antique Linen, Vintage, and Black Soot; Memento Tuxedo Black, Stampin' Up! Night of Navy

Other: Cuttlebug Tiny Bubbles embossing folder, Sponge for direct to paper inking, Crop-o-Dile, large, brown eyelets, brown mini-brads, foam tape, brown leather string

Tuesday, February 20, 2018

Wish Big


Recipe:

Stamps: Hero Arts Woodland Creatures, Penny Black Critter Party (inside sentiment), Stampendous Rainbows Play (umbrella), Penny Black Micey Day (outside sentiment)

Inks: Versafine Onyx Black, Mementos Tuxedo Black (for colored image), Copics YR12, YR 15, YR 18

Cardstock: White, Black, DCWV Pocket Full of Posies designer papers

Other: Cuttlebug Floral Screen and Tiny Bubbles embossing folders, large oval punch, small oval punch, foam tape, black gingham ribbon, paper piercer, sponge mat

Sunday, February 04, 2018

Gingham Cupcake Birthday


Recipe:

Stamps: Inkadinkado Birthday Cupcakes, SU! Birthday Greetings

CS: SU! Blush Blossom, White, Vellum

Inks: Memento Tuxedo Black (cupcake), Versafine Onyx Black (sayings), Copics

Other: Cuttlebug Distressed Stripes, Tiny Bubbles and Kassie's Brocade embossing folders, stitching, scissors blade to rough up edges of cardstock, foam tape, Stampamajig to center sayings, Stickles glitter glue, black gingham ribbon

Monday, January 22, 2018

Happy Birthday Cupcake

Hello! Hope you're having a good week!

I made this card for one of my Susan Branch friends who has a birthday this month. Since winter is such a colorless part of the year, I was wanting to do something with some serious COLOR. So I reached into my designer papers and found a lovely pink and orange number that spoke to me. 


I also found some orange gingham ribbon that made me happy. And cupcakes are perfect for a birthday card, don't you think? So I used one from Inkadinkado's Birthday Cupcake set.

I "frosted" the cupcake with Copics and added Stickles glitter glue to highlight. I love Stickles!


The inside is not very fancy, but I did some paper piercing and corner treatments to spiff it up. The inside sentiment is from SU! Birthday Greetings. It says, "Sorry I'm late -- hope your birthday was great!" I was late getting this out, so that saying fits perfectly.


Well, that's it, Thanks for coming by!

Recipe:

Stamps: Inkadinkado Birthday Cupcakes, SU! Simple Sayings II, SU! Birthday Greetings, SU! Canvas

Inks: Versafine Onyx Black, VersaMark, Copics

Cardstock: Pocket Full of Posies designer paper by DCWV, White from Papertrey Ink, hot pink from ???

Other: Cuttlebug Tiny Bubbles and Floral Screen embossing folders, SU Ticket Corner Punch, Ornare Decorative Corners piercing template, piercing tool, sponge mat, Stickles (various colors), orange gingham ribbon

Monday, September 10, 2012

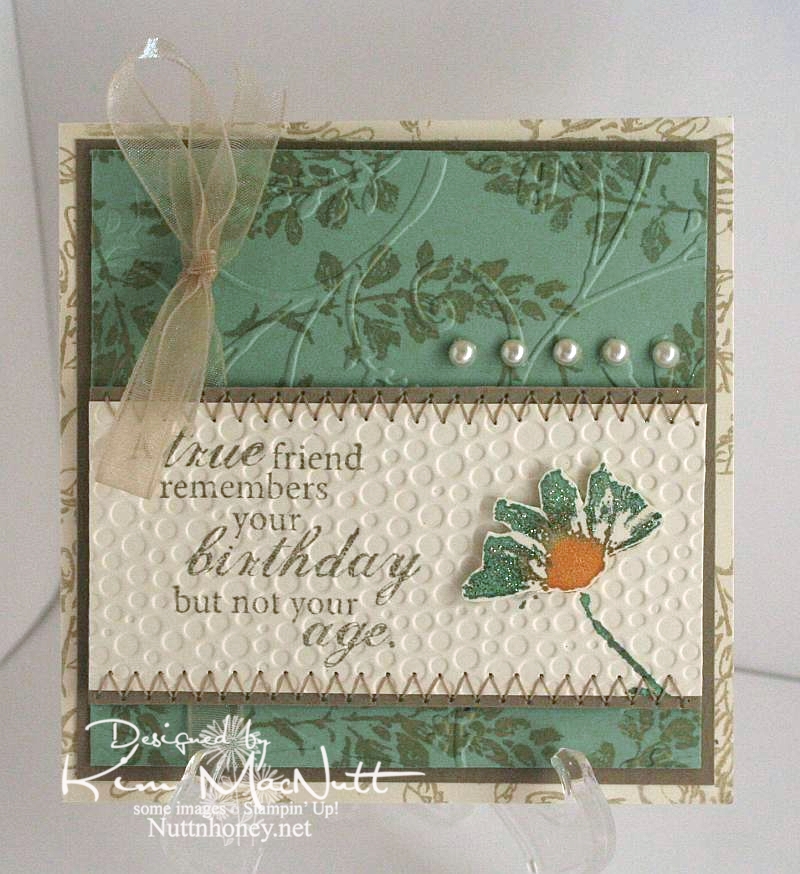
A true friend...


The dear friend I made this card for has never revealed her age to me in the 20 years I've known her. She's determined! But she's given away clues that made me at least get in a good guess. It's not important, though. Just a funny aside to why I chose the saying for her card.

Once again, I used the Petal Prints set. Such a pretty set with such versatility. Any of those shadow stamp type sets are like that. You can draw on them with markers and either huff on them or spritz them with water for different watercolor effects. You can stamp other stamps on them and restamp to create patterned images. So, so versatile.

I stayed completely away from black on this one. A rare thing for me. ;) It was a fun excursion.

I used a cream cardstock rather than white to give a softer appearance to the Sage Shadow green and the Kraft cardstock.

On the cream background piece I used an outline stamp from SU Petal Prints in Encore Gold (just in a gold mood, I guess). I did the same on the Sage Shadow piece. Then on that same piece I cuttlebugged it using the Stylized Flowers embossing folder.

For the main piece I stamped a phrase from the Fiskars set, Make a Wish Quotes, in True Thyme (a retired SU color). I colored the shadow stamp with More Mustard, Sage Shadow and Pale Plum markers, huffed on the stamp and stamped it. Then I did a duplicate of the flower and colored part of it with glitter. I ran the piece through the Cuttlebug using the Tiny Bubbles embossing folder before attaching the dimensional flower. Then I finished it by sewing a zigzag stitch along the edges.The ribbon and pearls were added last.

Thanks for coming by for a look! Have a blessed Monday!

Recipe:

Stamps: SU Petal Prints, Fiskars Make a Wish Quotes

CS: Cream, Sage Shadow, Kraft

Inks: SU True Thyme, Encore Gold

Other:  Cuttlebug Stylized Flowers and Tiny Bubbles embossing folders, sewing, pearl gems, glitter, foam mounting tape, SU More Mustard, Pale Plum and Sage Shadow markers, narrow taupe organdy ribbon

Tuesday, January 04, 2011

Mojo Monday week 172

Wow! Week 172?!? Time flies, doesn't it?


I was in the mood to do a whole sheet of some stamped images as a background for a card, kind of a lighter version of the Double Time technique. So I used Stampin' Up!'s Doodle This set, which I think is retired. They retire stuff way too fast these days!

I used a mixture of Copics and SU markers to color the images along with a water brush, and I used an air art gun with a (SU) Basic Black marker to get the sprayed black splotches.

There is clear glitter on the main flower element and I glued a gem to the center to give it some wow.

This card has lots of cuttlebugging on it. I used the Tiny Bubbles, Mesh and Forest Branches embossing folders.

The "Thanks!" stamp is by PSX.

Thanks for looking and have a lovely day!

Thursday, April 08, 2010

Eternal Summer even though it's still Spring


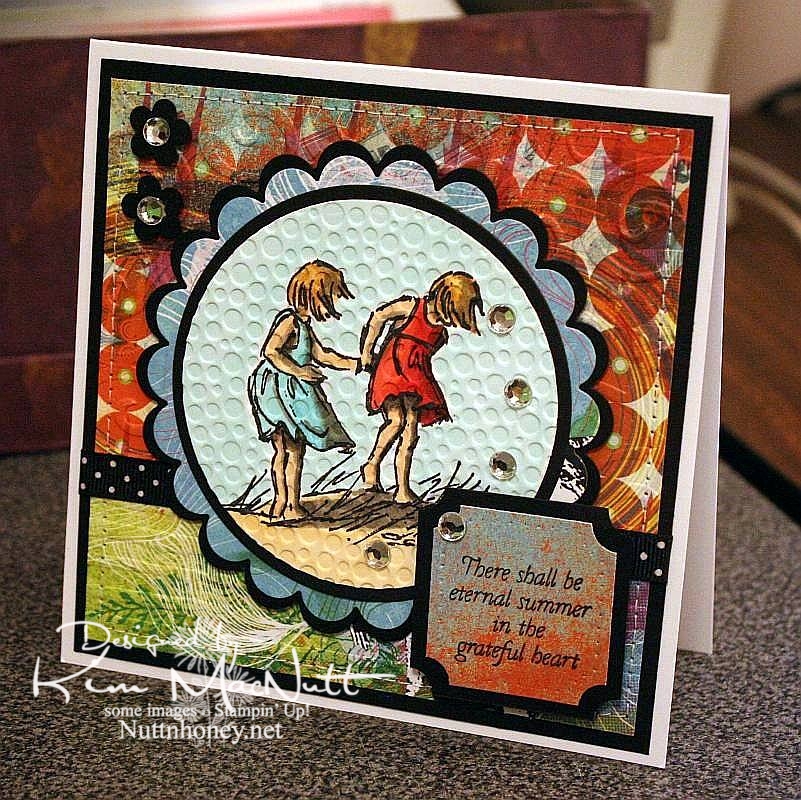
I know it's not Summer yet, but I thought this saying from Flourishes' Poppy Patch set went perfectly with this image from SU Seaside Sketches.

We had a lovely, rainy day that washed away all the pollen, praise the Lord! Oh, how gorgeous it was this afternoon! Cool, fresh and sunny. And green! No more yellow everything!

My allergies didn't get a break today, but I'm hoping tomorrow will be better. I really want to enjoy the beautiful weather while it lasts.

It's kind of hard to see, but I cuttlebugged the hooey out of this card. I used D'Vine Swirls on the top background to mimic waves, and used Distressed Stripes horizontally on the bottom to mimic the seashore. Then I used Tiny Bubbles on the main image. It mimics...bubbles. That one you probably can see.

The papers are all from the retired Basic Grey Obscure 6x6 pad. I love their vibrant, fresh colors. They really pop when contrasted with the black!

Thanks for looking. Hope your weekend is a beautiful one! My 13 yo is giving a tea party for her AHG scout friends on Saturday. I'm hanging out close by, but I'm letting her do nearly all the work. She loves it!

Stamps: SU Seaside Sketches, Flourishes Poppy Patch (saying)

CS: PTI white, black, Basic Grey Obscure designer papers

Inks: Versafine Onyx Black, Memento Tuxedo Black

Copics: W3, W5, W7, R24, R29, R30, BG10, BG11, BG13, YR00, YR20, Y21, E31, E33, E35

Other: Cuttlebug D'Vine Swirls, Distressed Stripes, and Tiny Bubbles embossing folders, Nestabilities Standard Circles Small, Standard Circles Large, Classic Scalloped Circles Small, Classic Scalloped Circles Large, Classic Squares Large, ticket corner punch, small flower punch, sewing machine, black polka dot ribbon, clear gems, 3D-Dots, foam mounting tape, SU paper piercing tool, sponge mat

Wednesday, March 03, 2010

More Spring - Sending Happy Thoughts


Hello all! I am so wanting Spring to come. Can you tell? Ha!

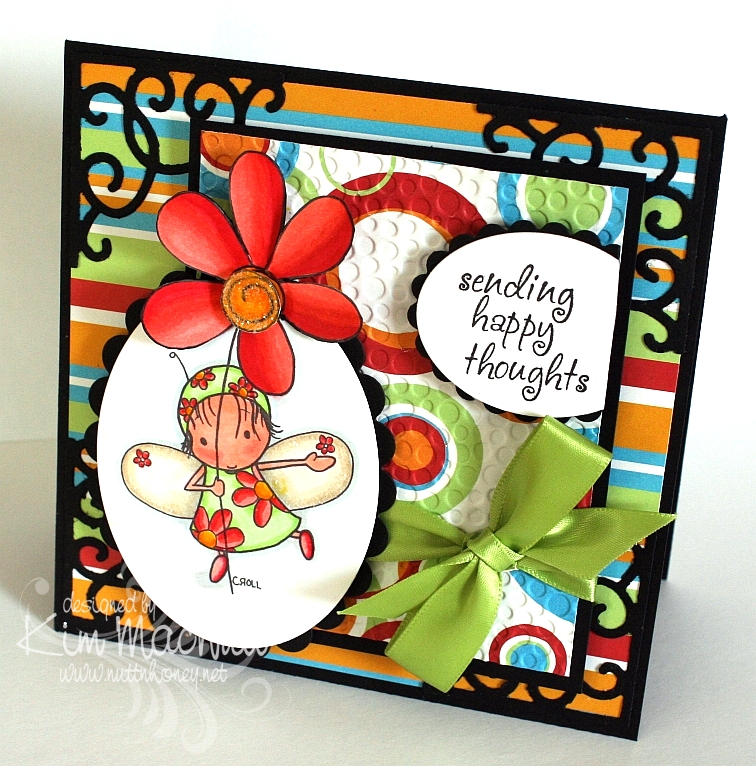
This Tiddly Inks image grabbed my attention when I was surfing over at Etsy for digital stamps. Interestingly, she's called Spring HuggaBugg. She certainly does make one feel like it's Spring to look at her with her adorable flowery dress and her big flower. I loved coloring her.

I used the technique I posted about yesterday on the main image. It was a little tricky getting the die to line up properly after placing the trimmed flower out of the way before cutting the oval. I had to cut into the flower more than I expected, but I like it better that way. So it happily worked out.

I am loving my Copics! I know I say that a lot, but I can't help it! They are just so nice. And so forgiving. I like that!

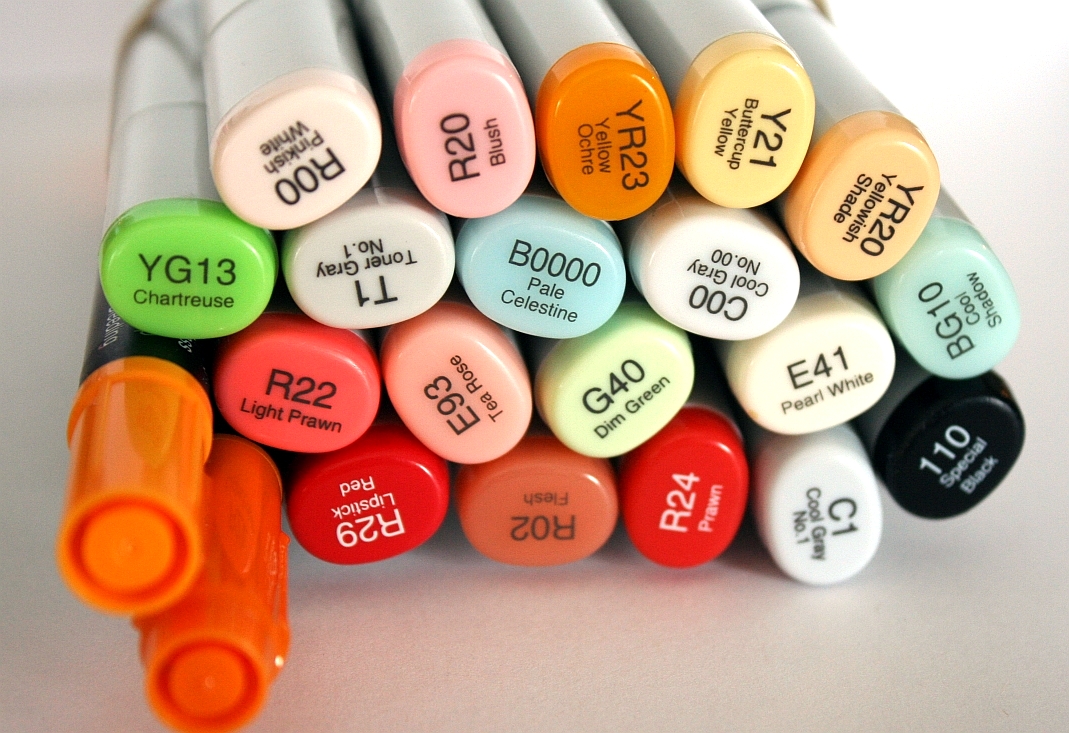
Here is a pic of the colors I used:


The black was used around the edges of the flower, carefully. I prayed my way through that part because I did it after the card was finished. Phew! I was relieved I didn't ruin anything!

It might be hard to see, but I used Crystal Snow fine white glitter on the center of the flower and on the edges of her wings. Just a little extra zing thrown in.

I used my homemade Bow Easy again to make the bow. It's getting easier each time. I don't need to look at the tutorial anymore!

I had started this card before I found out about this week's color throwdown colors, so I was tickled pink that I used colors very similar to them. A little serendipity in my week!

I did the Midnight Madness #43 sketch challenge over at the "priscillastyles" blog, but chose the simpler one of the two and embellished it differently, as I could not think of anything to put where the butterflies were on the more complicated version.

Hope your week is going well! We had snow yesterday and it's pretty much gone already. That's 2 snows this Winter in NE Georgia! Very unusual! Have a blessed evening!

Stamps: Spring HuggaBugg by Tiddly Inks, Sending Happy Thoughts from Hero Arts CL305

CS: Black, Celebration AC Patterned Paper by American Crafts, Papertrey Ink Stamper's Select White

Inks: Versafine Onyx Black, printer

Copics: B0000, BG10, G40, YG13, Y21, YR20, YR23, E41, E93, R00, R02, R20, R22, R24, R29, C00, C1, T1, Special Black 110

Other: Cuttlebug Tiny Bubbles embossing folder, Nestabilities Classic Oval Small, Classic Oval Scallop Small, Sizzix Architectural Accents die, SU Pumpkin Pie marker, SU Summer Sun marker, 3D-Dots, green satin ribbon, Crystal Snow fine white glitter, glue pen, Diamond Glaze to glue down bow


Thursday, February 18, 2010

With Love - Mojo Monday 126


I am happy to say that I finally ordered my Copics! I'm so excited!! I pretty much stuck with everything listed in this post plus a few more. My order is larger than I intended, but that is usually the case, isn't it? So I used more birthday money then I expected. I won't cry about it when I'm blissfully coloring my new digistamps!

I do own 2 Copics already: C1 (Cool Gray #1) and Special Black 110. I used the C1 on the background around the girl on this card, but the rest is done in Prismacolor pencils. I sponged black ink around the edges. I don't really care for the way the edges turned out. Oh, well.

This sketch came from this week's Mojo Monday #126. It's a busy one, yes? ;) Lots of stuff going on in this card.

Aren't the Pure Innocence images just darling?? They sure are rightly named. This image is called Pure Innocence 001. The neat thing about using digital stamps is that you can make them almost any size you want. That's a very convenient feature. I created a Word document and copied 4 images of the little girl onto the page to print. That way I have extras if I goof one of them up or want to dimensionalize one of them.

All the designer papers came from Basic Grey's Cupcake Collection.

I went a little wild with Cuttlebug embossing folders. I'm sorry. I do love those things.

Thanks for looking and be watching for my upcoming Copic adventures! Yay! Can't wait!

Have a lovely weekend!

Recipe

Stamps: Pure Innocence 001 digistamp by Digi Stamp Characters, With Love by PSX, Just for You by Stampin' Up!

CS: Stamper's Select White, Pure Poppy and True Black by Papertrey Ink, Basic Grey Cupcake Collection dp

Inks: Versafine Onyx Black, printer

Other: Cuttlebug Spots and Dots, Birds and Swirls, Tiny Bubbles and Mesh embossing folders, Nestabilities Classic Scalloped Circle Large and Standard Circle Large and Labels 2 die cuts, Martha Stewart Double Scallop border punch, sewing machine, sponge dauber, red gems, black gingham ribbon, 3D-Dots, Copic C1 marker, Prismacolor pencils, Stamp-a-ma-jig, black Micron pen for touching up image

Friday, January 22, 2010

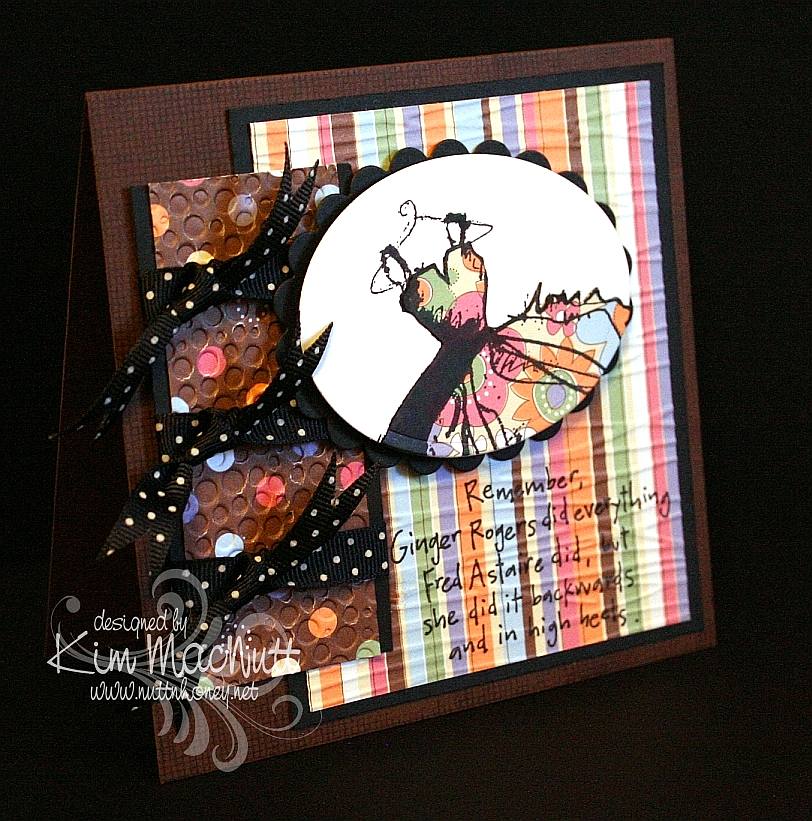
Ginger Rogers


I found some time to stamp yesterday! Since I'm slow in making a card it's quite a feat to get a big enough chunk of time to complete one, so I was a happy girl. I used this week's Mojo Monday (122) sketch and played yet again with my Dawn Houser stamp. Well, stamps, actually, because the saying stamp is hers, also. This time I only used part of the dress image. 

I stamped it on white cs and on dp. Then I cut the dp image out except for the hanger and glued it down over the white image. The rest is pretty self-explanatory. Two things I'll mention are that I stamped the saying before cuttlebugging it, and I used an extra piece of cs under the Forest Branches-embossed section when I cuttlebugged it, but not under the Tiny Bubbles-embossed section. Can you see the difference? It really does help to add the cs. 

Btw, I am busier than usual now because we have added a new member to our family. Thanks to The Pioneer Woman, I fell in love with her Basset, Charlie, and wanted one of our own; and now we have one! We adopted her this week from a Basset rescue. Her name is Ally and she's a dream. My hubby says it's like having a big dog in a little dog's body. He's right! She's the most laid-back, easy-going dog ever! And you can't outlove her. She'll take it all. :) I might need to look around for some Basset stamps now! 

Thanks for coming by! Have a lovely weekend! 

Stamps: My Mother's Dress and 8357-N , both by Dawn Houser, SU Canvas 

CS: Papertrey Ink Dark Chocolate, PTI True Black, Making Memories Cheeky Collection designer paper, PTI Stamper's Select White 

Inks: Versafine Onyx Black, VersaMark (on Dark Chocolate cs) 

Other: Cuttlebug Forest Branches and Tiny Bubbles embossing folders, Nestabilities Classic Oval Scallops Large, Classic Oval Large, black polka dot ribbon, 3D-Dots, Stamp-a-ma-jig 

Card's outer measurements are 5"x5"

Tuesday, October 27, 2009

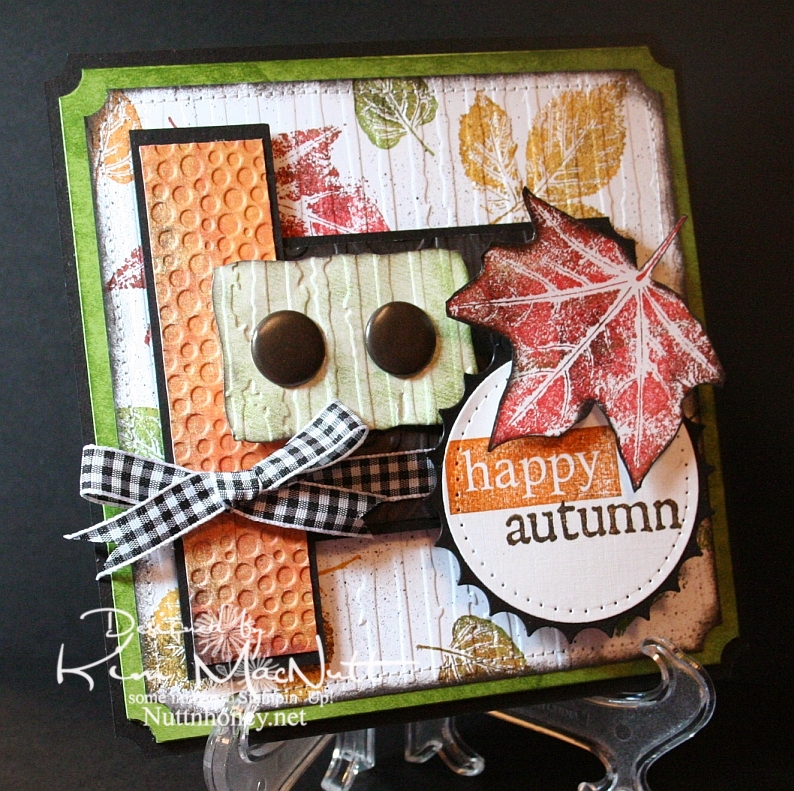
Happy Autumn!


This card was made using this week's Mojo Monday sketch.

I couldn't let autumn go by without pulling out my favorite autumn stamp set. It wouldn't be right. SU Lovely Leaves is a classic and I was surprised and disappointed when Stampin' Up! retired it. Maybe they weren't aware of its versatility.

Real fall leaves don't have just one color in them. They're a symphony of colors. So when I use my Lovely Leaves set I generally stamp them in a main color (largely from the Earth Elements color group) and then sponge other colors, including black for a little character, right on the stamp. Then I huff warm air on them and stamp. It produces a lovely effect.

That's what I did on the white background of this card. Then I finished it off using a Basic Black marker in an Inkworx Air Art gun to get a splattered effect. Once that was done I ran it through the Cuttlebug with the Distressed Stripes embossing folder and then clipped the corners with the ticket corner punch and then sponged black ink around the edges using a sponge dauber. Then I sewed around the edges. I really did a number on that poor old white piece of cardstock, didn't I?

It's not easily visible, but I used the D'Vine Swirls embossing folder on that dark piece of paper in the center. The dark paper has the pattern of tree bark on it from the Basic Grey Granola collection. I sponged it with black ink after running it through the Cuttlebug. A lot of work for something you can barely see! lol

For the words, I stamped the "happy" stamp from SU So Very in Pumpkin Pie ink and then lightly sponged it with black ink to burnish its appearance. I stamped the "autumn" stamp from the Purple Onion Designs' 4 Seasons set in Pumpkin Pie and then stamped it in black ink very lightly. Unfortunately, you can't see the cool, subtle effect that it produced in this pic.

I pressed the Old Olive cardstock behind the white piece onto the SU Just Jeans background stamp which was inked up with Old Olive ink. It gave a nice patterned but not too distinct appearance. I did the same on the greenish piece under the jumbo brads before running it through the Cuttlebug.

I always enjoy making cards with Lovely Leaves. It's one of my favorite sets.

Thanks for coming by for a look! Have a blessed day!

Recipe

Stamps: SU Lovely Leaves, SU So Very, SU Just Jeans, Purple Onion Designs "4 Seasons"

CS: Black, Old Olive, white, Basic Grey Archaic, Basic Grey Granola

Inks: Ruby Red, Old Olive, More Mustard, Pumpkin Pie, Versafine Onyx Black

Other: Nestabilities Standard Circle Large, Large Classic Inverted Scalloped Circles, Curved Rectangles, ticket corner punch, Cuttlebug Distressed Stripes, Tiny Bubbles and D'Vine Swirls embossing folders; sewing machine, paper piercing tool, sponge mat, sponges, sponge dauber, jumbo brads, 3D-Dots, Sticky Doos, Basic Black marker, Inkworx air art gun, Black gingham ribbon

Thursday, September 24, 2009

Flying Cupcakes


Hello all! My apologies for the picture of this card. It was hard to stand up to photograph because it's 5.5" X 8.5" - a whole sheet of cardstock folded in half. Actually, what I meant to say was that the black base is only on the back, so the front does not have support. So I had to lean it against something to get a pic of it.

Confession time. I bought cards at the store for almost everyone I needed a card for this month. And you know what? I was so glad I did because the one thing I always feel is lacking in my cards is sincere sentiments. I found the perfect cards for everyone I bought for! I mean the words spoke so deeply about my feelings. And it felt good to accomplish such a goal. It's not that my own handmade cards aren't appreciated, but sometimes I want it to be more than just a pretty card. I want it to speak from the heart.

I am not a poet and I am no good at saying how I feel in my cards. I try, but I don't really have that gift. Others do, and I'm so thankful for that because they can put to words just how I feel and set those words right in the perfect card, and all I have to do is buy it. Yeah, I could probably make a more glittery, splashy-looking card, but it's what is said inside (or outside) that really counts.

While I know there are sites out there that give free prose for the taking, my printers are very limited and buying a new one just to print on my cards seems wasteful. So I stick to the stamps I have. But they are so limited. And I'm trying to avoid wasteful spending right now. The Lord knows how much money I've already sunk into this hobby!

Anywho, I did want to make a dear friend a card because she is also a stamper and today's her birthday! So this one is for her. Teresa has a dream about baking cakes for a living. She's very good at it! I'm so hopeful that God may be directing her very soon in that direction. This being the case, I had to make her a card with some kind of cake on it! So I pulled out the Inkadinkado set, Birthday Cupcake, and did a nice scene of flying (or dancing, if you will) cupcakes in her favorite color - pink.

I wanted it to have a soft appearance, so I used Swirl vellum over Blush Blossom cardstock like I did for this card. The design is really simple. The most elaborate work I did was on the cupcake scene. I stamped it in Versafine Onyx Black ink on Canson watercolor paper. Then I colored it with markers. Then I put the glitter on and THEN decided to cuttlebug it. That was a slight mistake, but it still turned out fine since the glue was dry under the glitter.

Oh, btw, I used SU Basic Black ink on the saying because it dries on vellum quickly, unlike the Versafine.

I appreciate you having a look. Be well!

Recipe

Stamps: Inkadinkado Birthday Cupcake, Stampin' Up! Birthday Greetings

CS: Black, Blush Blossom, Swirl vellum, Canson watercolor paper

Inks: SU Basic Black, Versafine Onyx Black

Markers: Blush Blossom, Cameo Coral, Pixie Pink, Pretty in Pink, Mellow Moss, Certainly Celery, Barely Banana

Other: Cuttlebug Tiny Bubbles embossing folder, clear glue, fine white Crystal Snow glitter, black polka dot ribbon, Stamp-a-ma-jig, 3D-Dots

Tuesday, August 18, 2009

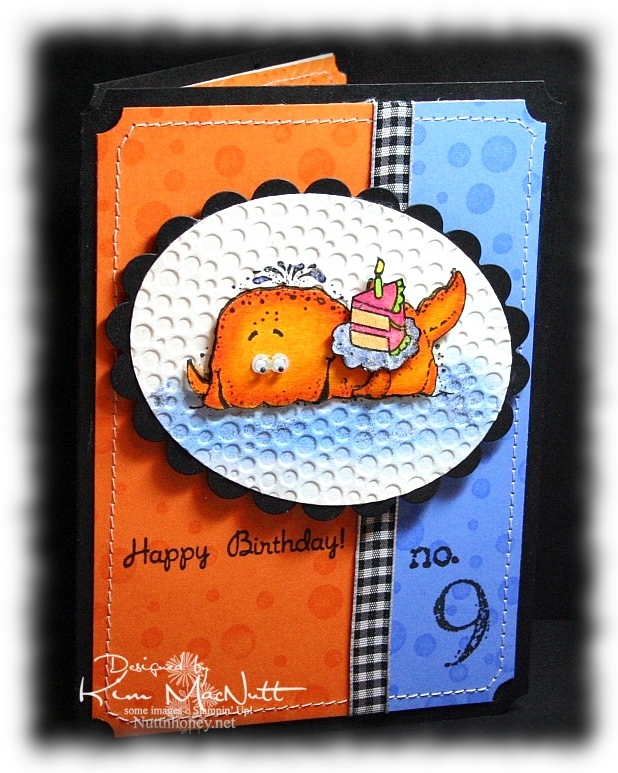
Whale Birthday


Wow, has it really been 17 days since I last posted here?? Well, my mojo just wasn't moving much in those 17 days and the only thing that got me stamping was my littlest's upcoming birthday. I just haven't been in a creative mood lately. I've not even been crocheting much which is odd for me because I love it. I think this whole national health care situation has been weighing so heavily on my mind that it's been hard to relax and do anything fun. Plus, it's so hot and huuuuumid. And the garden has been keeping me busy with the little energy I have in this heat. I canned tomatoes and homemade pizza sauce yesterday. It about did me in! I wish the garden didn't flourish in the hottest part of the year!

So anyway, I made this card for my littlest who just LOOOOOVES fish of any and every kind. When she checks out books at the library, they are almost all about fish and the sea. I knew that I would use either SU Fishy Friends or SU Silly Sealife on her card. I went with Silly Sealife's whale. He's always fun to color.

And for once, I actually stamped the background rather than use a designer paper. I used to use VersaMark ink on pretty much every card I ever made until I fell in love with designer paper.


For the whale, I used Canson watercolor paper and stamped the whale with my favorite black ink: Versafine Onyx Black. Then I colored with SU markers and a few CTMH markers. I started with a darker color (Pumpkin Pie) on the edges. Then I used Summer Sun to blend toward the center. Then I recolored the edges and the inside to strengthen the colors. No water brush. I just used the markers to blend. Works perfectly on watercolor paper!

I used a Post-It note to block the whale while I sponge-daubed Bashful Blue and Ballet Blue inks on the "sea". Then I rubbed a glue stick over parts of the sea and sprinkled blue glitter here and there. I colored the water spouting out of his head with a Bashful Blue marker and glued a bit of blue glitter there, too. "Glued a bit of blue glitter". Say that 5 times fast! lol


The cake is from the Taylored Expressions set "Sweet Celebration". I also used the cake on the inside (see above). I blocked the cupcake part of the image so I could just get the cake inside.

The dimensions of this card are approx. 4.5" x 6". It was made to fit an invitation envelope measuring 4.75" x 6.5". I bought some at WalMart just to have a different size to create with.


Can you guess where our littlest wants to go on her birthday? The Georgia Aquarium, of course! We'll probably go by The Varsity for lunch beforehand. Can't wait!

TFL and have a blessed week! I hope my mojo returns soon! This place has been too quiet!

Recipe

Stamps: Stampin' Up! Silly Sealife, SU Collage Alphabet Numbers, SU Simply Circles, Taylored Expressions Sweet Celebration

CS: Black, Pumpkin Pie, Ballet Blue, Canson watercolor paper, white (inside)

Inks: VersaMark, Versafine Onyx Black, Bashful Blue, Ballet Blue

Markers: Pumpkin Pie, Summer Sun, Bashful Blue, Apricot Appeal, Yoyo Yellow, CTMH Bubblegum, CTMH Citrus Leaf

Other: Cuttlebug Tiny Bubbles embossing folder, Nestabilities Classic Oval Scallops Large, Classic Oval Large, Stamp-a-ma-jig, googly eyes, blue glitter, Frosted Lace Stickles, sewing machine, black gingham ribbon, 3D-Dots, ticket corner punch, sponge dauber

Sunday, June 21, 2009

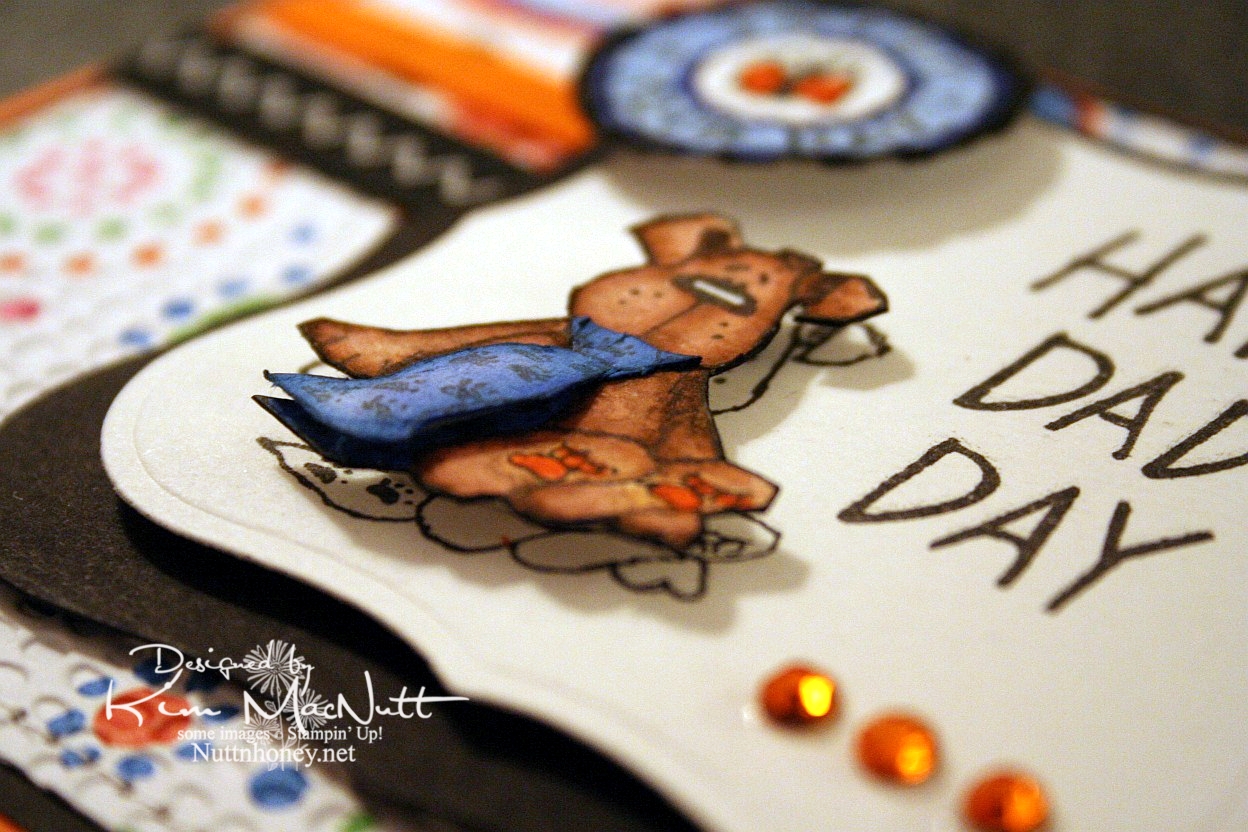
Happy Dad's Day!


Happy Sunday! And Happy Father's Day to all the dads out there (not sure I have any dad readers, but if I do, that's fer you!).

I gave this card to my hubs this morning. He already has his present. He's a tech geek and wanted one of these for Father's Day. It was quite the hit at scout camp (which is why he got it early - he had to share his joy with the other geeky scout dads, of course).

So, all he got from me today was a card and eating out at one of our favorite hole-in-the-wall Chinese restaurants.

This doggy from the Penny Black "Bubbly" set was, I thought, a great Father's Day image, what with the tie and all. I stamped him 3 times: once on the main piece, and twice on scraps, all watercolor paper. Then I cut out the dog and then just the tie to give it extra dimension. I glued the top of the tie down at the neck and used a bit of a dimensional piece to make it stick out at the bottom like a real tie would. I stamped the SU Riveting circle and then punched it out and ran it through the Cuttlebug. Then I put it on with a 3D-Dot.


For the inside I took a Hero Arts stamp from "Happy Dad's Day" (CL335) and blocked the word "Dad" and the exclamation point and re-inserted the exclamation point at the end of "I Love You". That was a bit tricky as the exclamation point kind of gets in the way and it took 2 Post-It notes to get it out of the way.


Well, I've got 2 more cards to get ready to post for you this week. I plan to continue spending lots of time offline as I find it so relaxing, and my kids like it that I'm so available to them! My house stays cleaner, too! Go figure! ;)

Have a wonderful day and week! Be blessed and get in some stamping!

Recipe

Stamps: Penny Black "Bubbly", Stampin' Up! Riveting, Hero Arts "Happy Dad's Day" (CL335) (inside)

CS: Only Orange, black, American Crafts "Celebration" dp, Canson watercolor paper

Inks: Versafine Onyx Black

Markers: Only Orange, Creamy Caramel, Close to Cocoa, Brocade Blue, Bashful Blue, Ballet Blue, Basic Black

Other: Cuttlebug Mesh and Tiny Bubbles embossing folders, Nestabilities Labels One, 1" circle punch, gems, black zigzag ribbon, orange grosgrain ribbon, 3D-Dots, sewing machine, Post-It notes

Saturday, June 20, 2009

Thanks Butterfly!


Good morning and Happy Saturday! I hope your day is a good one so far!

Last week when I was stamping, I felt like pulling out a favorite old set and playing. I just wanted to color some butterflies. Not that they resemble anything in nature, color-wise, but I didn't care. I just wanted to wing it. Get it? Anywhoooo.

I just stamped them randomly and then colored them. I used the Inkworx air art gun with my Basic Black marker to spritzed some color in the white areas. Once it all dried I cuttlebugged it with my old standby, Tiny Bubbles. I tell ya, that is my most used embossing folder EVER. Just love it even though I use it so much it's insane!

It's probably hard to see, but I scored 1/2" lines horizontally across the white base just for fun. I used my Scor-Pal which makes it so easy to do.

Not much else I can say about this card other than that the gems are not as green as they look in the pic. They actually match the turquoise butterfly very closely. But you can't always get things just right in a pic, right? I am learning some tricks, though, from my GIMP program (it's free, btw!) and who knows if someday I'll be able to make every card pic perfect?

Have a good one and TFL!!

Recipe

Stamps: Stampin' Up! Wonderful Wings, Stampin' Up! Many Thanks

CS: White, black, Pumpkin Pie

Inks: VersaMark, Versafine Onyx Black, Pumpkin Pie (DTPed on Pumpkin Pie CS)

Markers: Summer Sun, Pumpkin Pie, Taken with Teal, Tempting Turquoise, So Saffron, Really Rust, Close to Cocoa, Basic Black

Other: Cuttlebug Tiny Bubbles embossing folder, Nestabilities Long Rectangles and Long Scalloped Rectangles, Scor-Pal, Inkworx air art gun, opaque white embossing powder, teal gems, black zigzag ribbon, 3D-Dots, Stamp-a-ma-jig