Showing posts with label Cuttlebug - Traffic Jam. Show all posts

Friday, May 14, 2021

My Mom's Mother's Day Card

Good morning! It's a beautiful sunny day here in Georgia. Sunny days just make all the difference, don't they? While I'm sitting here typing this I'm enjoying the birds at my bird feeders, watching them busily flitting about. It's so therapeutic.

I wanted to honor my mother this year with a homemade card. Some years I buy her a card, some years I make one. 

I was seeing a number of cards I liked on Pinterest that were using an old Stampin' Up! set called Garden Collage, so I bought it on eBay. I rarely buy stamps these days, but I bought this set because I thought I would get a lot of use out of it. It really is a pretty set.

Per my usual, I wanted lots of texture on my card. I just think it adds so much visual interest. For the designer papers I went with Basic Grey Wisteria. I used the Cuttlebug Traffic Jam embossing folder. But before embossing the lower piece I stamped the sentiment in Versafine Onyx Black ink using the Purple Onion Designs Girls Are Weird small alpha font set. I wasn't totally happy with that part, but oh, well. One "p" is a bit over-stamped, and a couple others are under-stamped. I didn't have another piece of that paper, so I let it be. I added some pearl bling on one corner and used some ribbon to blend the papers together.


I stamped the main image in Memento Tuxedo Black ink since I was going to color it with Copics. Then after coloring it I dry-embossed it with the Cuttlebug Mesh folder. I made an extra butterfly to add dimension, and used foam tape to pop it out. I used some Orange Peel Stickles glitter gel on the flower center to add more oomph to the look. I mounted it on some black cardstock that was cut using the Nestabilities Blossom die.

Inside the card I carried the theme of the green polka-dotted paper and the Traffic Jam embossing folder. I used another image from Garden Collage and colored it similarly to the outside image. The sentiment is from Penny Black's Bubbly stamp set. I blinged a bit with the pearls inside, as well.


I'm happy to say she loved it. That makes me happy. Take care.

Stamps: Stampin' Up! Garden Collage, Purple Onion Designs Girls Are Weird small alpha, Penny Black Bubbly

CS: SU Eggplant Envy, Papertrey Ink white, Black, Basic Grey Wisteria designer papers

Inks: Memento Tuxedo Black, Versafine Onyx Black, Copic markers

Other: Cuttlebug Traffic Jam and Mesh embossing folders. Nestabilities Blossom and Standard Circle Small dies, foam tape, pearl gems, Stickles Orange Peel glitter gel, black zigzag ribbon

Monday, September 30, 2013

A little stamping done!

After a long break from doing anything stamping-related I recently made some cards for family and a friend. I've not been following the stamping trends or buying anything new, so I'm clueless as to what is currently popular. Just trying to be content using what I already have. It's been very enjoyable and I hope the urge lasts.

This one was for a good friend of mine. I took a white pompom and colored it with a yellow Copic marker for the hat top. I used black string to give the balloons a little dimension, and also popped out the left balloon with a dimensional dot. I did a nifty stitch on the ribbon that makes me think of a heartbeat and zigzags just to jazz the edges up a bit. Let me just say, corners are so hard to stitch!


I could not get the colors in the upper and lower pics to match, so please forgive the differences. You can see the pompom, string and the balloon more closely below (and every stray bit and boo-boo that I never catch until after I look at the pics!)


I made this one for my hubs last year for his birthday, but never posted it. Probably should've avoided the overuse of the Mesh texture. Oh, well. I had fun doing the crazy sewing stitches all over the place!


Squiggle squiggle! Love it!


And this one I made him this year. More guy-ish for sure, and he loves classic cars. I made mine to look kind of like a rainbow trout. I don't know why! I just did!


Still love using LOTS of texture on my cards. All coloring was done using Copics.


I went wild with my sewing machine on all of these cards, trying different stitches. Turning corners was tricky, so I had to kind of ad lib because of what I ended up with. I threw in the gems in a funky way to play along with the jumpy stitches. It sort of works, I think.


So that's all the stamping I've done so far, but I have another birthday I need a card for, so there's more stamping in the near future.

Not sure if anyone still comes here anymore, but if you do, thanks for stopping by!

Friday, January 21, 2011

Tiddly Thanks


This card is, once again, not what I had originally planned. I was inspired by Donna's Tiddly Inks challenge card that is all white except for the Tiddly Inks image (and the sentiment), so I was going to do this week's Mojo Monday sketch in all white using a Tiddly Inks image as my focal point. Except it didn't look as good as I'd hoped. So as I often do, I just made my own design for the image I chose.

I was originally going to have the Thanks stamp (an old wood-mounted stamp by D.J. Inkers) going vertically along the right side and the fairy also vertically in front of the small white rectangle. But the balance seemed off and I turned the card to the right and had the fairy perpendicular to the white rectangle with the sentiment horizontal. That felt better! Then I popped the Thanks sentiment after coloring a second copy and that made things even better.

Oh, the fun and frustration of designing a card!

Btw, I colored the images using these Copics:


Mentioning the whole vertical/horizontal thing reminds me of a skit by my favorite comedian, Brian Regan. Here's a clip about Pop Tarts where the vertical concept comes into play. Enjoy!


Recipe

Stamps: Tiddly Inks Spring HuggaBugg digital stamp, Thanks sentiment by D.J. Inkers

CS: White, Real Red, Black

Inks: Versafine Onyx Black, computer ink

Copics: E00, E93, YR00, R29, BG13, 110

Other: Cuttlebug Traffic Jam, Swiss Dots, and Forest Branches embossing folders, Nestabilities rectangular dies, clear glitter, glue pen, red gem, black polka dot grosgrain ribbon, white grosgrain ribbon, foam tape

Friday, January 14, 2011

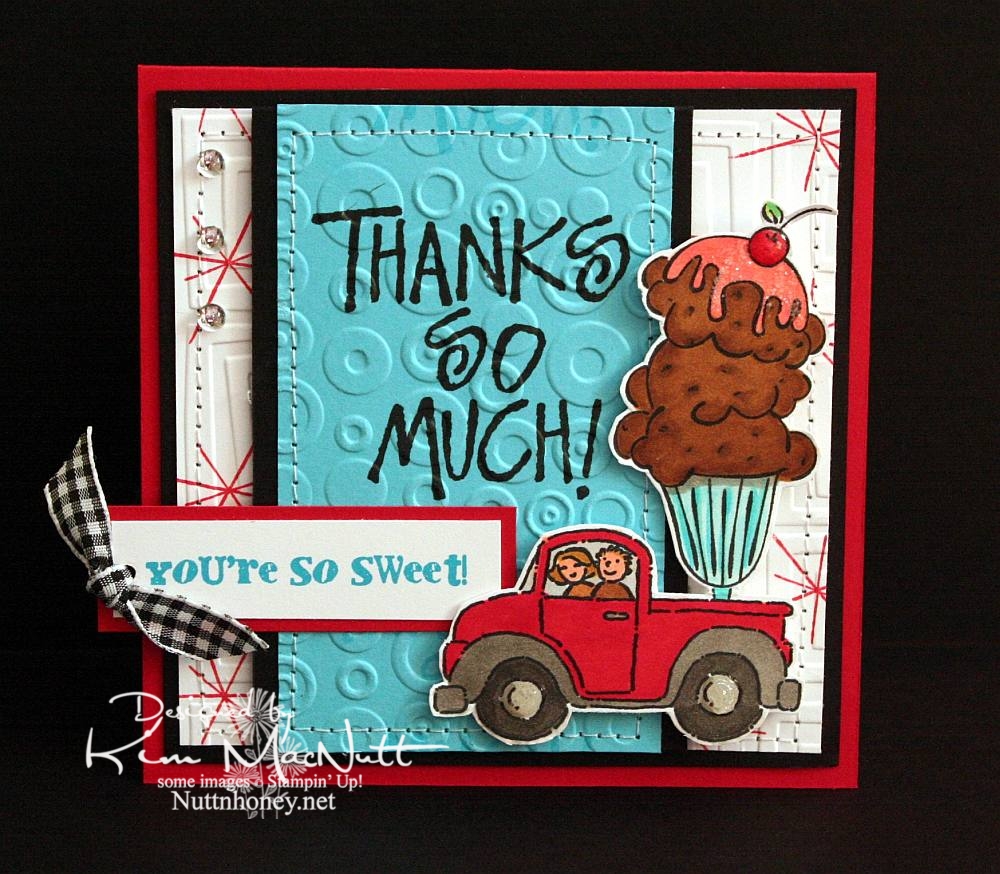
You're So Sweet!


Do you ever struggle with a card to the point of almost giving up on it, and then it magically comes together? That be my experience with this h'yere card.

To start with, I had the idea of putting the ice cream sundae in the back of the pickup truck from the SU Loads of Love set. Then I colored it without too much planning of colors in mind. Once I got to that point it got hairy. Since it was such a big "scene" I couldn't just plug it into a prefab sketch, so I just designed the card myself. First I started with a rectangular card in the standard A2 size. But it just wasn't feeling right. Then I went to a square format and that seemed the best fit for it to me.

Once that was decided I just had to decide which colors of cardstock to use and which colors to emphasize. One of my favorites is often red, but I love turquoise as well, so that's what I went with. I didn't want too much black, just accents, and that worked out really well.

I wanted a 1950's feel to the card (a la soda fountain), so I used the star image from SU All the Best as a background image. I wanted a bold word phrase to balance out the truck/sundae image, but I wanted it to be more than just the word phrase. So I used VersaMark ink to repeat the word phrase in a scroll-like fashion up and down. Then I cuttlebugged the turquoise cardstock with Spots and Dots and sewed a stitch around it. Busyness without being too busy.

For the white background I stamped the star from All the Best in Real Red ink randomly and then used the Traffic Jam embossing folder to add to the 50's look.

The "You're So Sweet" phrase was done in Microsoft Word on the computer. I printed it out in turquoise ink. I got the font from Kevin and Amanda's site, Fonts for Peas. Awesome site, btw! They're so kind to offer such a huge selection of free fonts! The font I used can be downloaded here. My font size was 8, the smallest it could be. You can learn how to use their fonts here.

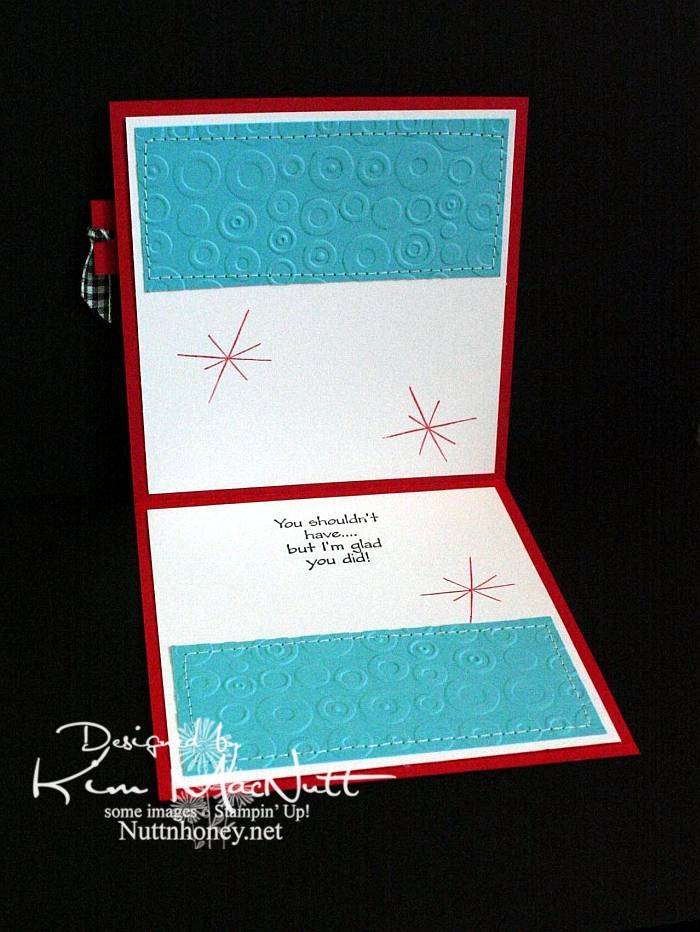
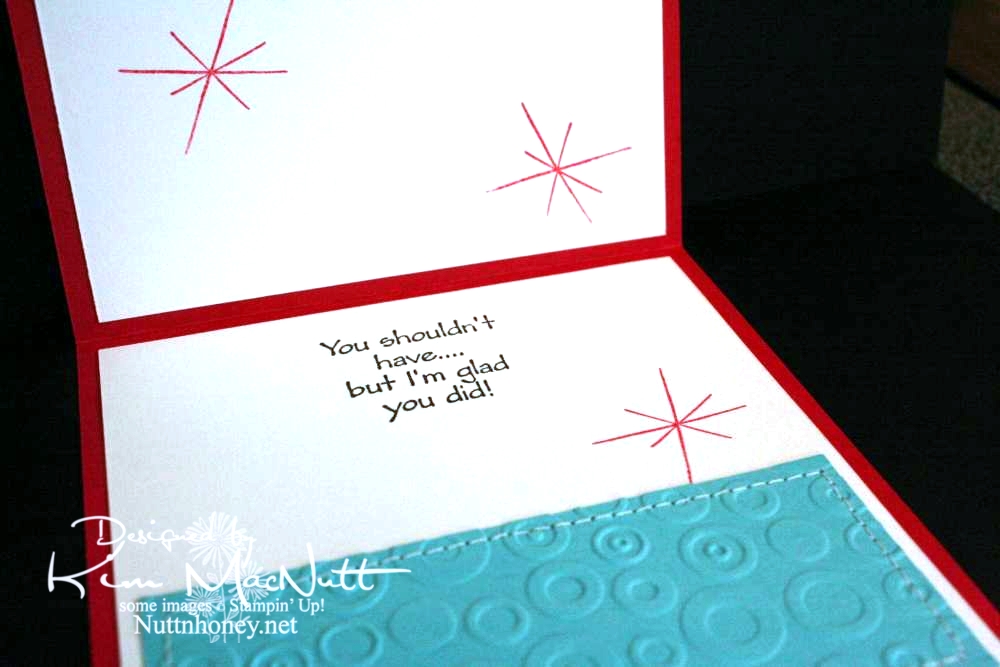
As you can see, I did the red stars inside the card, as well, and I also repeated the turquoise, Spots and Dots, and sewing theme from the front.


Both outside and inside phrases are from the SU Many Thanks set.


Most likely all the stamps used are now retired. But I still enjoy them. They're still current and fresh.

I wanted to mention that I did not do what I encouraged you to do. These are not my most well-loved stamps. But I do love them. They are stamps I doubt I'll ever sell.

Did you pull out any well-loved stamps recently?

Recipe

Stamps: SU Loads of Love, SU Loads of Love Accessories, SU Many Thanks, SU All the Best, SU Sweet Treats, "You're So Sweet!" phrase from computer

CS: Real Red, Black, White, Tempting Turquoise

Inks: Versafine Onyx Black, VersaMark watermark ink, SU Real Red

Other: Cuttlebug Traffic Jam and Spots and Dots embossing folders, sewing machine, Various SU and Copic markers
, clear gems, black gingham ribbon, clear glitter, Diamond Glaze, Stamp-a-ma-jig, foam tape, 1/8" circle punch

Monday, September 07, 2009

Mousy Birthday Cupcake


Hello there!

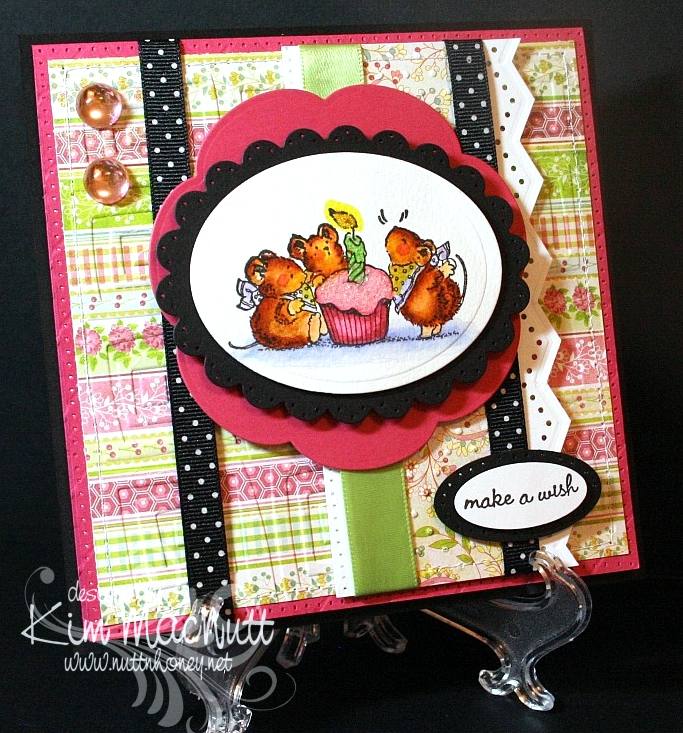
Wow! You wouldn't believe how much trouble I had with this card! I finally wrestled it to the ground today and won! My mojo was nowhere to be found and every way I arranged the card elements just did not appeal. I think I've gotten into a creative rut. At least I finished the card, though. This will be for my mother-in-law's birthday. I thought she'd enjoy the sweetness of the Penny Black mice. So cheerful!

The designer papers I used were from the Basic Grey Lemonade 6x6 pad. Such cheerful papers! They're some of my favorites.

I tried something new with my hole punching. I used the sewing machine without thread to do around the edges of the Rose Red base and along the edge of the white vertical piece. It certainly was easier, but I wouldn't say it was straighter. In the right situation this could be a nice shortcut.

For the mice scene I used watercolor paper to stamp the image on because I feel it lends itself to far more flexibility in coloring. I used SU markers to color with and blended mostly with them - with a bit of water brushing here and there to remove color or wash it out a bit. What fun it is! I don't crave Copics anymore since finding this method. I'm sure they're superior in every way, but their price just stops me dead in my tracks every time I have a notion to buy some. And then where to start? There are so many! SU markers will happily satisfy me for now.

I glittered the cupcake frosting and the candle flame to make them stand out some. I used Crystal Snow fine white glitter on the frosting and yellow Stickles for the flame.

I actually had the mice scene done weeks ago. I just had to build the card around it. I've been working on this card for almost 2 weeks, off and on! Phew! Talk about frustrating!


I have so many cards to make this month. September and May seem to be the big birthday/anniversary months for us. Hopefully, my mojo will return and I will have cards made for everyone! I've got to get busy!

Hope all is well with you! TFL! God bless you all!

Recipe

Stamps: Penny Black Critter Party

CS: Black, Rose Red, Basic Grey Lemonade, white, Canson watercolor paper

Ink: Versafine Black Onyx

Markers: Creamy Caramel, Really Rust, Close to Cocoa, Almost Amethyst, Certainly Celery, Bashful Blue, Yoyo Yellow, Pretty in Pink, Rose Romance

Other: Spellbinders Nestabilities Classic Oval Scallop Small, Classic Oval Large, Blossom; Cuttlebug Traffic Jam and Swiss Dots embossing folders, large and small oval punches, Martha Stewart Embossed Zigzag border punch, sewing machine, paper piercing tool, sponge mat, large pale pink gemstones, black polka dot ribbon, pale green satin ribbon, 3D-Dots, water brush, Crystal Snow fine white glitter, yellow Stickles

Friday, May 08, 2009

Daisy Pledge of Allegiance


I went lighter on the blue with this card because I wanted to showcase the lovely blue Primas from the Daisy Dreams Lagoon collection. Thankfully, each Prima flower set also comes with some creamy white flowers, so there is lots of versatility there.

I used the flag stamp from Our Daily Bread Designs' God Bless America set and the I Pledge Allegiance single stamp.

I'm really happy with the way this flag turned out. I stamped it in Versafine Onyx Black ink on plain white cs. Then I colored the blue area with an SU Bashful Blue marker. I colored the red stripes with an SU Ruby Red marker. I touched up the flag's black lines with my Special Black Copic marker since I didn't get a strong impression and didn't want to waste the image. With a light hand I was able to improve things without making it look overdone.

I used Brocade Blue cs because it matched so well with the 2 coats of Bashful Blue ink I had applied.

The red gingham ribbon reminds me of picnics (checked table cloths) and this card has that 4th of July feel about it. And what do we usually do on the 4th? Picnic!

Thanks for looking! Hope you have a great weekend! Pray for our nation!

Stamps: I Pledge Allegiance single stamp and God Bless America by Our Daily Bread Designs

CS: Real Red, black, Brocade Blue, white

Ink: Versafine Onyx Black

Other: Cuttlebug Tiny Bubbles and Traffic Jam embossing folders, Nestabilities Classic Oval Scallops Large and Classic Oval Large, Prima Daisy Dreams Lagoon flower collection, paper piercer, sponge mat, red gingham ribbon, ticket corner punch, Bashful Blue marker, Ruby Red marker, 3D-Dots, Sticky Doos (behind flowers)

Saturday, May 02, 2009

Convertible Birthday


Our son turns 16 this coming Monday. He's a joy to us all and a blessing in every way. I wanted to make him a special card. I hope he'll like it!

All the stamps used are Stampin' Up! I used Cheery Chat for the sentiment, Collage Alphabet Numbers for the 'no. 16' and Classic Convertibles for the car.

This card is pretty simple and straight-forward. The base is Chocolate Chip and was cuttlebugged using the Traffic Jam embossing folder.

I cuttlebugged the side panel of dp (Basic Grey Archaic) with the Mesh embossing folder. I glued it to the black background and stitched it on the sewing machine.

For the circle I stamped 'Happy Birthday' on ivory cs, cut it out using a Nestabilities circle die, ran it through the Cuttlebug using the Tiny Bubbles EF, and then sponged around the edges with my awesome new Tsukineko sponge daubers using Creamy Caramel ink.

For the car, I heat-embossed it with Brilliance Graphite Black ink and Judikins Detail Black embossing powder on ivory cs. Then I colored it with a Creamy Caramel marker, layering the color heavier in some areas and barely coloring others. I finished it up by using a silver Sharpie for the chrome and metal parts and a white Prismacolor pencil for the tires.

I stamped the 'no. 16' part on ivory cs, punched it out with the large oval punch and sponged the edges with Creamy Caramel ink.

Thanks for looking! Now I better git a move on and finish up the Mother's Day cards I need to make! Whew! May is a busy month!

Stamps: All Stampin' Up! - Cheery Chat, Classic Convertibles, Collage Alphabet Numbers

CS: Chocolate Chip, black, Basic Grey Archaic, ivory

Inks: Versafine Onyx Black, Brilliance Graphite Black, Creamy Caramel

Other: Cuttlebug embossing folders - Traffic Jam, Mesh, Tiny Bubbles; Nestabilities Standard Circle Large and Small, Judikins Detail Black ep, large oval punch, 3D-Dots, black zigzag ribbon, silver Sharpie, Creamy Caramel marker, Tsukineko sponge daubers, sewing machine, white Prismacolor pencil (for tires)

Friday, April 24, 2009

Sporty birthday


I've got SO many cards I need to make! This card is for my teenage nephew whose birthday is already past. Oops. Wish there were more stamping hours in my day!

I felt the need to simplify again. Mind, this isn't 'simple' in some people's eyes, but it is in mine. It's hard to go backwards once you're used to flinging the bling!

The base is one layer thick (excluding the inside) with a minimum of bling (for me). But the bling I did use works well enough, I think.

It's always hard trying to come up with a card for a teenage young man. Men's cards are difficult, in general, but a teenage version is the hardest. And thinking about it now I should've used the Nestabilities Labels One set (forgot I had it! Can you beLIEVE it?) rather than the scallop for the car image (which btw is from Stampin' Up! Classic Convertibles - retired). It would've been less foo-foo-y. Oh well, he'll never know. My 16 yo son loved it and thought my nephew would like it, so that's enough for me.

The base is Taken with Teal, but I couldn't get that color to look right in the photograph to save my life. It looks more like Tempting Turquoise, doesn't it? Some colors are just like that when you photograph them indoors. I used the Cuttlebug Traffic Jam embossing folder to add some visual interest.

I used 2 black jumbo eyelets that I think are by Making Memories. I wove black hemp through and around and pulled one end back through again, tying it on the inside.

I used the small and large oval punches for the birthday greeting, which I stamped in VersaMark ink and embossed with white ep. The sentiment is from the Stampin' Up! Amazing to Zany set.

The car scene is popped out with 3D-Dots as is the sentiment piece. I used black and Chocolate Chip cs for the sentiment piece.

When coloring the car I used the CTMH Breeze marker and Prismacolor pencils. I added highlights here and there with my Inkssentials opaque white pen. To finish it off I added Diamond Glaze (aka Crystal effects) to the windshield, side panel, hub caps and headlights. I had colored it before running the image through the Cuttlebug. I added the Diamond Glaze afterward.

Don't you just love my new watermark? I had it made by Dina Kowal. Here's her digi-sig site. She's very reasonable and ever so nice to work with. I got 4 watermarks for $11. Very reasonable, indeed!

Thanks for looking!

Recipe

Stamps: Stampin' Up! Classic Convertibles, Stampin' Up! Amazing to Zany

CS: Taken with Teal, black, white, Chocolate Chip

Ink: Versafine Onyx Black, VersaMark

Other: Cuttlebug Traffic Jam and Tiny Bubbles embossing folders, Nestabilities Classic Oval Large and Classic Oval Scallops Large, large and small oval punches, 3D-Dots, white embossing powder, Making Memories jumbo black eyelets, black hemp, Croc-a-dile (for making holes and setting eyelets), Diamond Glaze, CTMH Ocean marker, Prismacolor pencils, Inkssentials opaque white pen

Thursday, October 02, 2008

Happy Birthday Butterfly


What didn't I do to this card? Dry embossing, direct-to-paper, distressing, heat embossing, paper piercing...you name it, I probably did it.

I made this for my sister. Her birthday is this month and I wanted to go all out for her. It seems my cards are getting a bit more artsy these days, doesn't it? Or is it just me?

Every inch of this card has been touched by ink. Please forgive me because I refer to this a lot in my post.

For the main black base I direct-to-papered (from now on known as DTP'd) using Basic Black ink. It sounds odd to want to cover black cs with black ink, but it does add a nice touch.

I DTP'd the Real Red cs with Real Red ink and then DTP'd along the edges with Basic Black ink, going around in a swirly motion. Then I ran it through the Cuttlebug using the Traffic Jam folder. I had actually planned to have the un-cuttlebugged area under the ribbon on the bottom of the card. But I accidentally glued it on wrong and didn't realize it until it was too late. Honestly, I like it better on the side, so that was a happy accident!

I distressed the black base and the red piece and also distressed the smaller circles and the bigger mustard circle. Really enjoying the distressed look.

To distress, I ran my open scissors blade across the edges, perpendicular to the edges, in the same way I would if I was sanding them. It's very simple and yields a nifty result. I inked the edges after distressing them to hide the plain cs I had exposed.

Close-up of distressing:


Lots of paper piercing. I used my Making Memories piercer mentioned in this post to do the holes. I used the spongy pad from my mat pack underneath. That piercer is great except that it loosens after awhile (the tip is reversible, so it comes out). So I had my hubby glue the stylus part (I don't need or use it) into the handle with super glue (found in some hobby stores). So far it's staying put, and I used it a LOT on this card.

I paper-pierced around the edges and around the Nestabilities scalloped piece. Also went around the circles. I did the back of the card as well to keep the theme going on the inside.

I stamped the "Happy Birthday" stamp from SU Birthday Greetings and a bit of a butterfly from SU Wonderful Wings on the main circle which was white cs using Basic Black ink; then I cut it out with the Nestabilities circle die. I DTP'd the circle with More Mustard and Summer Sun and sponged a bit of Only Orange on it here and there. I DTP'd the edge with Basic Black.

I only stamped part of the butterfly to get the antennae in place for my popped up butterfly later on.

For the smaller circles I used 2 circle punches: a 1" and a 1.25". Before punching the red one out I stamped the word "Sis" in Basic Black. The alphas are from the small Girls are Weird set from Purple Onion Designs. I DTP'd the red cs with Real Red ink. I should've stamped after the DTPing because of the smear factor. Then I punched it out. I DTP'd the black cs with Basic Black ink before punching. Then I distressed the circles with my scissors and DTP'd the edges with their matching inks. Then I paper pierced the edges...because I must. It's a disease.

For the butterfly I...you guessed it...DTP'd some white cs with Taken with Teal ink. Then I let it dry and did the same with More Mustard, but only a little bit, just to warm it up. Then I stamped the butterfly from SU Wonderful Wings in Brilliance Graphite Black ink over it and heat embossed it using detail black embossing powder. Then I cut it out and adhered it with Dimensionals to the main circle. I like the way it floats. I used Sticky Doos to pop out the big circle/scallop part from the red background piece.


The black mini brads were a last minute decision, but I really like what they add to the overall look. The ribbons are black organdy, black plaid and the teal ribbon was actually some cream grosgrain I saturated with Taken with Teal ink so it would match the butterfly and add an extra touch of that color to the scene. I used the TWT re-inker to really saturate the ribbon. Then I blotted it as best I could and let it dry before adding it. Someday I plan to get white grosgrain ribbon so I can stain it any color I want to match my cs.

For the inside I took 2 pieces of Real Red cs and DTP'd with Real Red ink and did the same thing around the edges with the Basic Black as I did on the front, only a bit more. Then I adhered them with Sticky Doos. Lots of paper piercing around them on the black. Between the paper piercing and the distressing the cardstock was just about like cloth!


Phew! This card was a job to make and a job to describe! I hope I didn't forget anything! Hope you enjoy it.

Stamps: SU Wonderful Wings, SU Birthday Greetings, Purple Onion Designs small "Girls are Weird" alphas

CS: Black, Real Red, White

Inks: Real Red, Basic Black, Taken with Teal, More Mustard, Summer Sun, Only Orange, Brilliance Graphite Black

Other: Cuttlebug Traffic Jam embossing folder, Nestabilities scallop and plain circle dies, 1" and 1.25" circle punches, 1/16" hole punch (for mini brads), Making Memories piercing tool, Sponge mat from Mat Pack, Sticky Doos, Dimensionals, Black mini brads, Black organdy ribbon, Black plaid ribbon, Cream grosgrain ribbon, Taken with Teal re-inker, Scissors for distressing, Sponge for Only Orange ink, Detail Black EP

Monday, September 01, 2008

For You Floral


This will be known as my Hurricane Gustav card. I spent all day yesterday watching and listening to a Louisiana broadcast online of the coming hurricane while I was stamping (still watching). I had a hard time focusing on this card as my mother-in-law and brother-in-law are in Louisiana weathering the storm (they're doing fine, though). So please forgive its imperfections. My mind was quite distracted, but I needed to do something with myself. So I stamped, of course.

I began with a black cs base, but the Mellow Moss cs is where the card opens. I stamped the SU Hand Stitched background stamp in VersaMark ink on the Mellow Moss. After stamping the "For You" sentiment in Basic Black ink on Real Red, I ran it through the Cuttlebug using the Swiss Dots folder.

I punched the edges on the floral Anna Griffin paper and the black with the Martha Stewart Doily Lace punch and ran the floral paper through the Cuttlebug using the Traffic Jam folder. I was careful to line it up above the lacy edge. I used Dimensionals between the floral and the black and the red. Probably too many Dimensionals! lol

I used the Crop-a-Dile to punch the holes and set the eyelets. That was a bit tricky and they aren't lined up perfectly. I added the plaid ribbon and adhered the whole mess to the Mellow Moss cs.

For the girl, I stamped her in Basic Black ink on Vanilla cs. Using a water brush, I painted her dress with Ruby Red ink, going over it several times in some places to add depth. I used a white gel pen to whiten her collar, sash and sleeve edge. I used Mellow Moss and So Saffron inks to paint the grass. The flowers and butterflies are in So Saffron (marker). I used the Blush Blossom marker to paint her skin and Close to Cocoa to do the tiny bit of her hair.

I ran the girl piece through the Cuttlebug using a plain oval Nestie. Then I dry embossed the edge. I ran the black cs through using a scallop Nestie. I paper pierced the black scallop using a straight pin and the mat pack cushion after attaching the girl piece with Dimensionals (I find it easier to paper pierce the scallops that way).

Close-up of paper piercing:


Thanks for looking! Be safe if you're in this hurricane or are waiting it out elsewhere. God be with you!

Stamps: SU Hand Stitched, SU Summer By the Sea, CTMH Spunky Greetings

CS: Black, Mellow Moss, Real Red, Anna Griffin floral (AG 024), Vanilla

Inks: VersaMark, Basic Black, Ruby Red, Mellow Moss, So Saffron

Other: Cuttlebug Traffic Jam and Swiss Dots embossing folders, Martha Stewart "Doily Lace" punch, Oval plain and scallop Nestabilities, Crop-a-Dile, Black eyelets, Dimensionals, Water brush, Plaid ribbon, Straight pin, Mat pack cushion, Blush Blossom marker, Close to Cocoa marker, So Saffron marker, White gel pen

Friday, July 18, 2008

Roses in Winter from the heart


Can you stand this design one more time? Actually, 2 more because I have one more planned. This look just popped into my head and I had to make it. But I am slightly regretting the glitter being used on the rose. I'm not a heavy bling user, but I do like some. I had intended the glitter to be much, much lighter, but it wasn't to be for this card.

I stamped the Always Artichoke cs with Always Artichoke ink using the SU Canvas background stamp. Love that stamp!! For the red cs I did the same thing as on this card. I sponged Rose Red and More Mustard on Purely Pomegranate cs. If only Stampin' Up! would come up with a cs that color! Wow! I'd buy a bunch! I stamped the SU French Script background stamp over that using Baroque Burgundy ink. Loved the look that gave! Then I ran it through the Cuttlebug using the "Traffic Jam" embossing folder and then sponged more Rose Red and More Mustard inks over it to pop the embossing out.

Nothing new to mention about the Always Artichoke part with the "Swiss Dots" embossing folder. Pretty self-explanatory. The ovals, as well. Pretty much like the other 2 cards I described recently except that I used a sentiment (from SU All Year Cheer I) instead of an image. I lined it up using my trusty Stamp-a-ma-jig. The ribbons are also pretty self-explanatory.

The rose was made similarly to this card except that I stamped and cut out parts of another leaf stamp from the Roses in Winter set and Dimensionalled them to the tops of the leaves to add more oomph. I also glittered the edges of the rose with a rose-colored iridescent glitter. Still not sure that was a good idea, but oh well. I used lots of Dimensionals to put the rose together, and the leaves have several Dimensionals stacked on top of each other to keep them in place.

Well, there it is. Thanks for looking! I hope you enjoy this card. I enjoyed making it (except for the glitter part!).

Stamps: SU Roses in Winter, SU All Year Cheer I, SU French Script, SU Canvas

CS: Always Artichoke, Purely Pomegranate (sponged with Rose Red and More Mustard), Black, White

Inks: Basic Black, Rose Red, More Mustard, Baroque Burgundy, Old Olive, Certainly Celery

Other: Cuttlebug "Traffic Jam" and "Swiss Dots" embossing folders, Nestabilities regular and scalloped ovals, Stamp-a-ma-jig, Dimensionals, 2-way glue, Rose-colored iridescent glitter, Sponges, Plaid ribbon, Polka dot ribbon