Showing posts with label SU Paris in the Spring. Show all posts

Wednesday, October 16, 2013

Paris in the Spring birthday card

Well howdy there! Yes, it's another card from me! Amazing, I know. I'm feeling such a strong desire to stamp right now. It's wonderful! Almost every day I stamp and create a little. I love it!

This card is more what I normally do, but you'll be seeing me go back to my stamping roots in the near future. I've got another card I'll post soon and I'm almost finished with a third. My mojo is back, y'all, and it's all because I am playing like I used to!

I had actually made parts of this card many months ago, and was re-inspired to finish it whilst going through my cardstock pile and finding pieces of cards I had started. Do you have a cardstock pile that forms every time you make a card? I usually do, and it normally grows with each project, gathering dust in the process. But I got it all put back and now have my cardstock within easy reach so I can put scraps in their proper place. I keep a box like this nearby for smaller scraps so I am more likely to grab them instead of reaching for a new sheet. It works! I feel so good using my scraps up!


I realized how perfect this saying from SU Loads of Love Accessories was with this image from SU Paris in the Spring.

The middle flower and the smallest flower were inked up with a Copic marker. It was so easy to make the white flowers into whatever colors I wanted and was much less messy than pressing the flowers on an ink pad (my old way) which soaks up a lot of ink.


All coloring was done with Copics.


See the wheel stamping I did below? I have totally ignored my lovely wheel stamps for far too long! Btw, you can also see that I started to write in the card before I realized I hadn't photographed it yet. Oops! It went in the mail to my sister today!


More Copic coloring. I did a little doubling and tripling up on the colors to make the images more whimsical.


Tried hard to copy the outside image coloring inside. Considering that the outside image was done months ago, I found it a bit challenging. But the FUN kind of challenging!


Well, I hope you enjoyed this birthday card I made! Thanks for coming by!

Stamps: SU Paris in the Spring, SU Loads of Love Accessories, SU Swirl Style Wheel, Fiskars Make a Wish Quotes

CS: SU True Thyme, Tim Holtz Idea-ology Paper Stash: Lost and Found, White

Inks: Copic markers, Memento Tuxedo Black, Versafine Onyx Black, VersaMark, SU True Thyme

Other: Martha Stewart Arched Lattice border punch, Nestabilities oval die, Cuttlebug D'Vine Swirl and Polka Dot embossing folders, Cloth flowers, Gems, Grosgrain ribbons

Friday, April 03, 2009

ODBD Children of God new release


This card was so much fun to make. Originally, I had planned on just using the "sun" element and the Jesus image from Our Daily Bread Design's Children of God set (one of their new April sets). But it needed more. So I dug through my sets (including the ones I need to put on eBay!) and came up with a couple of nice additions to the scene. The flowers come from the Stampin' Up! set Paris in the Spring (retired) and the sheep came from another SU set called Udderly Moovelous (also retired).

As you can see, I went a little nuts with the Cuttlebug folders. Thinking about it now, I might've done it slightly different had I made this card again. Next time I would leave the top green section un-cuttlebugged and would cuttlebug the sun's front. I think that would add greater dimension and would be more pleasing to the eye. What do you think? I used the Tiny Bubbles, Swiss Dots, and D'Vine Swirls folders.

I enjoyed coloring the Jesus image using Prismacolor pencils after heat-embossing with Brilliance Graphite Black ink and detail black ep from Judikins. I started with lighter colors and layered darker ones over them.


After coloring the flowers and trimming them down, I cut the image in half and glued the halves behind the "hills" with a little Diamond Glaze. They are also heat-embossed in the same way as is described above.

For the sun, I wanted it to look a bit whimsical, so I didn't try to make the stitching perfect. It's meant to be off. I paper-pierced the scalloped circle just a bit for visual interest. Yes, there's lots of activity on this card! lol


For the inside I carried the "hills" theme using the Cuttlebug D'Vine Swirls embossing folder and threw in a couple of sheep to add authenticity. My favorite series EVER is All Creatures Great and Small, and there are lots of sheep to behold on that show (you can see a sweet video clip from the very first episode if you go through the link). I don't recall that there were any brown sheep, but I couldn't figure out a way to make them more white-ish without making them look washed out. So brown it is. Plus, it looks good against the green.


You'll notice that one of the sheep faces the other way. I achieved that by stamping the sheep onto a large shadow stamp, huffing on it, and then stamping it (on white cs).


My inspiration for this card came from Jenn Biederman and her amazing stitched cards and from Angella Brockett and her amazing pottery card (second one in post). Angella's inspiration was a tall card with hills. It's funny, the things that will spark one's creativity. Her card is so awesome, it HAS to inspire. It can't help itself. :)

The inside sentiment also comes from the Children of God set. I slightly goofed when stamping it and was not going to redo the whole inside just for a slight flaw. So the flaw stays. See? I'm getting better about my perfectionism. Or am I just too tired to care? lol Yeah, probably that.

TFL!

Stamps: Our Daily Bread Designs Children of God, SU Paris in the Spring (retired), SU Udderly Moovelous (retired)

CS: Black, Mellow Moss, Always Artichoke, Wild Wasabi, Pumpkin Pie, Apricot Appeal, White

Ink: Brilliance Graphite Black

Other: Prismacolor pencils, Cuttlebug Tiny Bubbles, Swiss Dots, and D'Vine Swirls embossing folders, Nestabilities Classic Scallop Circle Small, Nestabilities Standard Circle Small, sewing machine, paper piercing tool, sponge mat, X-Acto knife (for trimming flowers), 3D-Dots, Diamond Glaze, corner punch, Detail Black ep

Tuesday, March 24, 2009

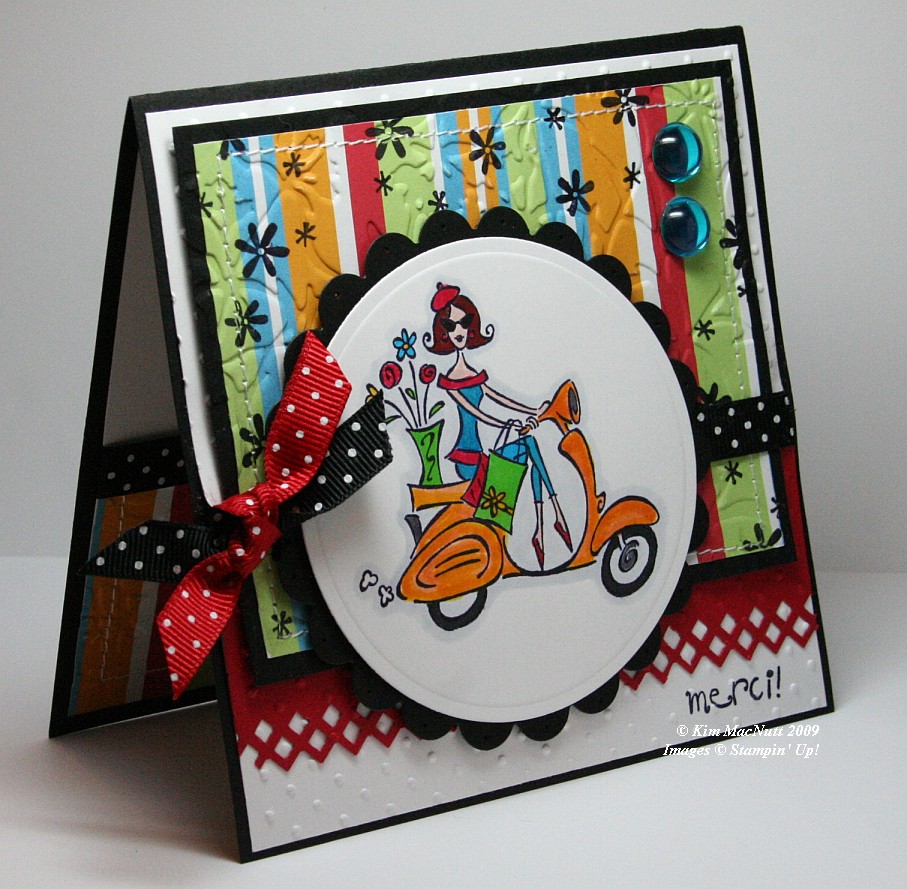
Merci!


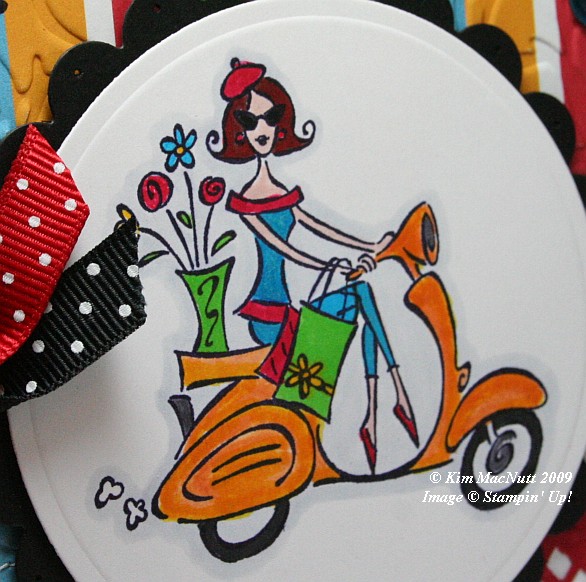
It's funny how for the last several springs I've brought this set out. If any set says "spring" I think SU Paris in the Spring does. Who can't imagine feeling the fresh spring air running through their hair while looking at this Parisian girl on her scooter? Even though this set is retired (harumph!) I hope to never part with it. It's fresh no matter how many times I've use it.

When you take pics of your work, you often only then notice its many flaws. And being a recovering perfectionist, I see them all loud and clear. It's what keeps me from selling my cards on eBay or sending them more often to magazines. So when looking at this card, please forgive the flaws if you are also a perfectionist, recovering or otherwise.


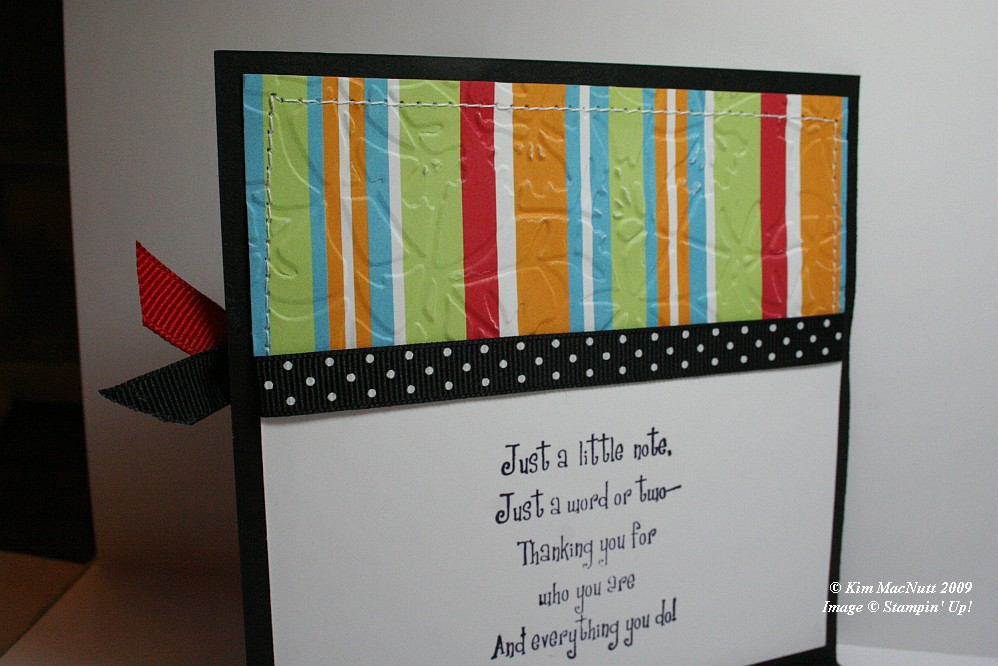
First let me say that this card fought me tooth and nail. It didn't want to come into this world, but I made it. It tried to thwart me in every way. Whether it was forgetting to put the ribbon on over a certain part and gluing it down wrong or getting the inside messed up so badly that I had to redo it completely (it was going to be white only on the main card, but now it is black).


One thing I learned while making this card is that zigzag stitching is a booger to do. Those corner turns are murder. Any tips out there on how it is done properly-like? I ruined 2 pieces of designer paper and black cs trying to zigzag stitch. I gave up and went with a straight stitch. Then my sewing machine went all wonky from me changing the settings! I have sew much to learn. heh heh

Isn't the border punch lovely? Its Fiskars "Diamond". Don't look at the left end. *sigh* See? imperfect. I had my troubles with that punch, too. It's a miracle this card exists, I tell ya!


In coloring the girl I stamped on white cs with Basic Black ink. Once it was dry I colored the majority of the parts of the image with SU markers. The exceptions are that I used a water brush and Pumpkin Pie ink pad for the scooter (which I later shaded a bit with the Summer Sun marker) and the pale gray outline around the whole image which I achieved using the Copic Cool Gray (C1) marker. I've wanted that thing for the longest time. Finally got it.

I stamped the "merci!" and the flowers before embossing over them, btw.

For embossing, I used the Cuttlebug Swiss Dots and Floral Screen folders. I also used the Cuttlebug to create the scalloped and regular circles using Nesties. I used a paper piercer to poke a hole in each "petal".

Dat's about it. Ask questions if I forgot something you'd like to know. TFL!

Recipe:

Stamps: SU Paris in the Spring, SU Cool Cat (flowers)

CS: Black, White, Real Red, American Crafts "Celebration" designer paper

Inks: Basic Black, Pumpkin Pie

Markers: Summer Sun, Tempting Turquoise, Green Galore, Real Red, Ruby Red, Blush Blossom, Close to Cocoa, Going Gray, Copic Special Black, Copic Cool Gray (C1)

Other: Cuttlebug Floral Screen and Swiss Dots embossing folders, Nesties - scalloped circle, regular circle; Fiskars Diamond border punch, 3D-Dots, Large aqua gems, Black polka dot ribbon, Red polka dot ribbon, Stamp-a-ma-jig, Sewing machine

Thursday, July 03, 2008

SC182 a second time


Playing with this design challenge again. The hardest part of doing this design is in placing the squares in the right places. I goofed in that respect and had to cut out the squares along with the black background they were attached to. It turned out alright in the end, but my squares are still not perfect. I need to get. over. it. Too perfectionistic.

I don't know if you can see the embossing on the designer paper (can't wait till I get that OTT-LITE I ordered!), but I used the Cuttlebug "Bloom Dots" embossing folder. The Making Memories paper I embossed for this card tends to be a bit too thin for embossing, as embossed image pierces the paper a bit; and if you look closely, you can see the white inner core of the paper. I often sponge it with ink to cover that up, but left it alone on this card since it wasn't terribly noticeable.

And of course, I had to use "Tiny Bubbles" somewhere on my card because I am obsessed with that folder! I used it to emboss the orange cs behind the scooter girl from SU Paris in the Spring.


The scooter girl image was stamped in Basic Black dye ink and was colored with markers. I popped out the package, vase and one of the flowers to add some visual interest. I also used Diamond Glaze on the sunglasses to mimic glass and added some to the headlight, as well. I used the sentiment on one of the stamps in the SU Life Cycles set. I cut the sentiment away from the image and mounted it on the edge of the wood block so I could use it without having to block out the image. Do you ever do that?

I used a water brush and the Bordering Blue ink pad to give the smoke puffs some color. The marker was too intense for that job.
I put Dimensionals behind the white cs, the black cs and each individual square. Yeah, a lot of Dimensionals! That wasn't my original plan, but oh well. I love the popped out look.

The rest of the card's info is pretty self-explanatory. See recipe below.

Thanks for looking!

Stamps: Paris in the Spring, Life Cycles

CS: Only Orange, Black, Making Memories Cheeky Collection - Abby designer paper, White

Inks: Basic Black, Bordering Blue

Markers: Pixie Pink, Basic Black, Only Orange, Sage Shadow, Certainly Celery, Rose Red, Summer Sun, Bordering Blue, Creamy Caramel, Blush Blossom

Other: Cuttlebug embossing folders, "Bloom Dots" and "Tiny Bubbles", Square punch, Stamp-a-ma-jig, Dimensionals, Diamond Glaze, Water brush