Showing posts with label SU Birthday Greetings. Show all posts

Wednesday, June 06, 2018

Mini Bird Crazy Masculine Birthday Card

This card is nothing like I had envisioned it to be. Have you ever had that happen? 


When I started making it, I had completely different colors and papers in mind. But I ruined them both with bad cuts and general mishaps and had to go with Plan B since I did not have anymore of either. Drat! 

Thankfully, I have pads and pads of masculine paper from Basic Grey. Did Basic Grey stop selling papers? I went to their website and only saw fabric! Wah!! It was one of the best designer paper companies out there with such limitless variety. I'm sad that they won't be making their wonderful papers anymore. It's insane when you do something so well and then you stop and go into something else (fabrics). Can't they do both?

Despite the issues with papers, this bird was definitely part of the plan. He's from Tim Holtz's set Mini Bird Crazy & Things and I love him! My 3rd daughter gave me this set for my birthday this year, and I made her a card with it; and now I've made this one for my son-in-law. Both are funny, nutty people who can appreciate the goofy bird characters in this set. In fact, I made this little guy even goofier by giving him googly eyes. Anytime I can add googly eyes, I'm happy! 

You can see all the layers below on the center piece. I love popping things out. It just jazzes up a card exponentially. What you can't see is my poorly-set eyelets. I'm sorry, but my Crop-O-Dile is just failing me. I have got to find a better way. It is hard to see where to punch the holes for the eyelets, and it is hard to set eyelets that are a harder metal, like these. Nothing I've done recently when trying to set eyelets with that thing has come out well. Maybe it's my eyelets?


I was fairly minimal inside the card because I was short on time and just needed to get it done. Otherwise, I would've filled all 3 panels up with something. One thing you can't see is that I added a black velcro dot on the outside to hold the card closed. I was in a hurry by the time I got this done, and just got bare minimum pictures taken.


Well, I hope you've enjoyed your visit, and please let me know you've come by with a comment. Take care!

Stamps: SU! Birthday Greetings, Mini Bird Crazy & Things

CS: Papertrey Ink Terracotta Tile, Basic Grey Obscure, Basic Grey Recess, Papertrey Ink Stamper's Select White

Inks: Memento Tuxedo Black

Copics: B24, B41, B45, B95, R14, YR24, W3

Other: Nestabilities Standard Circle Large, Large Classic Inverted Scalloped Circles, Standard Circle Small, Cuttlebug Distressed Stripes & Spots and Dots embossing folders, Sizzix Mini Bird Crazy & Things Framelit dies, Paper piercer Sponge mat, Silver eyelets, Crop-O-Dile, Googly eyes, Stamp-a-ma-jig, Foam tape

Card Style: Gatefold

Sunday, June 03, 2018

To Someone Special

This card was made for my granddaughter who recently had a birthday. I love this image. It's another Pure Innocence digital stamp. It's so sweet, and it's so much fun to color. I seem to be drawn to them lately.

For this one, I went monochrome.....just because. I actually found it quite satisfying to limit myself on colors. I had done a card that way in the past


I loved playing with my old Stampin' Up! Botanicals set on the gray designer paper and inside the card. I hadn't pulled it out in a long time. It's a classic that will never age. The images look so beautiful stamped.

On the inside, I went simple. Just a piece of the Basic Grey Granola paper with some paper piercing around the edges. The bee is also from Botanicals. The "Happy Birthday" image is from SU Birthday Greetings. It fits in so well with the Botanicals set, don't you think?


I took this pic so you could see the shine on the wings. Maybe I should've added glitter, too? I dunno.


And I gave her some princessy slippers by adding a gem to each. 


Well, thanks for looking! Take care!

Stamps: Pure Innocence PI049, SU Botanicals, SU Birthday Greetings

CS: Black, Papertrey Ink Stamper's Select White, Basic Grey Granola designer papers

Inks: Copic W1, W3, W5, W7; Memento Tuxedo Black

Other: Nestabilities Curved Rectangles, SU corner punch, SU 1/2" circle punch, clear gems, Inkssentials Glossy Accents (on wings), paper piercer, foam tape

Thursday, May 10, 2018

You're a Classic

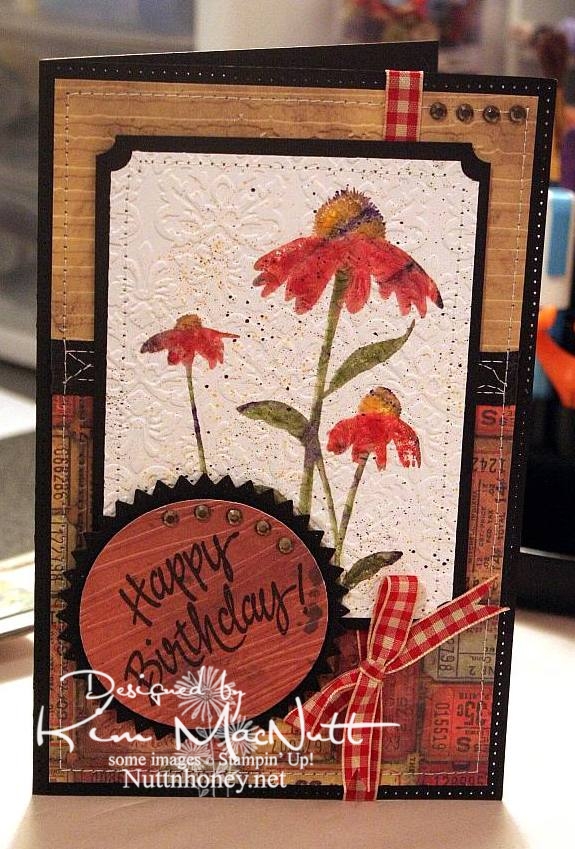
My son is an avid classic car guy. He owns 2 old pickup trucks that he is restoring. So for his birthday I thought I'd pull out the old Stampin' Up! set Classic Pickups to make his card.


I sponged different inks on the tags before stamping the truck image. I also stamped the saying before dry-embossing the paper:


I did a double version of the truck image to pop it out. And I popped out the tags as well (all with foam tape).


I did a pitiful job on setting the big eyelets inside the card. Even with the Crop-o-Dile it's hard for me. I'm probably not using it properly. Maybe I should use my trusty old eyelet setter.


Thanks for looking! Have a great day!

Stamps: SU! Classic Pickups, SU! Birthday Greetings, The Angel Company (inside center saying)

CS: Black, White, Basic Grey Granola papers, white tags

Inks: Tim Holtz Distress Inks in Antique Linen, Vintage, and Black Soot; Memento Tuxedo Black, Stampin' Up! Night of Navy

Other: Cuttlebug Tiny Bubbles embossing folder, Sponge for direct to paper inking, Crop-o-Dile, large, brown eyelets, brown mini-brads, foam tape, brown leather string

Sunday, February 04, 2018

Gingham Cupcake Birthday


Recipe:

Stamps: Inkadinkado Birthday Cupcakes, SU! Birthday Greetings

CS: SU! Blush Blossom, White, Vellum

Inks: Memento Tuxedo Black (cupcake), Versafine Onyx Black (sayings), Copics

Other: Cuttlebug Distressed Stripes, Tiny Bubbles and Kassie's Brocade embossing folders, stitching, scissors blade to rough up edges of cardstock, foam tape, Stampamajig to center sayings, Stickles glitter glue, black gingham ribbon

Friday, October 18, 2013

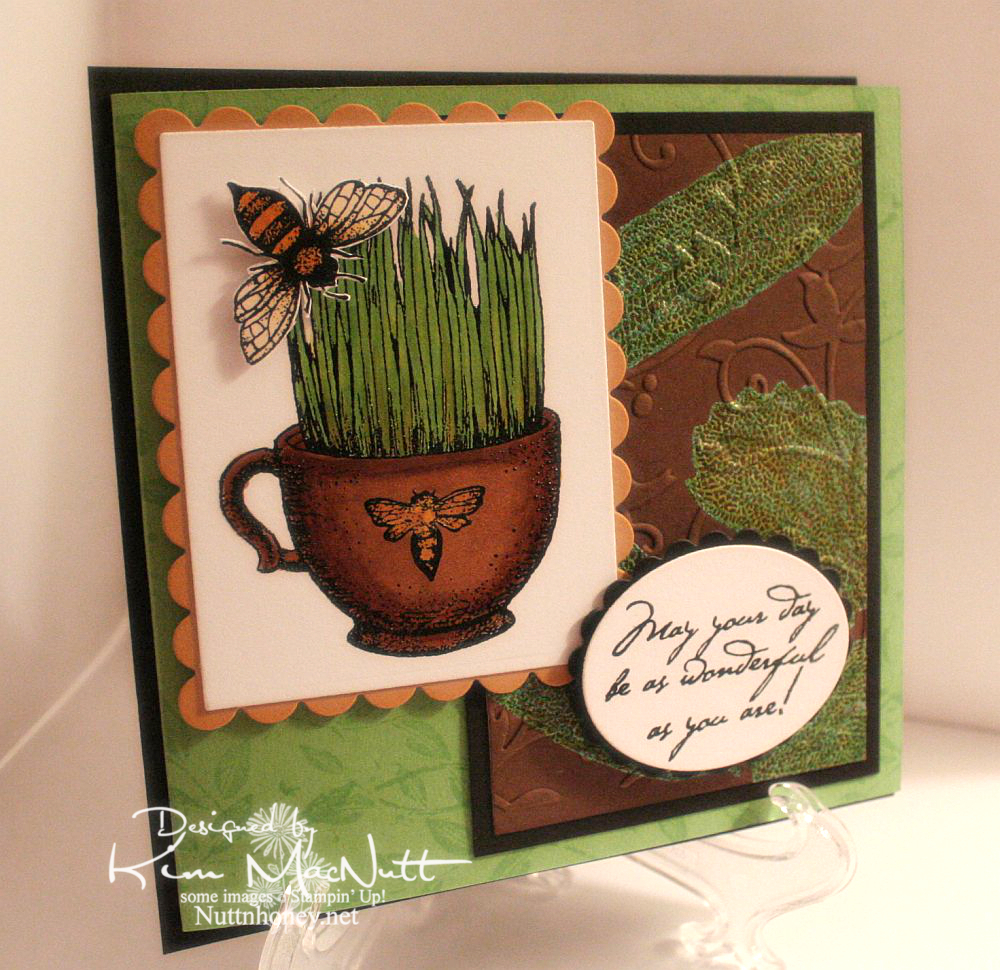
May Your Day Be As Wonderful As You Are!

This is the most stamping and playing with ink I've done in a long time! I heat-embossed so much on this card, y'all! I am loving all this playtime! This card is for my mother's birthday.

For the brown background piece I first did direct to paper with the Antique Linen Distress Ink pad. Then I stamped the leaves from SU Autumn in VersaMark ink and heat embossed with SU Vintage Verdigris EP. Then I went over it with DI Vintage Photo and lastly with SU Basic Brown. So now it just looks brown. But that's how I got there! lol Then I rubbed a light green Copic marker over the leaves and wiped them off. I'm not sure, but I think embossing powder might react with Copics and soften. Just be careful if you try this.


I hope you can see that I heat-embossed the grass image and the bee. It made for some enjoyable coloring with Copics afterwards. The bee is popped up with foam tape.


On the inside I wanted to create a sort of dancing bee scenario. I stamped them all in Brilliance Graphite Black and heat-embossed them with clear EP. Then, once cooled, I ran the edges through the Cuttlebug using the D'Vine Swirls embossing folder. To hide the folder edge and keep with the black lines image, I used some grosgrain ribbon. I rolled both inside and outside edges of the Green Galore CS with the Leaf Prints wheel and VersaMark ink. Busy, busy, buzzy!


The white paper collapsed a bit from the Cuttlebug embossing. A thin extra layer in the sandwich probably would've fixed that. Ah, well.


I hope you liked my imperfect, but happily-created card, and thanks for looking!

Stamps: The Angel Company (TAC) - not sure of stamp set names, but the image is from one and the saying is from another; SU Autumn, SU Leaf Prints wheel, SU Birthday Greetings

CS: Black, SU Green Galore, SU More Mustard, White

Inks: VersaMark, Copic Markers, Brilliance Graphite Black (for heat embossing), Tim Holtz Distress Ink Vintage Photo and Antique Linen, SU Basic Brown

Other: Cuttlebug Birds and Swirls and D'Vine Swirls embossing folders, Nestabilities oval, rectangle, and scalloped dies; Clear heat embossing powder, SU Vintage Verdigris embossing powder, foam tape

Tuesday, October 08, 2013

I never, ever tire of using Lovely Leaves

This is the perfect time of year to pull out an old favorite like Lovely Leaves, isn't it? I needed a birthday card for my oldest daughter and I haven't played with this set in a long time. I did the leaves by stamping on different colored ink pads with some inks overlapping. This is a bit risky, and I usually color the stamps with markers and then lightly touch the edges with a little black or other dark ink. It's better with the markers, but the ink pads really do some neat things. So I sometimes risk it. I always go light to dark when overlapping colors.


There's an interesting little story behind those dotted holes. I was doing a single row around the oval and I goofed them up. Rather than start all over I just kept adding holes and ended up with a pleasing result.


I did some matching panels on the inside as well as the outside, running the panels through the Cuttlebug after stamping them.


I'm very pleased with my leaves. This set is so amazing!


For the inside sentiment I stamped part of it in one color and part in another. Then I ran a bit of it over some black ink.


The main colors in my card are Pumpkin Pie and Brocade Blue. Does SU even sell those anymore?

Thanks for looking! I hope you enjoyed my little ode to Autumn!

Friday, February 03, 2012

Inspired By Nature and a comeback?

I'm back, sort of. My stamping mojo left me and I haven't really felt like stamping for quite a long time. But I've taken up hand embroidery and I love it and usually spend my time on that these days.

But my friend, Teresa, inspired me with her recent card creations and I'm kind of looking at my stamping stuff again. Where this goes I don't know, but at least I took this blog out of mothballs. :)

Below is the only card I've created for months. Even so, my mojo was nowhere to be found.


Maybe opening things up here again will help.

Thursday, September 24, 2009

Flying Cupcakes


Hello all! My apologies for the picture of this card. It was hard to stand up to photograph because it's 5.5" X 8.5" - a whole sheet of cardstock folded in half. Actually, what I meant to say was that the black base is only on the back, so the front does not have support. So I had to lean it against something to get a pic of it.

Confession time. I bought cards at the store for almost everyone I needed a card for this month. And you know what? I was so glad I did because the one thing I always feel is lacking in my cards is sincere sentiments. I found the perfect cards for everyone I bought for! I mean the words spoke so deeply about my feelings. And it felt good to accomplish such a goal. It's not that my own handmade cards aren't appreciated, but sometimes I want it to be more than just a pretty card. I want it to speak from the heart.

I am not a poet and I am no good at saying how I feel in my cards. I try, but I don't really have that gift. Others do, and I'm so thankful for that because they can put to words just how I feel and set those words right in the perfect card, and all I have to do is buy it. Yeah, I could probably make a more glittery, splashy-looking card, but it's what is said inside (or outside) that really counts.

While I know there are sites out there that give free prose for the taking, my printers are very limited and buying a new one just to print on my cards seems wasteful. So I stick to the stamps I have. But they are so limited. And I'm trying to avoid wasteful spending right now. The Lord knows how much money I've already sunk into this hobby!

Anywho, I did want to make a dear friend a card because she is also a stamper and today's her birthday! So this one is for her. Teresa has a dream about baking cakes for a living. She's very good at it! I'm so hopeful that God may be directing her very soon in that direction. This being the case, I had to make her a card with some kind of cake on it! So I pulled out the Inkadinkado set, Birthday Cupcake, and did a nice scene of flying (or dancing, if you will) cupcakes in her favorite color - pink.

I wanted it to have a soft appearance, so I used Swirl vellum over Blush Blossom cardstock like I did for this card. The design is really simple. The most elaborate work I did was on the cupcake scene. I stamped it in Versafine Onyx Black ink on Canson watercolor paper. Then I colored it with markers. Then I put the glitter on and THEN decided to cuttlebug it. That was a slight mistake, but it still turned out fine since the glue was dry under the glitter.

Oh, btw, I used SU Basic Black ink on the saying because it dries on vellum quickly, unlike the Versafine.

I appreciate you having a look. Be well!

Recipe

Stamps: Inkadinkado Birthday Cupcake, Stampin' Up! Birthday Greetings

CS: Black, Blush Blossom, Swirl vellum, Canson watercolor paper

Inks: SU Basic Black, Versafine Onyx Black

Markers: Blush Blossom, Cameo Coral, Pixie Pink, Pretty in Pink, Mellow Moss, Certainly Celery, Barely Banana

Other: Cuttlebug Tiny Bubbles embossing folder, clear glue, fine white Crystal Snow glitter, black polka dot ribbon, Stamp-a-ma-jig, 3D-Dots

Thursday, October 02, 2008

Happy Birthday Butterfly


What didn't I do to this card? Dry embossing, direct-to-paper, distressing, heat embossing, paper piercing...you name it, I probably did it.

I made this for my sister. Her birthday is this month and I wanted to go all out for her. It seems my cards are getting a bit more artsy these days, doesn't it? Or is it just me?

Every inch of this card has been touched by ink. Please forgive me because I refer to this a lot in my post.

For the main black base I direct-to-papered (from now on known as DTP'd) using Basic Black ink. It sounds odd to want to cover black cs with black ink, but it does add a nice touch.

I DTP'd the Real Red cs with Real Red ink and then DTP'd along the edges with Basic Black ink, going around in a swirly motion. Then I ran it through the Cuttlebug using the Traffic Jam folder. I had actually planned to have the un-cuttlebugged area under the ribbon on the bottom of the card. But I accidentally glued it on wrong and didn't realize it until it was too late. Honestly, I like it better on the side, so that was a happy accident!

I distressed the black base and the red piece and also distressed the smaller circles and the bigger mustard circle. Really enjoying the distressed look.

To distress, I ran my open scissors blade across the edges, perpendicular to the edges, in the same way I would if I was sanding them. It's very simple and yields a nifty result. I inked the edges after distressing them to hide the plain cs I had exposed.

Close-up of distressing:


Lots of paper piercing. I used my Making Memories piercer mentioned in this post to do the holes. I used the spongy pad from my mat pack underneath. That piercer is great except that it loosens after awhile (the tip is reversible, so it comes out). So I had my hubby glue the stylus part (I don't need or use it) into the handle with super glue (found in some hobby stores). So far it's staying put, and I used it a LOT on this card.

I paper-pierced around the edges and around the Nestabilities scalloped piece. Also went around the circles. I did the back of the card as well to keep the theme going on the inside.

I stamped the "Happy Birthday" stamp from SU Birthday Greetings and a bit of a butterfly from SU Wonderful Wings on the main circle which was white cs using Basic Black ink; then I cut it out with the Nestabilities circle die. I DTP'd the circle with More Mustard and Summer Sun and sponged a bit of Only Orange on it here and there. I DTP'd the edge with Basic Black.

I only stamped part of the butterfly to get the antennae in place for my popped up butterfly later on.

For the smaller circles I used 2 circle punches: a 1" and a 1.25". Before punching the red one out I stamped the word "Sis" in Basic Black. The alphas are from the small Girls are Weird set from Purple Onion Designs. I DTP'd the red cs with Real Red ink. I should've stamped after the DTPing because of the smear factor. Then I punched it out. I DTP'd the black cs with Basic Black ink before punching. Then I distressed the circles with my scissors and DTP'd the edges with their matching inks. Then I paper pierced the edges...because I must. It's a disease.

For the butterfly I...you guessed it...DTP'd some white cs with Taken with Teal ink. Then I let it dry and did the same with More Mustard, but only a little bit, just to warm it up. Then I stamped the butterfly from SU Wonderful Wings in Brilliance Graphite Black ink over it and heat embossed it using detail black embossing powder. Then I cut it out and adhered it with Dimensionals to the main circle. I like the way it floats. I used Sticky Doos to pop out the big circle/scallop part from the red background piece.


The black mini brads were a last minute decision, but I really like what they add to the overall look. The ribbons are black organdy, black plaid and the teal ribbon was actually some cream grosgrain I saturated with Taken with Teal ink so it would match the butterfly and add an extra touch of that color to the scene. I used the TWT re-inker to really saturate the ribbon. Then I blotted it as best I could and let it dry before adding it. Someday I plan to get white grosgrain ribbon so I can stain it any color I want to match my cs.

For the inside I took 2 pieces of Real Red cs and DTP'd with Real Red ink and did the same thing around the edges with the Basic Black as I did on the front, only a bit more. Then I adhered them with Sticky Doos. Lots of paper piercing around them on the black. Between the paper piercing and the distressing the cardstock was just about like cloth!


Phew! This card was a job to make and a job to describe! I hope I didn't forget anything! Hope you enjoy it.

Stamps: SU Wonderful Wings, SU Birthday Greetings, Purple Onion Designs small "Girls are Weird" alphas

CS: Black, Real Red, White

Inks: Real Red, Basic Black, Taken with Teal, More Mustard, Summer Sun, Only Orange, Brilliance Graphite Black

Other: Cuttlebug Traffic Jam embossing folder, Nestabilities scallop and plain circle dies, 1" and 1.25" circle punches, 1/16" hole punch (for mini brads), Making Memories piercing tool, Sponge mat from Mat Pack, Sticky Doos, Dimensionals, Black mini brads, Black organdy ribbon, Black plaid ribbon, Cream grosgrain ribbon, Taken with Teal re-inker, Scissors for distressing, Sponge for Only Orange ink, Detail Black EP

Saturday, June 21, 2008

Doodle This cards

I needed to make a thank you card and a birthday card. So I figured I'd play around with the SU Doodle This set using an old design standby I've used many times before. The old standbys are just more comfortable to fall back on sometimes.


Basically, the directions are the same for both except for a slight difference in colors. So I'll do a generic description keeping both in mind.

Things are pretty self-explanatory for these cards. The only things I might need to explain are the order I did the main scenes in and how to cut out this flower without losing your mind. ;)

The main section was stamped randomly so that no images would touch and that there would be a comfortable amount of space between them. I stamped, then colored, then cuttlebugged. Don't cuttlebug first or you will not get the whole images when you go to stamp. Maybe that's obvious, but I'll say it anyway. I used a water brush and a few drops of ink on the lids of the stamp pads to color things. It gave a more intense color than just wiping the brush on the pads or mashing the lid against the pad to pick up ink, although that's a good second choice. Also, markers leave more streaks, which is why I use a waterbrush. It just depends on the size of the image you're going to color.

The scene was okay, but not WOW until I cuttlebugged it with the Tiny Bubbles embossing folder. Then it really had zing! It made the white CS almost watercolor paper-like in texture.

For the flower accent, I recommend using an X-Acto knife to cut slits between the petals close to the center of the flower first. Otherwise, you might cut too much off when trying to round the bends between each petal and lose a petal in the process. Ask me how I know this! lol It just simplified the process to do that prep work first.

I colored the flower pretty much the same way I colored everything else. I cut it out after coloring, but I recommend letting it dry thoroughly before cutting. Otherwise, you might rip the flower. In fact, it might be better to cut out the flower first, and then color it. Either way, be careful! This flower image is a bit tough to work with.

I glued the gems on with Diamond Glaze. I used the Stamp-a-ma-jig to keep the sentiment just right. Love that tool! That's pretty much it!

Recipes:

Stamps: Doodle This, Paisley Print, Many Thanks, Birthday Greetings
CS: Apricot Appeal, Pixie Pink, Sage Shadow, Black, White
Inks: Apricot Appeal (pad and re-inker), Pixie Pink (pad and re-inker), Basic Black, Sage Shadow re-inker, Summer Sun re-inker, Pumpkin Pie re-inker, Positively Pink
Other: Cuttlebug embossing folder "Tiny Bubbles", Polka dot ribbon, Dimensionals, Gems, Stamp-a-ma-jig, Diamond Glaze, Water brush

Thursday, June 19, 2008

Friendship birthday card


This card design is similar to another one I did for Amy Westerman's Sunday Sketch Challenge. I don't think she does those anymore. Nevertheless, I felt the flower from Doodle This was perfect for this design.

To do the flower, I stamped it 3 times on glossy white cardstock and cut 2 whole flowers out and the center on the third one. I watercolored them using a water brush and the Ruby Red, More Mustard, and Close to Cocoa markers, building the color intensity a layer at a time. Once everything was good and dry I curled the petals back with a pencil-type object. I connected the layers with mini Pop Dots.

For the main part of the card I used Ruby Red cs. I stamped Canvas in Ruby Red on it. For the Cuttlebugged part I used Apricot Appeal cs and ran it through the Cuttlebug using the "Birds and Swirls" embossing folder (so pretty!). Then I sponged (more like rubbed) black ink over the cuttlebugged part.

I used a black polka-dotted ribbon, gluing it down to the Apricot Appeal and black cs before adhering that piece to the Ruby Red.

I stamped the sentiment from Birthday Greetings on white cs in Basic Black dye ink and stamped one of the swirls from Doodle This in Ruby Red and then lightly sponged a little black ink on the stamp, huffed and then stamped it on the white. It toned down the Ruby Red just right. I stamped the sentiment area with the speckled stamp from Itty Bitty Backgrounds in More Mustard with a light sponging of black ink. I mounted the sentiment on black cs and used Dimensionals to adhere it to the card.

Recipe:

Stamps: Doodle This, Birthday Greetings, Itty Bitty Backgrounds
CS: Ruby Red, Black, Apricot Appeal, White, Glossy white
Inks: Basic Black, Ruby Red, More Mustard
Others: Markers: Ruby Red, More Mustard, Close to Cocoa; Cuttlebug embossing folder "Birds and Swirls", Stamp-a-ma-jig for sentiment, Polka dot ribbon, Dimensionals, Pencil for curling flower petals, Sponge

Wednesday, June 06, 2007

Wonderful Wings card


Recipe:

Stamps: Wonderful Wings, Birthday Greetings, Ferns, French Script

Paper: Baroque Burgundy, black, Basic Grey designer paper, white, thick vellum

Ink: Brilliance Graphite Black, Basic Black, Baroque Burgundy, Almost Artichoke

Accessories: Markers: Basic Black, Old Olive, Inkworx air art gun, Detail Black EP, misc. Twinkling H2Os, water brush, sponge, black zigzag ribbon, Dimensionals, Diamond Glaze, Stamp-a-ma-jig, Cuttlebug "Mesh" embossing folder

Techniques: Cuttlebugging, Twinkling H2Os, heat embossing

I used the retired Ferns set on the big green background, which is a piece of designer cardstock from Basic Grey. I stamped in Basic Black dye ink and then ran that piece through the Cuttlebug using the Mesh embossing folder. I find that using designer papers in the Cuttlebug folders causes the papers to slightly tear a bit. But I can make that less noticeable if I sponge a similar color of ink over the white parts lightly.

I pressed some strips of thicker vellum onto the French Script background stamp which was inked up with Baroque Burgundy ink and sponged a bit with black ink. I attached the strips with a mono adhesive only where it would be hidden behind the butterfly feature. I tied one end of the black zigzag ribbon and glued it down and around with mono. I did a fancy cut on the end that was tied.

For the butterfly feature, I stamped the butterfly from the retired Wonderful Wings set in Brilliance Graphite Black craft ink. Then I sprinkled Detail Black embossing powder over it, tamped off, and heat-embossed it. Then I painted it with many different Twinkling H2Os which gave it a shimmery appearance. They dry quickly, which I love. I stamped the word stamp from Birthday Greetings and finished the piece off with a few squirts from the Inkworx air art gun and Basic Black and Old Olive markers. I used the Stamp-a-ma-jig to line everything up where I wanted it. I adhered the butterfly feature with Dimensionals and added a little Diamond Glaze (Crystal Effects) to the Dimensionals to help them adhere better to the Cuttlebugged surface.