Showing posts with label Hero Arts Stamps. Show all posts

Thursday, June 21, 2018

Father's Day Card for My Hubby

Train up a child in the way he should go, and when he is old he will not depart from it. Proverbs 22:6

My hubby is a wonderful dad and husband. He has raised 5 children in the nurture and admonition of the Lord, and that is the theme of this card: Thanking him for encouraging our children in the right direction, avoiding the wrong directions (and they are many), and encouraging the right path that pleases God. And I used CTMH's set Road Signs to do it.

I found a really cool card design via Pinterest which was very easy to make. I basically made the card to fit into a 6"x6" envelope, and cut it as I would normally. Then I cut it across the front part where I wanted the upper part of the opening to start. Then I took the piece I cut off, lined it up at the bottom, marked where I wanted to cut it, and trimmed it to fit up to where I wanted it to stop. The main image piece will hold the bottom piece to the top piece. 


I stamped all the black images using Memento Tuxedo Black ink with my homemade stamp positioner for clear stamps. It worked so well to ink up those solid images thoroughly. I also used it for the red background on the stop sign, which is not actually red, but clear Versamark ink. 

I had purchased some Park Lane embossing folders at JoAnn's recently (their new line, I think) and thought that the Chevron pattern would go well with the other images on the card since it looked "arrowish". The embossed image was not terribly deeply etched, but that can be a good thing, especially on designer paper which usually tears when using the Cuttlebug folders. The Chevron folder is one of the bigger folders.


I used an image from ye olde Stampin' Up! Seaside Sketches. The dad and son image works so well for Father's Day. I colored it with Copics and popped it out to add some pizazz. And I popped the whole piece out when adhering it to the top and bottom parts of the card.

Inside the card I added mini-brads to line up along the bottom of the open space. As usual, I did not do a great job of lining them up. Who cares? I had planned to put a saying in the empty space, but nothing I had fit. So that should be your #1 decision before making this card design. As it was, I left it blank and stamped Happy Father's Day inside. No biggie.


Well, that is all. Thanks for looking! Take care.

Stamps: CTMH Road Signs, Stampin' Up! Seaside Sketches, Hero Arts C1401 Happy Father's Day

CS: Black, Papertrey Ink Pure Poppy, Papertrey Ink Stamper's Select White

Inks: Versafine Onyx Black, Memento Tuxedo Black, Versamark, various Copic markers

Other: Park Lane Chevron embossing folder, Nestabilities Labels Two, Antique mini-brads, foam tape

Tuesday, February 20, 2018

Wish Big


Recipe:

Stamps: Hero Arts Woodland Creatures, Penny Black Critter Party (inside sentiment), Stampendous Rainbows Play (umbrella), Penny Black Micey Day (outside sentiment)

Inks: Versafine Onyx Black, Mementos Tuxedo Black (for colored image), Copics YR12, YR 15, YR 18

Cardstock: White, Black, DCWV Pocket Full of Posies designer papers

Other: Cuttlebug Floral Screen and Tiny Bubbles embossing folders, large oval punch, small oval punch, foam tape, black gingham ribbon, paper piercer, sponge mat

Tuesday, July 13, 2010

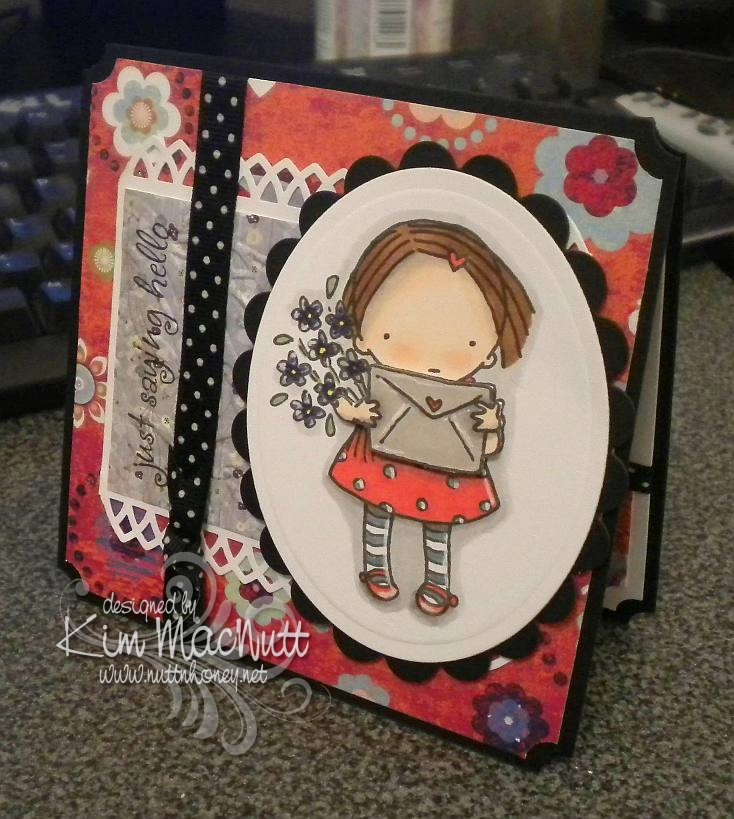
Just saying hello


Yay! I actually created a card! I've put my stamping on the sidelines for awhile now. Real life has pushed it way down the list, but I just had to do some creating or I'd burst!

I actually made this card on Sunday, but my camera has a problem and needs fixing, so I had to borrow my daughter's camera. Unfortunately, it's not as crisp and clear as mine is in low light, which is all I had to work with. So forgive the not-so-great photo.

Nothing much new here. I picked the same old standbys: ticket corner punch, cuttlebugging some of the designer paper, favorite polka dot ribbon (which, of course, comes in tiny, expensive little spools!), digital image as center point.

As always, I had fun coloring the sweet little girl from the Pure Innocence collection. And she was what prompted me to choose the papers I did.

I used my new Martha Stewart Arch Lattice border punch and trimmed the ends to create a pointed edge.

The envelope and arms are popped out with foam tape. I wanted to show that better, but the camera wouldn't cooperate with me.

I highlighted here and there with an opaque white gel pen. I love how much that trick adds to the look.

I hope you enjoy this meager offering of mine. Have a lovely week!

Recipe

Stamps: Digital stamp Pure Innocence 004, saying from Hero Arts CL305 set Sending Happy Thoughts

CS: Black, Pocket Full of Posies by DCWV designer paper, Basic Grey Wisteria designer paper, white

Ink: Versafine Onyx Black, computer ink

Copics: Y15, R24, YG63, E25, E35, E00, E93, BV08, BV11, T1, E41, W1, W3, W5

SU Markers: Bordering Blue, Brocade Blue

Other: Cuttlebug Floral Screen embossing folder, Spellbinders Nestabilities Classic Oval Large, Classic Oval Scallop Large, ticket corner punch, Martha Stewart Arch Lattice border punch, Inkssentials opaque white gel pen, black polka dot ribbon, foam tape

Wednesday, March 03, 2010

More Spring - Sending Happy Thoughts


Hello all! I am so wanting Spring to come. Can you tell? Ha!

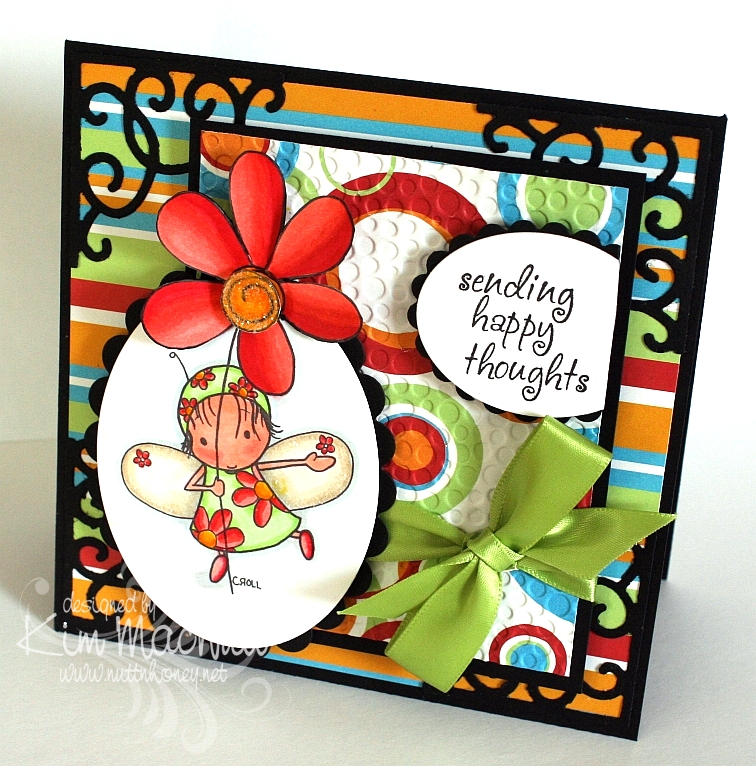
This Tiddly Inks image grabbed my attention when I was surfing over at Etsy for digital stamps. Interestingly, she's called Spring HuggaBugg. She certainly does make one feel like it's Spring to look at her with her adorable flowery dress and her big flower. I loved coloring her.

I used the technique I posted about yesterday on the main image. It was a little tricky getting the die to line up properly after placing the trimmed flower out of the way before cutting the oval. I had to cut into the flower more than I expected, but I like it better that way. So it happily worked out.

I am loving my Copics! I know I say that a lot, but I can't help it! They are just so nice. And so forgiving. I like that!

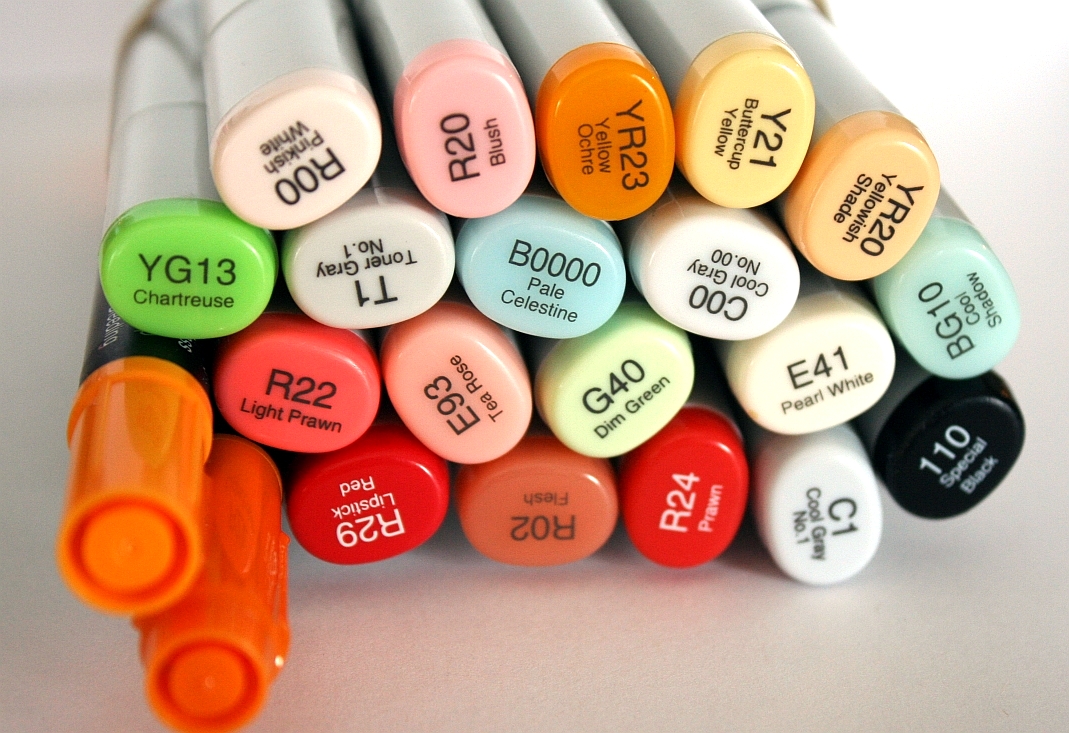
Here is a pic of the colors I used:


The black was used around the edges of the flower, carefully. I prayed my way through that part because I did it after the card was finished. Phew! I was relieved I didn't ruin anything!

It might be hard to see, but I used Crystal Snow fine white glitter on the center of the flower and on the edges of her wings. Just a little extra zing thrown in.

I used my homemade Bow Easy again to make the bow. It's getting easier each time. I don't need to look at the tutorial anymore!

I had started this card before I found out about this week's color throwdown colors, so I was tickled pink that I used colors very similar to them. A little serendipity in my week!

I did the Midnight Madness #43 sketch challenge over at the "priscillastyles" blog, but chose the simpler one of the two and embellished it differently, as I could not think of anything to put where the butterflies were on the more complicated version.

Hope your week is going well! We had snow yesterday and it's pretty much gone already. That's 2 snows this Winter in NE Georgia! Very unusual! Have a blessed evening!

Stamps: Spring HuggaBugg by Tiddly Inks, Sending Happy Thoughts from Hero Arts CL305

CS: Black, Celebration AC Patterned Paper by American Crafts, Papertrey Ink Stamper's Select White

Inks: Versafine Onyx Black, printer

Copics: B0000, BG10, G40, YG13, Y21, YR20, YR23, E41, E93, R00, R02, R20, R22, R24, R29, C00, C1, T1, Special Black 110

Other: Cuttlebug Tiny Bubbles embossing folder, Nestabilities Classic Oval Small, Classic Oval Scallop Small, Sizzix Architectural Accents die, SU Pumpkin Pie marker, SU Summer Sun marker, 3D-Dots, green satin ribbon, Crystal Snow fine white glitter, glue pen, Diamond Glaze to glue down bow


Friday, February 26, 2010

Spring!


I am desperate for spring! Are you? I'm tired of being cold all the time and having pruney, dry skin and the bleak grayness everywhere I look and the low light. I yearn for green grass and flowers, fresh air and sunshine! Since I can't have any of it yet, I picked one of the Pure Innocence digis that says "spring" to me. It also says "carefree" and "sunshine" and "warmth".

Oh, how I love my new Copics! I want to color all the livelong day. I have been so distracted trying to do my usual stuff: laundrylaundrylaundry, dishes that never end and homeschooling. I just want to PLAY! And sometimes I do play when I should be doing other things. Oh, spring, please get here soon so I can have a big dollop of you and start feeling like myself again! I'm tired of hibernating!

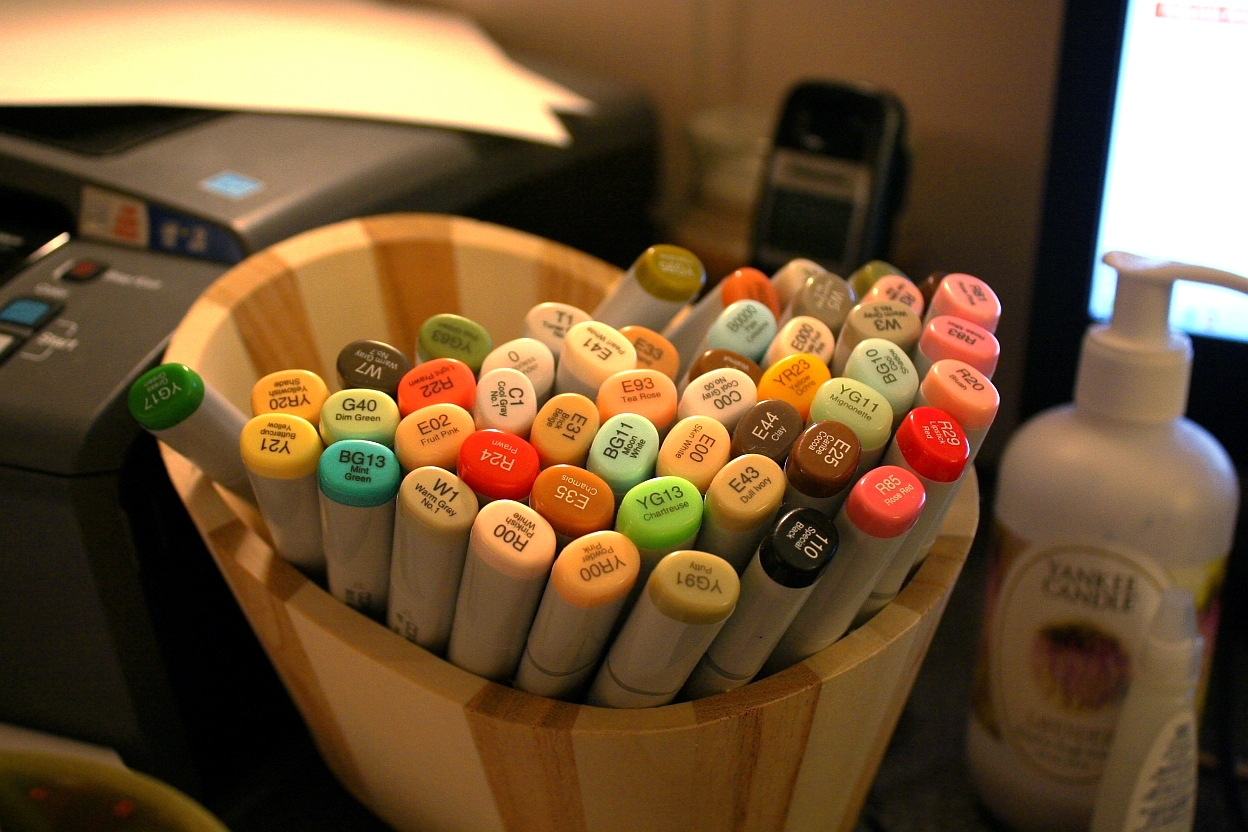
I think I almost used every one of my Copics on this card scene, seriously. So I am posting a pic of all of my markers. Hee! Actually, I just like looking at them. They're so pretty. *sigh* Like a bouquet of flowers.


I used my new homemade Bow Easy to do the bow. It worked great! To make it look like I tied the bow onto the ribbon that went around the card, I tied a knot in the ribbon, positioned it in place, and then glued the bow to the knot. It looks like I tied the bow right to the ribbon, or like it's all one piece.


I really wanted a fresh feel to the card. White and the pale blue from the sky were my inspiration.

I am in love with the Pure Innocence digi line! (Site is currently down for maintenance) They are just soooo precious! To this sweet little girl I added freckles and the word, "Spring" from Hero Arts CL305 and bumped up the grass scribbles a bit for added depth. Otherwise, everything else is the digi image.

Thanks for looking! I hope to be doing more coloring soon, so keep an eye out!

Recipe

Stamps: Pure Innocence 007 by Digi Stamp Characters, Spring by Hero Arts Sending Happy Thoughts (CL305)

CS: Papertrey Ink Stamper's Select White

Inks: Versafine Onyx Black, printer

Other: Cuttlebug D'Vine Swirls embossing folder, Nestabilities Curved Rectangles, paper piercing tool, sponge mat, Prima daisy, Basic Grey button, 3D-Dots, Diamond Glaze (to hold down flower, button and bow), white organdy ribbon
, Micron pen for freckles and scribbles

Wednesday, June 24, 2009

Just Saying Helloooo


Happy Wednesday to you all!! I am offline for the week, but I wanted to share with you this card I made just for the fun of it. Way back when I stamped mainly for holidays, but sometimes it's fun just to stamp for stamping's sake, isn't it? I try to do that more and more these days.

I just love this cute owl from the Hero Arts set, "Sending Happy Thoughts"! He would look even cuter with bigger googly eyes, don't you think?

NIFTY TIP ALERT!! I stamped the saying over him in a strange way. I bent it into a curve and put it on my acrylic block and then stamped. Cool, huh? I saw someone do it and thought how neat that was, so I tried it myself. Some clear and unmounted stamps can't bend very easily, but some are quite flexible!

I sponged Tim Holtz's Distress Ink Vintage Photo on the striped middle area to cover the cracks in the paper after running it through the Cuttlebug using the Forest Branches ef (thin papers will do that).

I used one of those Sizzix Architectural Accents dies on the corners of the card. What I did was, after running the die through the Cuttlebug 4 times to make 4, I ran the die cuts back through the Cuttlebug using the rubber mat and several pieces of cardstock to flatten them. That way they would match once two of them were flipped over to mirror the other two. It worked pretty well!

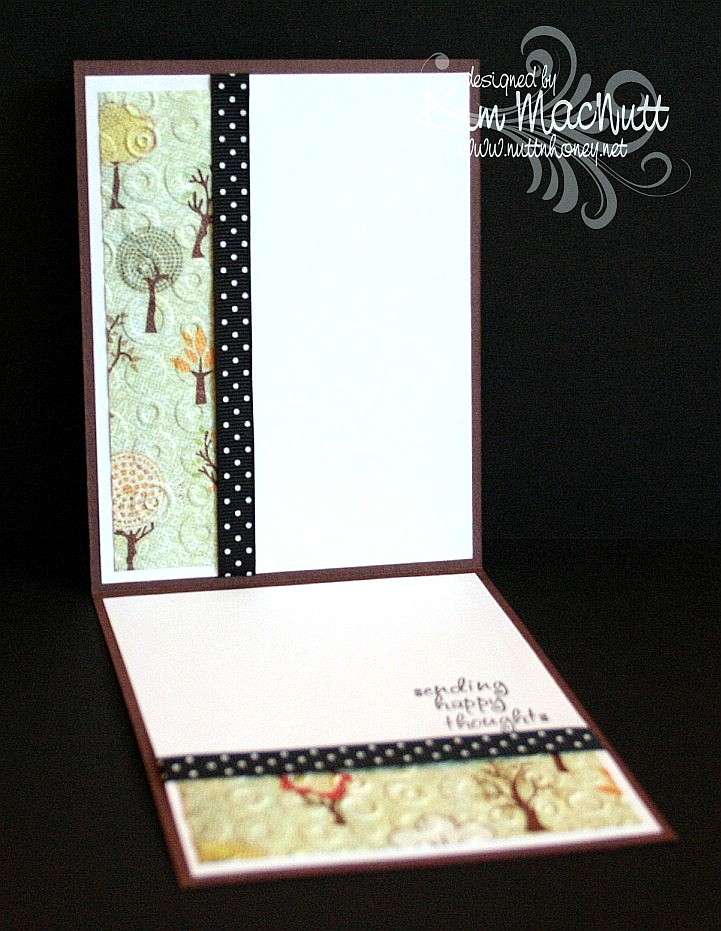
For the inside, I carried the theme of the Spots and Dots ef, the polka dot ribbon and the Mellow Deciduous dp. The saying is from the same set.


I will be sharing one more card this week and then I'll see you on the weekend! It's been really hard getting in everything I want to do online in the short time I allow myself, so some things have fallen through the cracks, I'm sorry to say, like time to blog hop. Still trying to figure out how to remedy that or if it can even be remedied. I'm always hopeful. Hope is one thing we always have!

Blessings on your day!

Recipe

Stamps: Hero Arts "Sending Happy Thoughts" (CL305)

CS: Chocolate Chip, Basic Grey Mellow (Deciduous) and Stella Ruby, black, Canson watercolor paper, white

Inks: Versafine Onyx Black, Chocolate Chip, Tim Holtz Distress Ink Vintage Photo

Markers: Creamy Caramel, Close to Cocoa, Really Rust, Ruby Red, Copic Special Black (110), Old Olive, Always Artichoke, Summer Sun

Other: Cuttlebug Spots and Dots, Forest Branches and Mesh embossing folders, Nestabilities Classic Circle Small, Scalloped circle, Sizzix Architectural Accents die, sponge dauber, 3D-Dots, black polka dot ribbon, Xyron 150 Create-a-Sticker (permanent), googly eyes

Sunday, June 21, 2009

Happy Dad's Day!


Happy Sunday! And Happy Father's Day to all the dads out there (not sure I have any dad readers, but if I do, that's fer you!).

I gave this card to my hubs this morning. He already has his present. He's a tech geek and wanted one of these for Father's Day. It was quite the hit at scout camp (which is why he got it early - he had to share his joy with the other geeky scout dads, of course).

So, all he got from me today was a card and eating out at one of our favorite hole-in-the-wall Chinese restaurants.

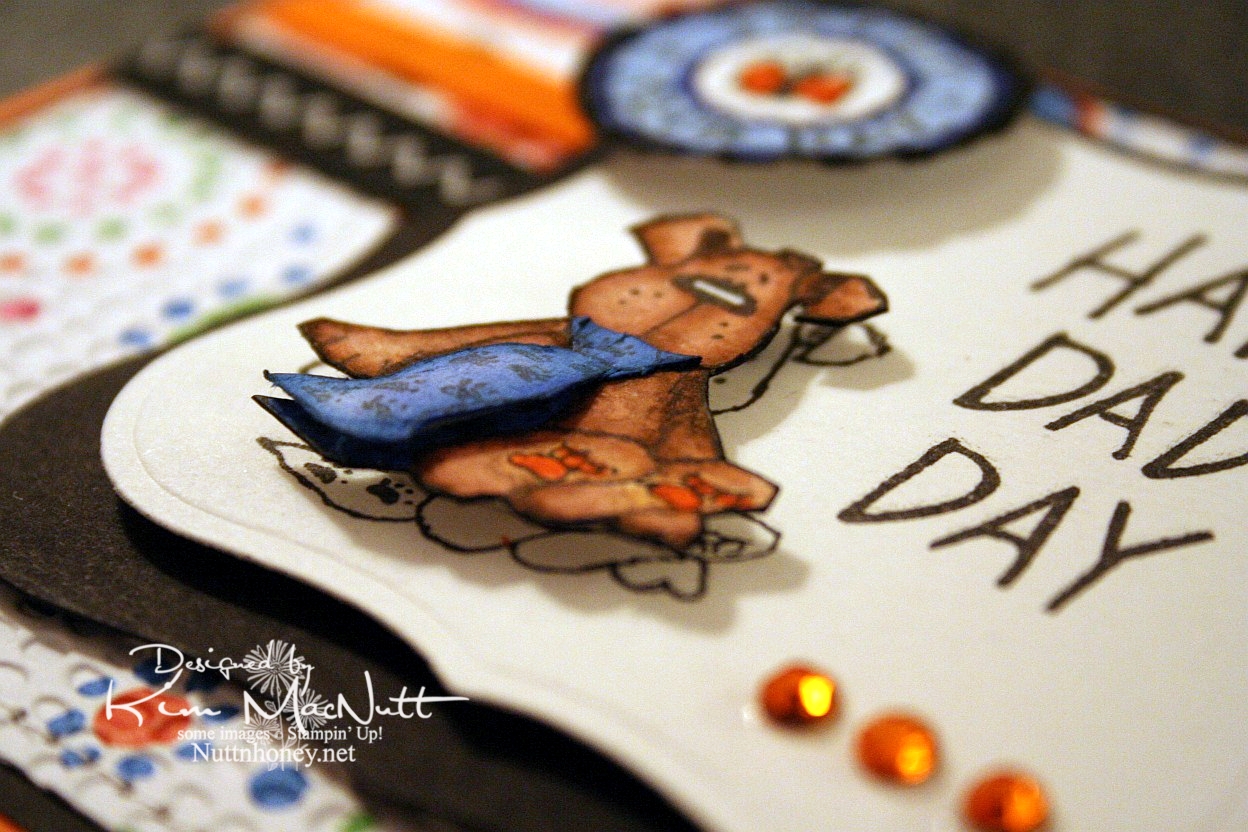
This doggy from the Penny Black "Bubbly" set was, I thought, a great Father's Day image, what with the tie and all. I stamped him 3 times: once on the main piece, and twice on scraps, all watercolor paper. Then I cut out the dog and then just the tie to give it extra dimension. I glued the top of the tie down at the neck and used a bit of a dimensional piece to make it stick out at the bottom like a real tie would. I stamped the SU Riveting circle and then punched it out and ran it through the Cuttlebug. Then I put it on with a 3D-Dot.


For the inside I took a Hero Arts stamp from "Happy Dad's Day" (CL335) and blocked the word "Dad" and the exclamation point and re-inserted the exclamation point at the end of "I Love You". That was a bit tricky as the exclamation point kind of gets in the way and it took 2 Post-It notes to get it out of the way.


Well, I've got 2 more cards to get ready to post for you this week. I plan to continue spending lots of time offline as I find it so relaxing, and my kids like it that I'm so available to them! My house stays cleaner, too! Go figure! ;)

Have a wonderful day and week! Be blessed and get in some stamping!

Recipe

Stamps: Penny Black "Bubbly", Stampin' Up! Riveting, Hero Arts "Happy Dad's Day" (CL335) (inside)

CS: Only Orange, black, American Crafts "Celebration" dp, Canson watercolor paper

Inks: Versafine Onyx Black

Markers: Only Orange, Creamy Caramel, Close to Cocoa, Brocade Blue, Bashful Blue, Ballet Blue, Basic Black

Other: Cuttlebug Mesh and Tiny Bubbles embossing folders, Nestabilities Labels One, 1" circle punch, gems, black zigzag ribbon, orange grosgrain ribbon, 3D-Dots, sewing machine, Post-It notes

Sunday, June 14, 2009

Father's Day BBQ


Good evening!

While my hubby and son were away at scout camp for the week I had myself locked out of my computer so I could really focus on my time with my girls. I loved it! In fact, I loved it so much I'm going to do it again! See, I have this addiction to my computer...It makes me stay in front of it like it's some kind of big magnet or something. And I am only safe when my hubby isn't around to log me in. We use software that can lock someone out if we want to. Well, *I* need locking out. And after a week of detox I think I might be able to restrain myself from begging hubby to let me back on for the week.

Ya know, one thing that's fer sher is that the stamping community is addictive. It's also overwhelming. I can't keep up, plain and simple, without making my family suffer. God has been dealing with me on that one for quite sometime, and I've been putting my fingers in my ears and yelling "lalalala", trying to tune Him out.

One thing I learned last week is that if I don't cut down on my Internet time I will never grow spiritually. How can I hear God speaking to me when my head is so full of stuff? Yes, there is such a thing, I believe, as Internet gluttony and stamping gluttony and I am guilty of indulging in both *raising hand*.

So you will be seeing less of me, but I will still be stamping and sharing here, just that it will only be on Sundays for the time being. The rest of the week will be devoted to being a mom and wife and Jesus follower who will hopefully then have room in her head and heart to hear His loving voice, and will hopefully be able to focus on her children and hubby when they speak to her instead of her mind wandering off somewhere like it usually does.

So, anywho, here is a card I made my dad. Simple, yet a few little touches to jazz it up a bit. I was inspired by Jenn Biederman and her adorable Father's Day card.

I thought the Argyle embossing folder would be a perfect choice for a Father's Day card.

The cloud was free-form drawn and cut out of watercolor paper. Then I added a pierced edge.

For the inside I continued the Argyle theme.


All stamps are from the same set, btw.

I have more cards to share. Hopefully, I'll get them up tonight, but I will set them to post during the week so you have something to look forward to here!

TFL and have a blessed week!!

Stamps: Hero Arts "Happy Dad's Day" (CL335)

CS: Black, maroon, Brocade Blue, True Thyme, watercolor paper

Inks: Real Red (DTPed on maroon cs), Bashful Blue (sponged on Brocade Blue cs), True Thyme (sponged on True Thyme cs), Versafine Onyx Black

Other: Nestabilities Labels One, Cuttlebug Argyle embossing folder, ticket corner punch, piercing tool, sponge mat, black grosgrain ribbon, sponge daubers, Diamond Glaze, 3D-Dots, Post-It notes for blocking and sponging

Monday, June 01, 2009

Breakfast Friends


Good evening! I'm still having fun with those Penny Black stamps, as you can see!

Something simple this time. I think I might try making this in a standard A2 size next time. I like this, but I think I'd love it if it weren't so big. What do you think?

No frills coloring. I used mainly Stampin' Up! markers, the True Thyme ink pad (because there is no marker), and a water brush. About the only odd thing I did was use a silver Sharpie marker for the toaster and I touched up the black parts with a black Micron archival ink pen. I tried a silver Prismacolor pencil on another one I did that didn't turn out well, and wasn't as happy with the look as I am with the Sharpie version.


I used NO Cuttlebug embossing! I only used Stampin' Up! background stamps, Sanded and Canvas. The "friends" stamp is from the Hero Arts set that has the cute froggie you've seen here in the recent past.

This one took a lot less time than some of my other cards, I can tell you that! Simple cards are fun to slip in between the more elaborate ones. Not sure what I'll do next!

Thanks for looking! God bless!

Stamps: Penny Black 'Micey Day', sentiment from Hero Arts 'Sending Happy Thoughts' (CL305), Stampin' Up! Sanded and Canvas background stamps

CS: Black, Real Red, True Thyme (retired In Color), Canson watercolor paper

Inks: Versafine Onyx Black, True Thyme, Real Red

Markers: Creamy Caramel, Close to Cocoa, Pretty in Pink, Mellow Moss, Real Red

Other: Nestabilities Classic circle, Classic Scalloped circle, ticket corner punch, black gingham ribbon, 3D-Dots, silver Sharpie, black Micron pen, Inkssentials opaque white gel pen, water brush

Saturday, May 09, 2009

For my mother


To make my mother's card I went with a card sketch at the Mojo Monday blog. This one is from Sketch 81.

I just love the girl image from the retired SU set Friendship's Journey. It's so versatile. I like versatile stamps. Stamps can be so expensive. If they're not versatile they're wasting money no matter how cute they are.

One set I have not used much at all, but need to is SU Travels Abroad (also retired). I used the Arc de Triomphe stamp from that set to visually balance the girl image.

The "Mother" image is from a Hero Arts stamp that I blocked. It actually says "Happy Mother's Day", but I blocked out everything but "Mother".

I used the Cuttlebug Textile embossing folder on both front panels of Basic Grey Porcelain paper. The buttons are also from the Porcelain collection. I tied embroidery floss to them and glued them down.

I'm recovering from some minor surgery I had yesterday, so please forgive me for not putting in more details on this post. I'm in a bit of a Lortab fog. TFL!

Stamps: SU Friendship's Journey, SU Travels Abroad, Hero Arts Happy Mother's Day (C1402)

CS: Mellow Moss, Basic Grey Porcelain collection, Cameo Coral, Chocolate Chip, Ivory

Inks: Mellow Moss, Cameo Coral, Chocolate Chip, Basic Brown, Creamy Caramel

Other: Cuttlebug Textile embossing folder, Nestabilities Labels One, Classic Scalloped Rectangles Large, Classic Rectangles Small, Standard Circle Large and Classic Scalloped Circle Small; Ornare Decorative Corners piercing template, Tsukineko sponge daubers, 3D-Dots, Sticky Doos, paper piercer, sponge mat, buttons from Basic Grey Porcelain Collection, embroidery floss, moss organdy ribbon, sewing machine, Post-It notes for blocking, Stamp-a-ma-jig

Thursday, May 07, 2009

Apricot Daisy Mother's Day


Here's the card I made for my grandmother. She suffers from dementia and doesn't know me anymore, but I always acknowledge her on Mother's Day because she was and is a special person to me. We were close before her mind started slipping and I miss those days years ago when we could talk about so many things together. I look forward to the day when her mind will be restored and we can be close again.

I did the Scor-Pal treatment like I did in the previous card. This time I used Apricot Appeal cs and the matching ink to get the dimensional effect. I rubbed (dtp'd) the ink pad all over the cs until it was well saturated. Then I set it aside to dry.

I wanted a really simple sketch design. So often when I try to follow someone else's card sketch ideas I end up pulling my hair out trying to make things work. I do much better if I start with an image I like and design my own sketch around it, taking ideas from the many sketches I've seen, of course.

For this one I wanted to use the Hero Arts Happy Mother's Day stamp and it has its limits on where it can be placed on a card since it's a bit long. Can you see it? It's a bit obscured by the Script embossing. I heat-embossed it using VersaMark ink and opaque white embossing powder. Then I cuttlebugged it.

I used the Martha Stewart Doily Lace border punch on the centerpiece's black cs and also on the vellum. I attached the green dp from DCWV Pocket Full of Posies to the black with 3D-Dots and then sewed around the edges. It created a pillowed effect that looks quite nice. Then I added it to the base with more 3D-Dots. I go through a LOT of 3D-Dots!

The daisies are from the Prisma Daisy Dreams Snow Collection. I colored in the centers with an SU Apricot Appeal marker.

Then, of course, there's the black gingham ribbon which goes PERFECTLY with the other colors. That was my source of inspiration.

Thanks for looking and have a lovely day! Today, I go for my pre-op for some minor surgery I'll be having on Friday. I hope to have lots of time to sit and stamp during my recovery (about a week)! You'd think that I'd be sick of stamping by now, but, surprisingly, no!

Stamp: Hero Arts Happy Mother's Day (C1402)

CS: Black, Apricot Appeal, vellum, DCWV Pocket Full of Posies dp

Inks: Apricot Appeal, VersaMark

Other: Scor-Pal, Cuttlebug Script embossing folder, Martha Stewart Doily Lace border punch, Primas from the Daisy Dreams Snow collection, Apricot Appeal marker, black gingham ribbon, ticket corner punch, opaque white embossing powder, 3D-Dots, Sticky Doos (for flowers), sewing machine

Monday, March 16, 2009

More Froggie Love


This was my original idea for a froggie card. I wanted the frogs to float around in the main piece. So today I played until I got what I wanted. Can you say lots of time wasted?? Really, I don't know how these card-a-day stampers can not only stamp a card, but blog about it every. single. day. without killing half the day. I can't! :-o

But I will be stamping up a storm soon as I have been invited to join a design team as a guest designer for April and May. I'm very excited and scared! Will share more later!

I think it's something like Murphy's Law at work when I decide to use a big piece of white cardstock as my main design piece or ANY design piece. Inevitably, I smear it or the ink doesn't take right, or I get something sticky on it or I get it perfect (or close) only to have something go wrong after everything is glued perfectly in place. Just must happen to me, I guess.

I actually started this card (or its predecessor) yesterday with lots of changes taking place because of goof-ups. I will call this my "Jane Eyre" card because I watched Jane Eyre (1983 version) on YouTube while working on it. I watched almost the whole series and STILL didn't have a finished card to show for it. Today I listened to Rush and Sean and worked on this one. Should I then call it my Rush/Sean card or my Conservative Talk Radio card?

Maybe it's because I do so many things to the card elements that I have so many mishaps. I don't just cut the paper, I punch it, pierce it, or emboss it or paint it or whatever. Glue is often my worst enemy. Ever since I found out that my cards were coming apart because the mono adhesive wasn't doing its job, I started using mono multi. Well, it's a white liquid glue. And no matter how hard I try, inevitably it squishes out the sides somewhere and puts the whole card at risk of being damaged and trashed. Wasn't card making supposed to relieve stress?? ;)

So please forgive me for not spending more time getting better pics of this card. I am too tired to worry about it, but may try harder later. If I do I'll switch out the old ones with the new ones.

Did you notice that there is no designer paper on this one? Yes, I'm doing things the "old-fashioned" way like I used to before discovering the wonderful world of designer paper.


For the main piece I stamped the flower from Stampin' Up! Unfrogettable in Basic Black ink on glossy white cs. Then I stamped the frog from Hero Arts Sending Happy Thoughts (CL305) around the flowers. I let that dry while I worked on the green area. I stamped the SU Canvas background stamp in Certainly Celery ink on Certainly Celery cs and set it aside.

Once the frog ink was dry I colored in the flowers with the Ruby Red and Rose Red markers and colored the green parts of the flowers with Certainly Celery and Old Olive. For the frogs I used a water brush and ink pads to give them a watercolored look. I started by applying More Mustard ink. Then went over that with Old Olive.

Once that was completely dry I ran the piece through the Cuttlebug using the Tiny Bubbles folder (my favorite). Wow, did that do the trick! I love it when something clicks for me.

I attached the frog piece to the Real Red and black cardstock using 3D-Dots and then ran a stitch around it to warm it up a bit. A big thanks to Barbara Latham (a reader of my blog) for her tip about tucking the strings to the back. I think it looks much nicer using your advice. Barbara says to pull the loose thread tail through to the back and secure it by tying it to the beginning thread tail. I glued mine down on the back rather than tie since I didn't leave a long enough tail to tie with. Her tip made my work look much more professional, don't you think? Thank you again, Barbara!


After putting the frog piece together, but not securing it just yet on the card, I figured out where the sentiment should go and stamped it in Basic Black ink using my Stamp-a-ma-jig to place it just right. The sentiment is also from SU Unfrogettable.

Once that was done I ran the Certainly Celery piece through the Cuttlebug using the Distressed Stripes folder sideways. I added the black polka dot ribbon, used the corner punch on the tips and attached it to the black background piece which I had already done the corners of with the punch.

Then I added the frog piece, the red gems and the bow. I also added gold gems to the flower centers on the frog piece to give it a finished look.


On the inside I used white cardstock and was a bit flummoxed about what to do since I had not used any designer paper I could repeat. So I figured I could use a more muted theme of the frog piece and just color part of it. I blocked it with Post-It notes so that it would have a nice clean ending place where the ribbon could go. I ran out of black polka dot ribbon (GASP) so I used solid black grosgrain to keep things at least in a similar vain. I added the bow (a scrap I scrounged up) to repeat the outside ribbon. I stamped another sentiment from Unfrogettable in a way that really pleased me. I hope you're pleased, too. Btw, that is not a smudge on the right side. Not sure why that showed up on my pic. Better check the camera lens!

Thanks for looking!

Stamps: Hero Arts Sending Happy Thoughts (CL305), SU Unfrogettable

CS: Black, Certainly Celery, Real Red, Glossy white, White

Inks: Basic Black, More Mustard, Old Olive, Certainly Celery

Markers: Ruby Red, Rose Red, Old Olive, Certainly Celery

Other: Cuttlebug Tiny Bubbles and Distressed Stripes embossing folders, Sewing machine, Stamp-a-ma-jig, Red gems, Gold gems, Black polka dot ribbon, Black grosgrain ribbon, Post-It notes for blocking, 3D-Dots, Corner punch

Saturday, March 14, 2009

Unfrogettable Froggie


I had a fun time playing with my favorite froggie today. I know the word is spelled "froggy", but I like the "ie" ending better. And it seems that making up words and respelling is "the thing" these days, so please humor me.

I had a totally different idea about how I wanted this card to look. I was going to have the frog floating around in a white space, pointing in numerous directions. But I saw the designer paper and just took a totally different route.

This paper is really fun. I bought a big pack of it at Tuesday Morning for $5.99! (Regularly $19.99) It's made by American Crafts and comes in a 12" x 12" size with 60 sheets, 30 different patterns! This set is called "Celebration" (71003).

For the big piece I used a corner punch in the...corners and then ran the striped dp through the Cuttlebug using the Spots and Dots folder. It held up pretty well with only minor cracking in some spots.

I used another paper for the middle piece. It is flowers made with dots, the same paper as I used inside the card. I ran that through the CB using the Mesh folder.

For the main image I used Basic Black ink on glossy white cs (better for watercoloring). I stamped the frog first. Then I made a block of him out of a Post-It note and covered him while I stamped the mushrooms. Then I added the butterfly. For the word stamp (Stampin' Up! Unfrogettable) I stamped "Unfrogettable" and blocked "You're" with a Post-It note, and then stamped "You're" next to it using the Stamp-a-ma-jig for perfect placement.

I colored the images with markers and a water brush and ink pads. Just kind of did a combination. Colors can be found in the recipe below.

I added googly eyes, tiny pearls and gold gems to enhance the scene. Also, I went a bit nuts with the Stickles. You see, I have yearned for Stickles for a long time. So when I saw them at my local Archiver's I bought a bunch and have been looking for a way to use them ever since. The urge will die down at some point, but for now I'm a little Stickles crazy. (Colors listed in recipe) Kind of like when I was paper piercing crazy. It's just got to run its course.

The inside of the card was fun to do. I get so much inspiration from other stampers out there. And I've seen some lovely ways to decorate the insides of cards. Bringing the theme to the inside is just amazing. It adds so much. It also allows you to use dark cs as your base, which would otherwise be difficult since you can't see writing on it very easily. As many of you know, I'm a big black cs fan. Making the insides of my cards more decorative has brought my black cs addiction to new heights!


I know I use black polka dot ribbon a LOT on my cards. I promise, I do try to use something else from my vast collection of ribbon, but nothing else looks as good. I can't help myself!

Thanks for looking! Have a lovely evening!

Stamps: Hero Arts Sending Happy Thoughts (CL305), SU Unfrogettable

CS: Black, American Crafts "Celebration", Glossy white, White (inside)

Inks/Markers: Basic Black, Old Olive, More Mustard, Positively Pink, Cameo Coral, Pumpkin Pie, Always Artichoke, Summer Sun, Basic Black (for doodling extra grass on side of frog)

Other: Cuttlebug "Spots and Dots" and "Mesh" embossing folders, Corner punch, Stickles: Lime Green, Yellow, Orange Peel; Gold gems, Tiny pearls, Googly eyes, Black polka dot ribbon, Stamp-a-ma-jig, 3D-Dots

Monday, February 16, 2009

Froggie Friends


More froggie goodness! No time to describe directions, but most of it is pretty self-explanatory.

Isn't he the cutest frog?


Have a lovely evening!
Stamps: Hero Arts 'Sending Happy Thoughts'

CS: Perfect Plum, White, Bravo Burgundy, Black, Basic Grey 'Sugared'

Inks: Brilliance Graphite Black, Basic Black, Perfect Plum

Other: Scor-Pal, Martha Stewart 'Embossed Zigzag' punch, Circle Nestie, Scalloped circle Nestie, Prismacolor pencils, Sewing machine, Paper piercer, Sponge mat, 1/16" 3D-Dots, Sakura Quickie Glue pen, Black gingham ribbon, Googly eyes, Clear gems, Corner punch, Frosted Lace Stickles (for crown)

Sunday, February 15, 2009

Happy Thoughts Froggie


I fell in love with a certain little froggie after seeing Jenn Biederman work her magic on him. See here, here, here and here. So when I received some birthday money I knew I needed to make a trip to Archiver's and get that set. I had some time to play today and this is my first creation with Sir Froggie. I love this little guy! He's cute whether he has ink eyes or googly eyes.

For this card I did something I thought turned out pretty cool. I used my Scor-Pal to run diagonal lines in two directions, creating a latticework design. Then I did direct-to-paper with Chocolate Chip dye ink. It really popped out the design and gave it a leathery look.

For the main background I used 2 Basic Grey papers called Stella Ruby 'Ladies' Book Club' (stripes) and Mellow 'Deciduous' (trees). I stamped the sentiment from Hero Arts' Sending Happy Thoughts set (CL 305) in Brilliance Graphite Black ink (letting it dry thoroughly) and ran the tree paper through the Cuttlebug using the Textile folder. I used the Mesh folder for the stripes. Then I did direct-to-paper to both using Creamy Caramel ink to pop out the design. I put those on a black background and added antique brass brads. I used 1/16" 3D-Dots by EK Success to pop that whole scene out from the brown background.

I stamped the frog using Brilliance Graphite Black ink and then blocked it to add the mushrooms, giving them the effect of being behind the frog. For that, all I do is stamp the frog image on a sticky note, cut it out, and place it over the frog (I always try to stamp on the part of the note where there is the stickiness so I can stick it over the image securely) and stamp the mushrooms where I want them.

I colored the scene with Prismacolor pencils and put a touch of yellow Stickles glitter glue on the tops of the mushrooms. Then glued the googly eyes on with a Sakura Quickie Glue pen. But first I ran the scene through the Cuttlebug using an oval Nestie and then I sponged Creamy Caramel around the edges. I adhered it to a black scalloped oval (also from a Nestie) and added it to the background.

I added the black polka dot bow as an afterthought using Diamond Glaze as a glue.

I carried the theme to the inside of the card, including doing the direct-to-paper inside.


This was a fun set to play with and I hope to play with it more in the near future.

Stamps: Hero Arts Sending Happy Thoughts (CL 305)

CS: Chocolate Chip, Black, Basic Grey Stella Ruby 'Ladies' Book Club' , Basic Grey Mellow 'Deciduous', White

Inks: Brilliance Graphite Black, Chocolate Chip, Creamy Caramel

Other: Cuttlebug 'Textile' and 'Mesh' embossing folders, Oval Nestie, Scalloped oval Nestie, Scor-Pal, Prismacolor pencils, Yellow Stickles, Antique brass mini brads, googly eyes, Black polka dot ribbon, Sponge, Sakura Quickie Glue pen, 1/16" 3D-Dots by EK Success