I've always wanted a cloud template, but have never bought one. It dawned on me the other day that I could probably make one. Sure enough, someone else had the same idea! Enjoy!

Showing posts with label nifty tips. Show all posts
Showing posts with label nifty tips. Show all posts
Thursday, October 24, 2013

Saturday, February 11, 2012
Mice make a wish birthday

More fun with Penny Black stamps!
This card is for a friend whose birthday is coming up. She likes pink and I was in the mood to work with pastel colors. Notice, no black paper!
I love coloring these images. Most of the coloring was done with Copics, but I used a few SU markers to do the bibs and the purple on the candle.
I had originally wanted to use eyelets rather than mini brads, but I couldn't get them to work right. Too much to go through, I guess, and my Crop-a-Dile couldn't even reach that far in. Why did I buy that thing again? Okay, it IS useful sometimes.
This card actually started out using this week's Mojo Monday sketch, but I just fought with the design so much that I tossed part of it and fudged another. In the end I was much happier with how things turned out.

My son was amazed at how I got the candlelight effect, but it's actually very easy. Once you color your design, use a medium to light yellow and color just the fronts of each character. Also, color the top of the cupcake in the center, radiating outwardly. The key is to start light and go heavier until you create the glow you want.
Hope you are having a lovely Saturday! It's cold and getting colder here in North Georgia. A front is coming in with lots of wind; and it's supposed to get down into the teens tonight with the wind chill likely getting into the single digits. I think this is the coldest it has been all winter.
Blessings to you all!
Recipe:
Stamps: Penny Black "Critter Party", SU By Definition
CS: SU Positively Pink, Sage Shadow, Barely Banana, white, Basic Grey dp
Inks: Positively Pink, Sage Shadow, Barely Banana, Memento Tuxedo Black
Markers: Sage Shadow, Bashful Blue, Lavender Lace, misc. Copics
Other: Cuttlebug Perfectly Paisley, Spots and Dots and D'Vine Swirls embossing folders. Oval Nestabilities dies, Martha Stewart Doily Lace border punch, Silver mini-brads, Pink grosgrain ribbon. Corner ticket punch, foam tape, sewing machine
Saturday, February 26, 2011
Inexpensive way to make alcohol ink applicator pads
If you use alcohol inks and an applicator with removable felt pads, here's a tip I ran across that keeps the cost down on those pads.
Sunday, February 06, 2011
The many faces of Unfrogettable
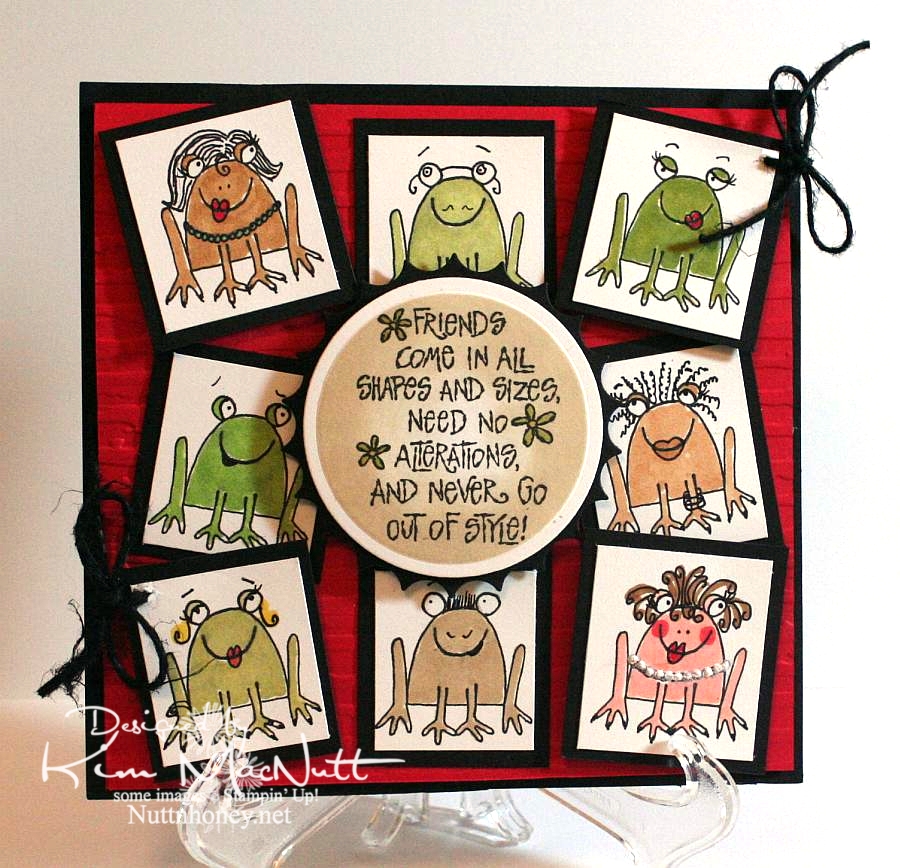
I never realized how versatile the sitting frog from SU Unfrogettable was. It was so much fun playing around with the features using just the thin end of an SU Basic Black marker. Now I need to see what other stamps I can embellish like this!
I had to be careful not to touch the black ink with the Copics as I colored them. The Copic ink makes the SU marker ink run, unfortunately. And the Versafine ink I stamped with also is not Copic-friendly. So you have to be careful. But I liked the more cartoonish way I colored the frogs. I meant them to show a little white here and there. It looks more whimsical, I think.
I used puffy fabric paint for the girl on the bottom right's pearls.
Nifty tip: To switch the direction of the eyes, draw eyelid lines over the pupils. Then redraw the pupils in a new spot.
Thanks for coming by for a look!
Recipe:
Stamps: SU Unfrogettable, SU I Like Your Style
CS: Black, Real Red, White
Inks: Versafine Onyx Black, Distress Ink Antique Linen
Markers: Copics, SU Basic Black
Other: Cuttlebug Distressed Stripes embossing folder, Nestabilities circle die, inverted scallop circle die, black hemp, foam tape, white puffy fabric paint, sponge dauber
Thursday, July 22, 2010
Blogger disappearing nav bar tutorial
Those of us who use Blogger sometimes find the nav bar at the top of the screen to be kind of ugly. But it serves a purpose and we need it for easy access to our blogs. So if you want access to your nav bar, but don't want it mucking up your look, this tutorial tells you what to do. A friend of mine shared it on her blog. I tried it and I like it!
You can pick the nav bar color you like in your design section after adding the widget. Just make sure that you delete the code that made it go away in the first place. To do that, click on "Edit HTML". After bringing up your blog's template do "Ctrl F" on your keyboard. It makes the "find" feature come up on your browser. Just type in "nav" and it will direct you to that code. Remove it and save. Then add the widget or add the widget and then remove the code. You must do both. Then go to Page Elements and click on "Navbar". Change to your preferred color - I use transparent light - and save. You're done!
You can pick the nav bar color you like in your design section after adding the widget. Just make sure that you delete the code that made it go away in the first place. To do that, click on "Edit HTML". After bringing up your blog's template do "Ctrl F" on your keyboard. It makes the "find" feature come up on your browser. Just type in "nav" and it will direct you to that code. Remove it and save. Then add the widget or add the widget and then remove the code. You must do both. Then go to Page Elements and click on "Navbar". Change to your preferred color - I use transparent light - and save. You're done!
Tuesday, July 20, 2010
Friday, July 16, 2010
Got shiny hair?
Donna made this fabulous card using this excellent video created by Lysa as a tutorial for making shiny black hair. Thanks for sharing this video with us, Donna! I'm definitely going to give it a try!
Monday, March 29, 2010
Embossing a digital image
I tell ya, the skilz out there in the stamping world amaze me. Someone on Paper Craft Planet pointed us to a tutorial on how to emboss a digital image. Holy cow! What will they think of next?

Tuesday, March 23, 2010
My marker storage
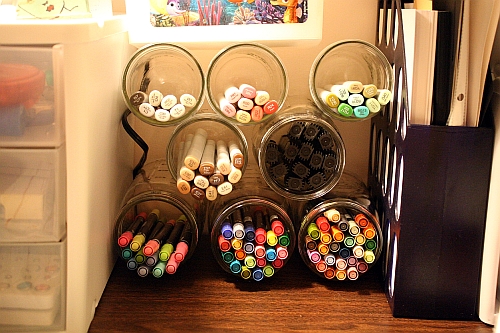
I've seen so many ways to store markers, but I was trying to come up with something that wouldn't cost me anything and would make them easy to grab. Plus I wanted all my markers in one place. This set-up will suit me for awhile. I have them all right in front of me when I'm stamping, so I don't have any trouble reaching for them as I go.
I wedged and stacked Mason jars and a card stock holder in between 2 drawer units. I have my SU markers in two of the bottom jars, my CTMH markers in 2 (bottom left next to the SU markers and middle right), and my Copics in 4 (middle left and all top row). The Copics fit perfectly in my widemouth pint jars and the longer markers work in the quart jars. I separated my SU markers into 2 color groups per jar. I might change that later, but for now it works for me. I have Earth Elements and Soft Subtles in one and Rich Regals and Bold Brights in the other.

The trick to keeping this grouping in place is for both supporting sides to be heavy enough not to budge. I keep my box of baby wipes on top. My Finding Nemo-themed Huggies box is a colorful addition to my little arrangement!
This set-up works for me until I can afford a better arrangement.
I wedged and stacked Mason jars and a card stock holder in between 2 drawer units. I have my SU markers in two of the bottom jars, my CTMH markers in 2 (bottom left next to the SU markers and middle right), and my Copics in 4 (middle left and all top row). The Copics fit perfectly in my widemouth pint jars and the longer markers work in the quart jars. I separated my SU markers into 2 color groups per jar. I might change that later, but for now it works for me. I have Earth Elements and Soft Subtles in one and Rich Regals and Bold Brights in the other.
The trick to keeping this grouping in place is for both supporting sides to be heavy enough not to budge. I keep my box of baby wipes on top. My Finding Nemo-themed Huggies box is a colorful addition to my little arrangement!
This set-up works for me until I can afford a better arrangement.
Friday, February 26, 2010
Spring!

I am desperate for spring! Are you? I'm tired of being cold all the time and having pruney, dry skin and the bleak grayness everywhere I look and the low light. I yearn for green grass and flowers, fresh air and sunshine! Since I can't have any of it yet, I picked one of the Pure Innocence digis that says "spring" to me. It also says "carefree" and "sunshine" and "warmth".
Oh, how I love my new Copics! I want to color all the livelong day. I have been so distracted trying to do my usual stuff: laundrylaundrylaundry, dishes that never end and homeschooling. I just want to PLAY! And sometimes I do play when I should be doing other things. Oh, spring, please get here soon so I can have a big dollop of you and start feeling like myself again! I'm tired of hibernating!
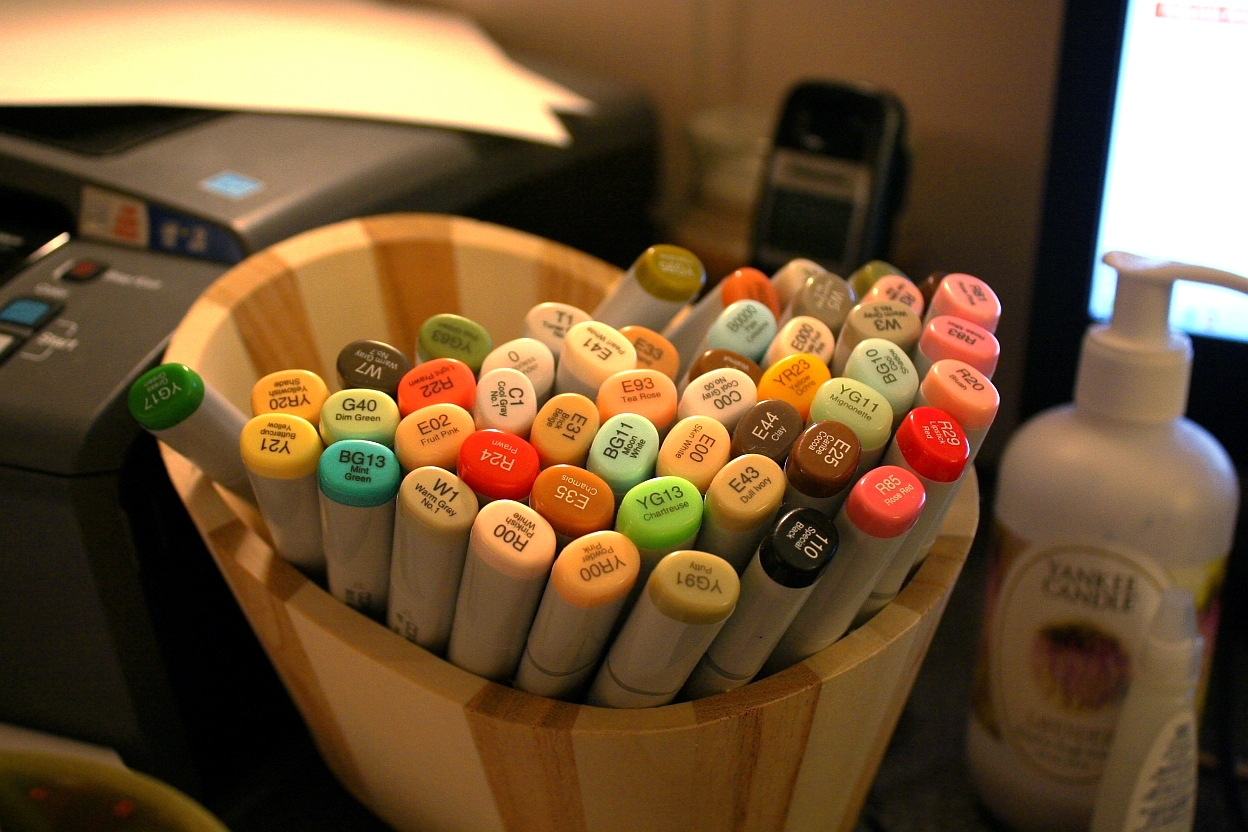
I think I almost used every one of my Copics on this card scene, seriously. So I am posting a pic of all of my markers. Hee! Actually, I just like looking at them. They're so pretty. *sigh* Like a bouquet of flowers.
I used my new homemade Bow Easy to do the bow. It worked great! To make it look like I tied the bow onto the ribbon that went around the card, I tied a knot in the ribbon, positioned it in place, and then glued the bow to the knot. It looks like I tied the bow right to the ribbon, or like it's all one piece.

I really wanted a fresh feel to the card. White and the pale blue from the sky were my inspiration.
I am in love with the Pure Innocence digi line! (Site is currently down for maintenance) They are just soooo precious! To this sweet little girl I added freckles and the word, "Spring" from Hero Arts CL305 and bumped up the grass scribbles a bit for added depth. Otherwise, everything else is the digi image.
Thanks for looking! I hope to be doing more coloring soon, so keep an eye out!
Recipe
Stamps: Pure Innocence 007 by Digi Stamp Characters, Spring by Hero Arts Sending Happy Thoughts (CL305)
CS: Papertrey Ink Stamper's Select White
Inks: Versafine Onyx Black, printer
Other: Cuttlebug D'Vine Swirls embossing folder, Nestabilities Curved Rectangles, paper piercing tool, sponge mat, Prima daisy, Basic Grey button, 3D-Dots, Diamond Glaze (to hold down flower, button and bow), white organdy ribbon, Micron pen for freckles and scribbles
Tuesday, February 23, 2010
I made my own Bow Easy template
When I saw a Bow Easy template I thought I might try making one of my own to save a few bucks. I looked around for something made of thick plastic and found an old Tupperware lid I didn't need anymore.
I found a template here and sized it in a Word document. Then I printed it out and laid the Tupperware lid over it. I used a silver Sharpie so I could see it just enough to cut, but not enough to uglify it. Btw, Gamsol will remove Sharpie ink, at least from Tupperware lids. ;)

I cut it with my rubber-cutting scissors (the ones Stampin' Up! sells). Easy!
Here is the finished product. Mine is pretty crude compared to the actual product, but it'll do me fine.

Here's a photo tutorial for how to use it. And here's a video.
I found a template here and sized it in a Word document. Then I printed it out and laid the Tupperware lid over it. I used a silver Sharpie so I could see it just enough to cut, but not enough to uglify it. Btw, Gamsol will remove Sharpie ink, at least from Tupperware lids. ;)
I cut it with my rubber-cutting scissors (the ones Stampin' Up! sells). Easy!
Here is the finished product. Mine is pretty crude compared to the actual product, but it'll do me fine.
Here's a photo tutorial for how to use it. And here's a video.
Thursday, February 18, 2010
Color Swatches for Copics
 I ran across this post today at Michele's Purple Onion Designs blog and thought it was a nifty idea. Make a swatch book using your Copics. Then it will be easier to match your inks to your designer papers.
Create tags on quality card stock using a tag die, and ink each one up with one, two and three layers of ink so you can tell at a glance what that marker will look like for your project.
Cool idea, Michele!
(pic from Michele's blog)
Monday, February 15, 2010
Digi stamp paper piecing
As I'm looking for color combos that inspire my huge Copics list, I run across things that inspire me in other ways. Here, Michele Boyer shows how she paper pieces using digital stamps. Hope it's of use to you!
Sunday, February 14, 2010
Digi stamp help
Thanks for all the helpful advice to my last post! While I am pulling my hair out trying to pare down my monstrous wish list of Copics, I thought I'd pass along a helpful link I ran across that addresses all the issues with using digi stamps. I'm still new to it and was glad for the advice.
Now, back to my Copics list!
Now, back to my Copics list!
Tuesday, January 26, 2010
I Think You're Amazing!

I played with my very first digistamp today! I've heard about digital stamps and wondered if I'd enjoy working with them. And I did! Not technically stamping, per se, but no one would know by looking at it. So is this cheating to use a non-stamp as an image that looks stamped on a card? Can you tell I'm from the olden days? I need to get with it, don't I. I would've loved to have lived in Cranford before the railway came, if that's any indication.
There's someone to blame for this adventure I had, but she doesn't know it. Donna at 3 Umbrellas, you are to blame for getting me started, you enabler, you! ;) You had to link to that incredibly adorable site, Pink Petticoat, and then you had to make me go all over their website to try to find the image you used on your card, which I never found, but I saw all sorts of other cuteness. All that looking brought me eventually to their blog where I found some freebies (blog's left sidebar) and just had to download them. And then I had to print out the too-cute-for-words little birdie to play with. And I had to learn this adorable, easy and FUN technique to use on it. And here we are. What a great little adventure! Expect me to be dragging out my chalks, glue pen and Crystal Snow glitter a lot in the future! What an easy way to color images in a soft way! I love it! Sometimes markers are too much - too dark, too intense, too heavy. Chalks fill the bill if you want a softer look. I use tiny 1/4" pompoms and an alligator clip to apply them, but I need something smaller for the tinier parts of an image (like the flowers and small hearts on this one). What do y'all use? I was thinking make-up applicators might work.
Not only did Donna enable me to try a digistamp, but she also inspired the design of this card. She has such a clean, simple style and I am in awe of how she does it. I tried really hard to not pile stuff on my card. It was hard for me, I'll admit. I'm a layer girl. But I kept it simple and clean as far as I was able. I just kept making myself "think like Donna". ;) Did I succeed? I love her style, not to mention, her sweet personality.
For the digi, I used the Papertrey Ink Stamper's Select White card stock in my printer on the "best" print setting. No problems. Set your printer to "card stock" (if yours has that setting) for the type of paper so it prints best.
Coloring was so easy with the chalks. I had it done in no time. Then I used the Sakura Quickie Glue Pen where I wanted glitter and lightly dusted everything with the Crystal Snow.
Before I cuttlebugged the yellow cs, I stamped it in VersaMark ink with the retired SU Canvas background stamp. I LOVE that stamp for adding a textured look.
Hope you enjoy this card. Thanks for coming by! And thanks, Donna, for being such an inspiration to me!
Recipe
Stamp: Pink Petticoat Little Birdie digi, SU Canvas
CS: SU So Saffron, Papertrey Ink Stamper's Select White
Ink: VersaMark, printer
Other: Cuttlebug Swiss Dots embossing folder, Nestabilities Labels Four die, chalks, 1/4" pompoms and alligator clip for applying chalks, Sakura Quickie Glue pen, Crystal Snow glitter, pale blue organdy ribbon, light blue gingham ribbon, pearl gems, 3D-Dots
Sunday, January 24, 2010
Loving my ATG 714!
I posted on SCS recently about the smell issue I had with the 908 adhesive and was advised to air it out when not using it. So I opened the applicator up and left it that way on my stamping table. It has made all the difference! So, if the smell bothers you try airing your applicator out and see if that helps.
I am really happy with the strength of this adhesive. The applicator is getting easier to use, too. And the size isn't even bothering me anymore. I highly recommend this great gadget!
I am really happy with the strength of this adhesive. The applicator is getting easier to use, too. And the size isn't even bothering me anymore. I highly recommend this great gadget!
Friday, January 15, 2010
Loading your ATG 714
There are many videos on YouTube that show you how to load the ATG 714. One thing I had trouble with was getting the tape to stay on the empty reel. They mentioned a sticky part, but mine wasn't sticky there, and there's no mention of it in the paper instructions. Here is a video that addresses this issue in case you also are bewildered by it. She also mentions avoiding the off brands of adhesive.
Tuesday, October 27, 2009
Make your own Flower Soft
I thought this was too cool not to pass on. Holly at Hog Wild About Stamping figured out a way to create her own Flower Soft equivalent with shaved Styrofoam balls! You can read her post and see her video here. The lovely thing about this is that you can make just enough of certain colors for your needs rather than buying a lot and only rarely using it. You could even mix colors like you get with Flower Soft just by coloring them separately, letting them dry and then blending them together.
Thanks Holly for this great discovery!
Thanks Holly for this great discovery!
Monday, September 07, 2009
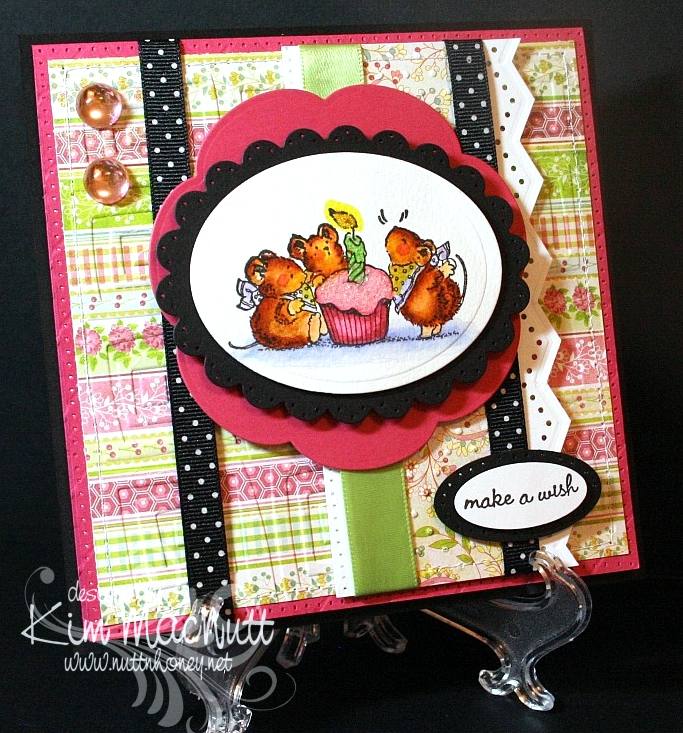
Mousy Birthday Cupcake
Hello there!
Wow! You wouldn't believe how much trouble I had with this card! I finally wrestled it to the ground today and won! My mojo was nowhere to be found and every way I arranged the card elements just did not appeal. I think I've gotten into a creative rut. At least I finished the card, though. This will be for my mother-in-law's birthday. I thought she'd enjoy the sweetness of the Penny Black mice. So cheerful!
The designer papers I used were from the Basic Grey Lemonade 6x6 pad. Such cheerful papers! They're some of my favorites.
I tried something new with my hole punching. I used the sewing machine without thread to do around the edges of the Rose Red base and along the edge of the white vertical piece. It certainly was easier, but I wouldn't say it was straighter. In the right situation this could be a nice shortcut.
For the mice scene I used watercolor paper to stamp the image on because I feel it lends itself to far more flexibility in coloring. I used SU markers to color with and blended mostly with them - with a bit of water brushing here and there to remove color or wash it out a bit. What fun it is! I don't crave Copics anymore since finding this method. I'm sure they're superior in every way, but their price just stops me dead in my tracks every time I have a notion to buy some. And then where to start? There are so many! SU markers will happily satisfy me for now.
I glittered the cupcake frosting and the candle flame to make them stand out some. I used Crystal Snow fine white glitter on the frosting and yellow Stickles for the flame.
I actually had the mice scene done weeks ago. I just had to build the card around it. I've been working on this card for almost 2 weeks, off and on! Phew! Talk about frustrating!

I have so many cards to make this month. September and May seem to be the big birthday/anniversary months for us. Hopefully, my mojo will return and I will have cards made for everyone! I've got to get busy!
Hope all is well with you! TFL! God bless you all!
Recipe
Stamps: Penny Black Critter Party
CS: Black, Rose Red, Basic Grey Lemonade, white, Canson watercolor paper
Ink: Versafine Black Onyx
Markers: Creamy Caramel, Really Rust, Close to Cocoa, Almost Amethyst, Certainly Celery, Bashful Blue, Yoyo Yellow, Pretty in Pink, Rose Romance
Other: Spellbinders Nestabilities Classic Oval Scallop Small, Classic Oval Large, Blossom; Cuttlebug Traffic Jam and Swiss Dots embossing folders, large and small oval punches, Martha Stewart Embossed Zigzag border punch, sewing machine, paper piercing tool, sponge mat, large pale pink gemstones, black polka dot ribbon, pale green satin ribbon, 3D-Dots, water brush, Crystal Snow fine white glitter, yellow Stickles
Friday, July 03, 2009
Summer Bloom
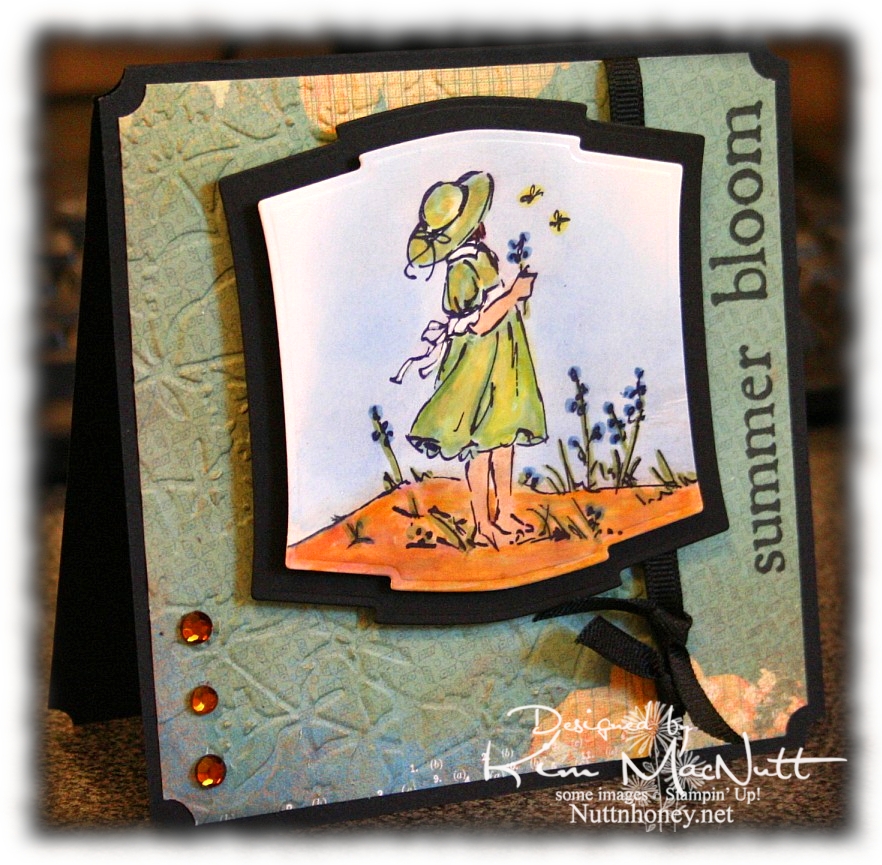
Happy Friday! I'm in the middle of painting a bathroom closet, but wanted to post a card while I'm resting. My sweet hubby is off work today and he's building some new shelves for me. When we had this house built over 14 years ago, we chose the ventilated shelving. You know, the wire kind? Well, it's good for some storage situations, but it's the pits for things like bottles and such. The shampoos and conditioners I have stored in there never want to stay totally upright, and if one falls over, the whole bunch fall over like Dominos. And things fall through the grates. I've lived with this annoyance long enough and it's time for real wood shelves! I can't wait! Next will be my pantry. Same issues! I want good old-fashioned wood shelving like my grandmothers had!
So in between applying coats of paint, I've been sneaking in some creative time. There hasn't been a lot of that this week, but I did manage to make one other card I will set up to post soon. (Yes, Doris, I knew about the pre-posting option on Blogger and have been taking full advantage of it! Praise God for such blessings, yes?) I still have lots of chores to do today, unfortunately. But tomorrow looks pretty free (for now). We'll be having company over.
Anywho, when I want to relax in a creative way, I watercolor. So this card and the next one are the results of that.
I used one of the papers from the Recess pad for this card, in fact. I also found out that Archiver's carries THE best black ink removing cleaner I have ever tried (and I've tried just about everything, including Simple Green):

It's the only cleaner I've tried that completely removes Stampin' Up's Basic Black ink from my stamps; it's the hardest ink I've ever tried to remove. Normally, I have to buy it online, so I was very happy to see it in the store! It's $5.99 for 2 oz., but there were no 8 oz. refills on their shelves just yet (I might just have to beg for them to carry it!).
NIFTY TIP ALERT! I found that if I spray a little quarter size amount of the Ultra Clean stamp cleaner on a rag and rub the stamp with it I use a lot less of the cleaner up. Since it's a bit pricey, I also only use it for black or very dark inks because the other cleaners all work fine with all other colors. It's just the black that is so stubborn. I've not tried it on StazOn Jet Black ink, so I can't report on that one, but I'm extremely happy with the results on every other black ink I've tried it on!
End of commercial! Now, back to the card.
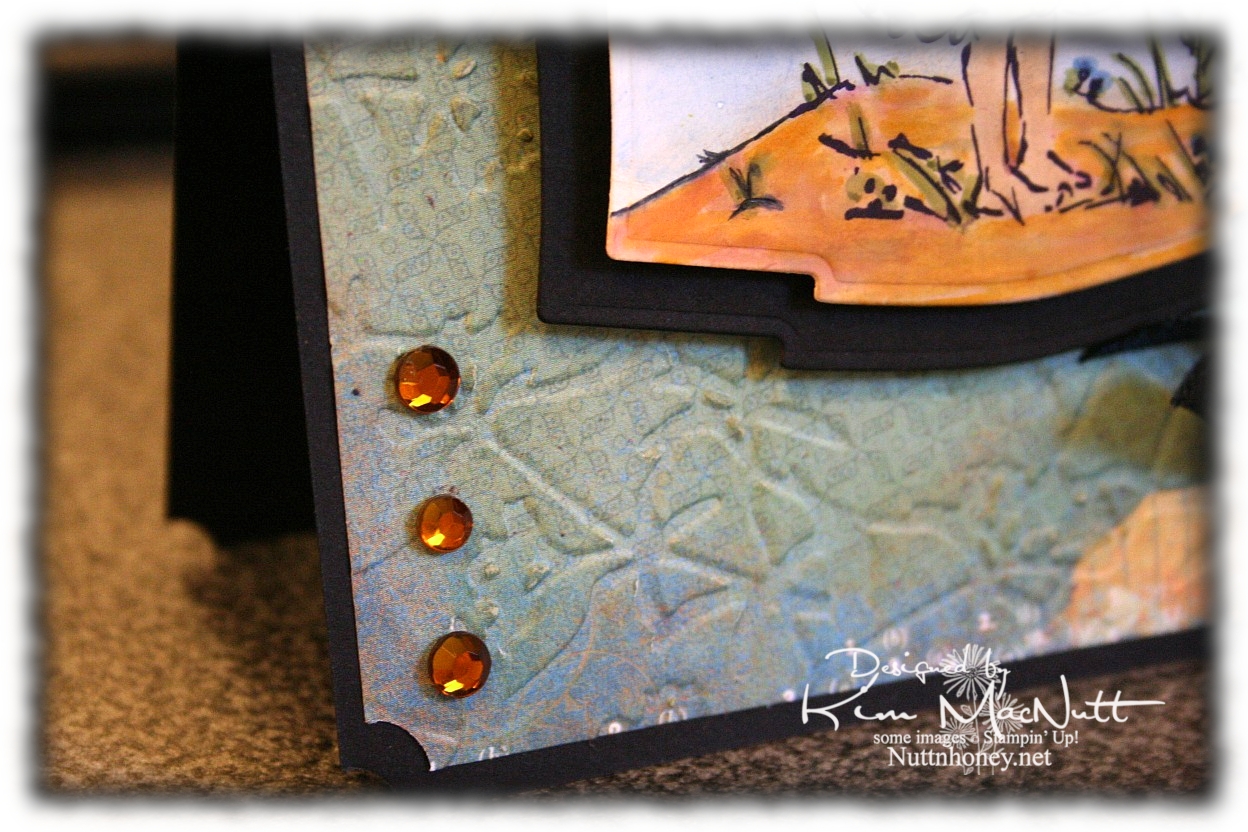
Here's a close-up of the paper. Cool patterns so small, you almost don't see them (click to enlarge).
I'm running out of free time so I had better get to the recipe! Have a lovely day and a great Independence Day, for all my American readers! We Americans need to grow in appreciation for our freedoms before they are lost! We are so blessed and we need to work hard to protect those precious freedoms we so often take for granted! We need to care about what our politicians are doing. It affects us whether we like it or not. We are endowed by our Creator with certain unalienable rights! And we must remember that our Creator is the One Who has given us these freedoms! Pray for our nation!
Blessings!
Recipe
Stamps: Stampin' Up! Summer By the Sea, Purple Onion Design "4 Seasons"
CS: Black, Basic Grey Recess "Academy", glossy white
Inks: SU Basic Black, Versafine Onyx Black, Bashful Blue, Creamy Caramel
Markers: Sage Shadow, Brocade Blue, Old Olive, More Mustard, Summer Sun, Basic Black (to extend line on the ground on the left)
Other: Cuttlebug Floral Screen embossing folder, Nestabilities Labels Two dies, ticket corner punch, amber gems, black grosgrain ribbon, Sticky Doos, 3D Dots, Inkssentials opaque white gel pen (for white dress accents), sponge daubers (used for applying ink to sky and sand)
Subscribe to:
Posts (Atom)