Showing posts with label SU Stipple Rose. Show all posts

Thursday, March 15, 2012

Medieval rose thanks


This is the second card I made a few weeks ago. I was playing around with a scalloped square Nestabilities piece and came up with a sort of medieval look. I might do this more often. I like the many options this opens up.

The Creamy Caramel cardstock was scored using a Scor-Pal. If you look closely you'll see a couple of goofs. I accidentally slipped when I was scoring the paper and I also dented the cardstock when I tied the ribbon too tight. Dern! Was not about to start over at that point, though. See? I am making progress on my perfectionism. :D


All the cardstock except the black and white was done direct-to-paper with matching inks. It makes the paper look like suede. Love that!

The roses were colored with Copics. I layered many colors over each other.

I used the Kassie's Brocade Cuttlebug embossing folder to emboss over the roses.

The word stamp is from SU Wonderful Words. Boy, all my stamps are becoming ancient relics, aren't they? lol I think just about everything I own is now retired!

Well, thanks for looking! Hope you enjoy this card. God's blessings on you.

Recipe:

Stamps: SU Stipple Rose, SU Wonderful Words

CS: Always Artichoke, Creamy Caramel, Black, White

Inks: Always Artichoke, Creamy Caramel, VersaFine Onyx Black, various Copic markers

Other: Cuttlebug Kassie's Brocade embossing folder, Scalloped square Nestabilities die, Square Nestabilities die, Scor-Pal, red gems, olive organdy ribbon, red zigzag ribbon, button, foam tape, Diamond Glaze (to glue button down)

Saturday, April 03, 2010

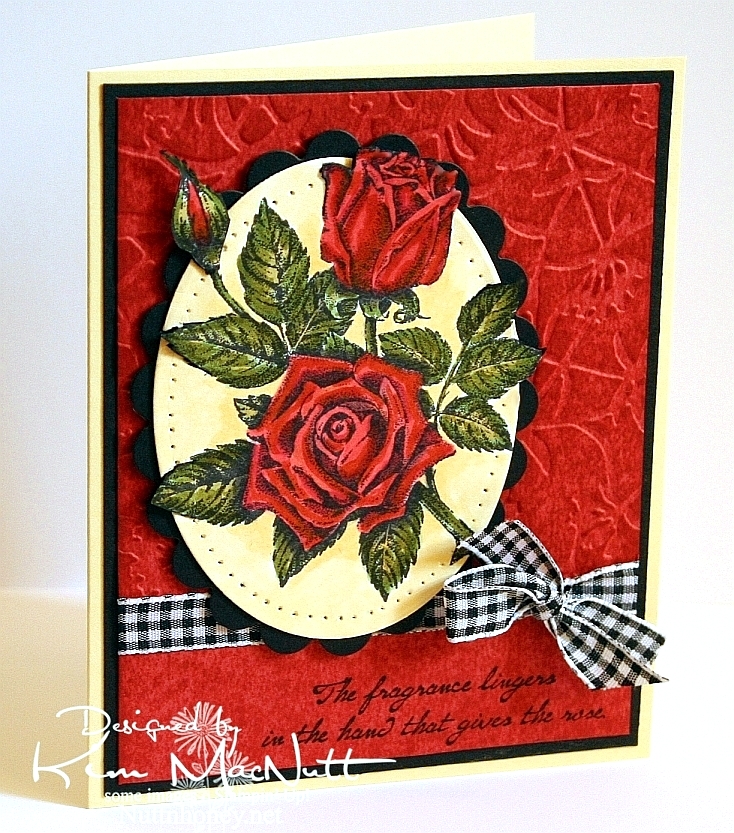
Because I just wanted to color a rose...


...that's why I made this card. I've not felt too good all day, but I managed to get this done. I had wanted to do an Easter card, too, but my energy is not with me. Just too dragged out for some reason.

I used the Out of the Box nestie tutorial again, and made it harder on myself by making several parts of the image overlap outside the oval. A bit tricky, it was, but I like challenging myself, even when I'm not feeling so hot.

For the red background I did direct-to-paper with SU Ruby Red ink over Ruby Red card stock. After it dried, I ran it through the Cuttlebug using the Floral Screen embossing folder. Then I dtp'd over it with more Ruby Red ink and let it dry.

I used both Copics and SU markers because my Copic markers are too light. It worked out just fine.

Well, that's about as much as my brain can muster right now. I pray you have a wonderful Easter celebration tomorrow. Christ is Risen!

Stamps: SU Stipple Rose, SU Roses in Winter

CS: SU Barely Banana, black, SU Ruby Red, PTI white

Inks: Memento Tuxedo Black, Versafine Onyx Black, SU Ruby Red

Copic markers: W7, R24, Y21, YR23, YG63

SU markers: Ruby Red, Old Olive, Basic Black (for edges of image that protrude from oval)

Other: Cuttlebug Floral Screen embossing folder, Nestabilities Classic Oval Scallops Large, Classic Ovals Small, SU paper piercer, Stamp-a-ma-jig, X-Acto knife, black gingham ribbon, 3D-Dots