Showing posts with label Cuttlebug - D'Vine Swirls. Show all posts

Tuesday, May 25, 2021

Silly Whale Birthday

Hello! Another sea-themed card. This time I'm using my old Stampin' Up! Silly Sealife set. The card sketch I'm using is Mojo Monday 560


I chose two papers from the Basic Grey Archaic collection because they are "wavy" like the sea. And one of them has a "bubbly" look that made me think of being under water. The one behind the sentiment wasn't "wavy" or "bubbly", but I liked how it went with the other two. 

I thought the Stampin' Up! Cheery Chat birthday greeting would go very well with the whole look on the front, and I used the matching birthday saying inside. I love the whimsy of the font.

I used the Nestabilities Labels Three die to frame the sentiment, but I'm not sure it was the best choice. Maybe a tad too wide for the look? I dunno.

And, of course, I gave in to using my Tiny Bubbles embossing folder because this card has a water theme...and...bubbles.


My happy little whale is spouting glittery water. 


It's probably hard to see, but I used the D'Vine Swirls embossing folder to create "waves" on the lower bubbly-looking paper. 

And here's the inside. Aren't those sea creatures adorable? This is such a versatile stamp set, I tell ya!


Close-up of the inside.


So, yet another sea card. I think that's my last one for awhile though. Hope you're having a good week! Take care and thanks for coming by!

Stamps: SU Silly Sealife, SU Cheery Chat

CS: Black, Ivory, SU Chocolate Chip, Basic Grey Archaic designer paper

Inks: Memento Tuxedo Black, Versafine Onyx Black

Copic Markers for whale: B0000, B00, B21, BG11, E11, E13, E15

Other: Cuttlebug Tiny Bubbles and D'Vine Swirls embossing folders, Nestabilities Standard Circle Large and Labels Three dies, hole punching tool, foam tape, large brown eyelets, Frosted Lace Stickles glitter gel

Wednesday, April 21, 2021

Christmas Cards in April?

Well, hello there! It's been awhile since I've posted here. I've made numerous cards since my last post in 2019 (!!), and will try to post them all here in the near future, even though I may be the only one looking at them at this point! 😏

These cards are the ones I made for my family for Christmas 2020. I made, I think, about 8 of these. 


I had run out of the lime green cardstock midway, so some were done in red. Thankfully, I didn't run out of the red!


I've done this card style before. But this time I went a bit more elaborate by making my own "snow" out of white embossing powder, glitter and clear Glossy Accents. I just mixed them up as I went. Because I didn't have a lot of white embossing powder on hand, I couldn't cover everything I wanted to with my "snow". But what I did cover turned out pretty good. 


I also did a lot with glitter gels. I used Stickles to accent many of the pieces. 


Stamping, coloring and cutting out all the little pieces was very gratifying, although I did get a bit weary of it toward the end. 


And here's what things tend to look like when I'm creating.


I used one of my favorite old Cuttlebug embossing folders, D'Vine Swirls, to create the snow effect. I have more than gotten my money's worth from that thing!  And I stamped all the snowflakes on the red and green backgrounds with white pigment ink using a stamp from my old Stampin' Up! Flaky Friends set.


I colored everything with Copic markers. And here they are, once again, finished and ready to give away.


I wish my background cardstock would've been long enough to make one more bend at the back. It would've held the gingerbread house more upright. But alas, I did not have the 12"x12" kind, just the normal size.


I realize that no one is really interested in Christmas cards in April, but I am posting it while the urge hits, so I guess it's Christmas in April on my blog. Sorry about that.

I hope you have a lovely day, and thank you for coming by for a visit. Please let me know if you've stopped by so I can know you were here. Take care.

Stamps: Taylored Expressions Season's Sweetings, Taylored Expressions Home Sweet Home, SU Flaky Friends

CS: All cardstock is from Papertrey Ink.

Inks: Memento Tuxedo Black, Colorbox Frost White pigment ink, Copics

Other: Cuttlebug D'Vine Swirls embossing folder, paper piercing tool, foam tape, Stickles glitter gels, white embossing powder, white glitter, Inkssentials Glossy Accents clear dimensional medium, Paper Shapers small and large oval punches

Tuesday, June 05, 2018

Blingy Monochromatic Birthday

I loved making that monochromatic card so much that I made another one! This time I also added red bling. I gave this one to my daughter who happens to be the mother of my granddaughter (the recipient of the other monochromatic card). So we're keeping it in the family. :)


I stamped several of the retired SU! Doodle This stamps on white cardstock using my favorite go-to black ink, Memento Tuxedo Black. It doesn't smear when used with Copics. I colored it using warm grays and then ran it through the Cuttlebug with the Script embossing folder. 

And then there's the bling! Blingety-bling-bling, I went nuts, didn't I? I just had to put something on all of that monochromishness, so I raided my gem collection to see if I could bring it up a notch. At first, I just did the clear gems. But it just needed something more. So I threw some red gems in and added some red organdy ribbon, and that seemed like just enough.


I used a piece of white cardstock only on half of the inside, and did a cut-out, popped-out piece on the other half since the ribbon would kind of be in the way. I think it works pretty well. I stamped and colored the inside image the same as on the outside and blinged it up, too. The inside saying is from Fiskar's Make a Wish Quotes.

I liked how these clear gems kind of went "outside the box" and spilled into the black base. I dunno, I'm weird.


So there you go! I have one more card to show you and then I need to get busy on my Father's Day cards and I need to make a baby quilt for my 5th grandbaby, due next month!

Thanks for looking and have a great day!

Stamps: SU! Doodle This, SU! Elegant Greetings, Fiskars Make a Wish Quotes

CS: Black, Papertrey Ink Stamper's Select White

Ink: Memento Tuxedo Black

Copics: W1, W3, W5, W7

Other: Nestabilities Standard Circle Large, Classic Scalloped Circle Small, Cuttlebug Script & D'Vine Swirls embossing folders, Red organdy ribbon, Clear and red gems, Foam tape, Paper piercer, Piercing mat

Sunday, January 28, 2018

Happy Happy Birthday


Recipe:

Stamps: Hero Arts Woodland Creatures, Penny Black Critter Party, "Happy Happy Birthday" sentiment by The Angel Company (TAC)

Inks: Memento Tuxedo Black, Distress Oxide Fired Brick

Cardstock: White, Teresa Collins Fabrications designer papers

Other: Cuttlebug D'Vine Swirls and Birds and Swirls embossing Folders, Martha Stewart Arched Lattice border punch, cream ribbon, stitching, foam tape

Friday, January 19, 2018

Winter Friend Card

Hello to anyone who might wander over here to my stamping place! I hope you enjoy your visit! I am back in the swing of things after a 3-year hiatus and am enjoying myself immensely. Stamping is a very satisfying, albeit expensive, hobby, and I love it.

I made a bunch of these cards for some online friends in lieu of Christmas cards, as I got a very late start on my Christmas cards last year and didn't have time for 10 more cards. So I made these January/Winter cards instead. Do you like my little pom-pom trim? It looks like little hanging snowballs!


I was looking through my Pure Innocence digital stamps and thought this cutie would be perfect for a Winter card. So I printed out 11 copies of her (one as a sampler) on good white cardstock and got busy coloring them. I did the backgrounds with Copic markers BG10, BG11, BG13, and BG18 until I ran out of ink for the BG10 and BG11 and had to find substitutes. Like I mentioned in a previous post, I had to use another brand of markers and found them wanting. But they did fill in for my Copics until I could get some refill ink.

I used R29, some YGs (yellow-greens), some Es and Rs for her face, Some Es for her hair, and the W7 plus a reddish brown for her boots (although the pic doesn't show it right).

I wanted to depict swirling snow, so I used the D'Vine Swirls embossing folder and a swirls stamp from the retired SU! set I Like Your Style. I stamped in SU! Real Red ink (do they still sell that color? I feel so ancient asking that!).

I used a Uni-ball Signo white gel pen on all the white areas. And I did a little stitching around the edge. What made the card pop for me were the red gems. They really added a lot.

Inside, I just made a simple design using the I Like Your Style stamp I used on the outside and 2 stamps from the SU set Amazing to Zany (probably also retired).


I made another card yesterday and will be sharing that one soon. Thanks for coming by! Please let me know that you stopped by! I love visitors! Happy Weekend!

Stamps: Pure Innocence 008 digital stamp, SU! Amazing to Zany, SU! I Like Your Style

CS: White

Inks: SU! Real Red, Copics

Other: Cuttlebug D'Vine Swirls embossing folder, turquoise stitching, red gems, pom pom trim, foam tape, Uniball white gel pen for white highlights
Friday, October 18, 2013

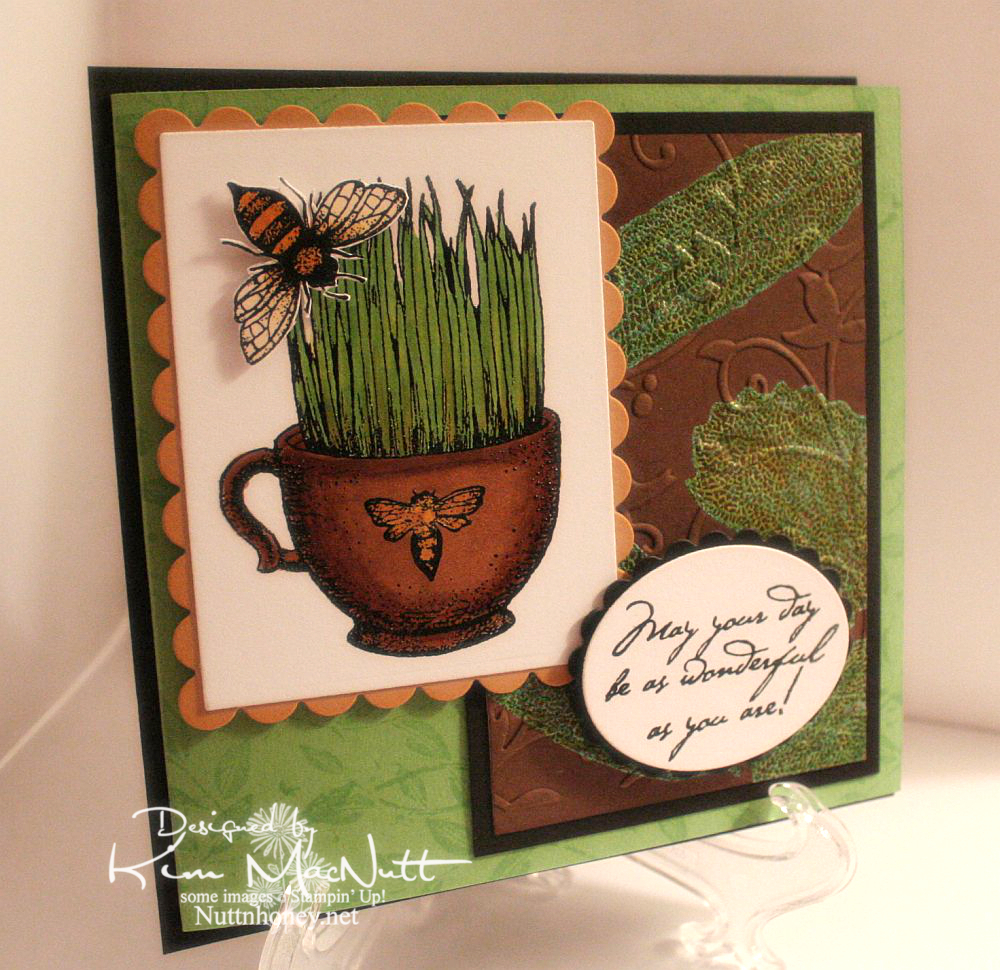
May Your Day Be As Wonderful As You Are!

This is the most stamping and playing with ink I've done in a long time! I heat-embossed so much on this card, y'all! I am loving all this playtime! This card is for my mother's birthday.

For the brown background piece I first did direct to paper with the Antique Linen Distress Ink pad. Then I stamped the leaves from SU Autumn in VersaMark ink and heat embossed with SU Vintage Verdigris EP. Then I went over it with DI Vintage Photo and lastly with SU Basic Brown. So now it just looks brown. But that's how I got there! lol Then I rubbed a light green Copic marker over the leaves and wiped them off. I'm not sure, but I think embossing powder might react with Copics and soften. Just be careful if you try this.


I hope you can see that I heat-embossed the grass image and the bee. It made for some enjoyable coloring with Copics afterwards. The bee is popped up with foam tape.


On the inside I wanted to create a sort of dancing bee scenario. I stamped them all in Brilliance Graphite Black and heat-embossed them with clear EP. Then, once cooled, I ran the edges through the Cuttlebug using the D'Vine Swirls embossing folder. To hide the folder edge and keep with the black lines image, I used some grosgrain ribbon. I rolled both inside and outside edges of the Green Galore CS with the Leaf Prints wheel and VersaMark ink. Busy, busy, buzzy!


The white paper collapsed a bit from the Cuttlebug embossing. A thin extra layer in the sandwich probably would've fixed that. Ah, well.


I hope you liked my imperfect, but happily-created card, and thanks for looking!

Stamps: The Angel Company (TAC) - not sure of stamp set names, but the image is from one and the saying is from another; SU Autumn, SU Leaf Prints wheel, SU Birthday Greetings

CS: Black, SU Green Galore, SU More Mustard, White

Inks: VersaMark, Copic Markers, Brilliance Graphite Black (for heat embossing), Tim Holtz Distress Ink Vintage Photo and Antique Linen, SU Basic Brown

Other: Cuttlebug Birds and Swirls and D'Vine Swirls embossing folders, Nestabilities oval, rectangle, and scalloped dies; Clear heat embossing powder, SU Vintage Verdigris embossing powder, foam tape

Wednesday, October 16, 2013

Paris in the Spring birthday card

Well howdy there! Yes, it's another card from me! Amazing, I know. I'm feeling such a strong desire to stamp right now. It's wonderful! Almost every day I stamp and create a little. I love it!

This card is more what I normally do, but you'll be seeing me go back to my stamping roots in the near future. I've got another card I'll post soon and I'm almost finished with a third. My mojo is back, y'all, and it's all because I am playing like I used to!

I had actually made parts of this card many months ago, and was re-inspired to finish it whilst going through my cardstock pile and finding pieces of cards I had started. Do you have a cardstock pile that forms every time you make a card? I usually do, and it normally grows with each project, gathering dust in the process. But I got it all put back and now have my cardstock within easy reach so I can put scraps in their proper place. I keep a box like this nearby for smaller scraps so I am more likely to grab them instead of reaching for a new sheet. It works! I feel so good using my scraps up!


I realized how perfect this saying from SU Loads of Love Accessories was with this image from SU Paris in the Spring.

The middle flower and the smallest flower were inked up with a Copic marker. It was so easy to make the white flowers into whatever colors I wanted and was much less messy than pressing the flowers on an ink pad (my old way) which soaks up a lot of ink.


All coloring was done with Copics.


See the wheel stamping I did below? I have totally ignored my lovely wheel stamps for far too long! Btw, you can also see that I started to write in the card before I realized I hadn't photographed it yet. Oops! It went in the mail to my sister today!


More Copic coloring. I did a little doubling and tripling up on the colors to make the images more whimsical.


Tried hard to copy the outside image coloring inside. Considering that the outside image was done months ago, I found it a bit challenging. But the FUN kind of challenging!


Well, I hope you enjoyed this birthday card I made! Thanks for coming by!

Stamps: SU Paris in the Spring, SU Loads of Love Accessories, SU Swirl Style Wheel, Fiskars Make a Wish Quotes

CS: SU True Thyme, Tim Holtz Idea-ology Paper Stash: Lost and Found, White

Inks: Copic markers, Memento Tuxedo Black, Versafine Onyx Black, VersaMark, SU True Thyme

Other: Martha Stewart Arched Lattice border punch, Nestabilities oval die, Cuttlebug D'Vine Swirl and Polka Dot embossing folders, Cloth flowers, Gems, Grosgrain ribbons

Tuesday, October 08, 2013

I never, ever tire of using Lovely Leaves

This is the perfect time of year to pull out an old favorite like Lovely Leaves, isn't it? I needed a birthday card for my oldest daughter and I haven't played with this set in a long time. I did the leaves by stamping on different colored ink pads with some inks overlapping. This is a bit risky, and I usually color the stamps with markers and then lightly touch the edges with a little black or other dark ink. It's better with the markers, but the ink pads really do some neat things. So I sometimes risk it. I always go light to dark when overlapping colors.


There's an interesting little story behind those dotted holes. I was doing a single row around the oval and I goofed them up. Rather than start all over I just kept adding holes and ended up with a pleasing result.


I did some matching panels on the inside as well as the outside, running the panels through the Cuttlebug after stamping them.


I'm very pleased with my leaves. This set is so amazing!


For the inside sentiment I stamped part of it in one color and part in another. Then I ran a bit of it over some black ink.


The main colors in my card are Pumpkin Pie and Brocade Blue. Does SU even sell those anymore?

Thanks for looking! I hope you enjoyed my little ode to Autumn!

Monday, August 20, 2012

Cuppy birthday card for my littlest


My youngest turns 12 tomorrow and I made her a card rather than buy. She, of all people, loves anything homemade; and especially anything homemade from paper. She's always bringing me things she's created with bits of paper or a painting or drawing she made. This very minute she is standing next to me making a horse with movable legs...out of paper.

Her favorite color is pink, but I realized while putting this card together that blue was speaking to me. So I thought I'd just accent with pink. She'll be happy.

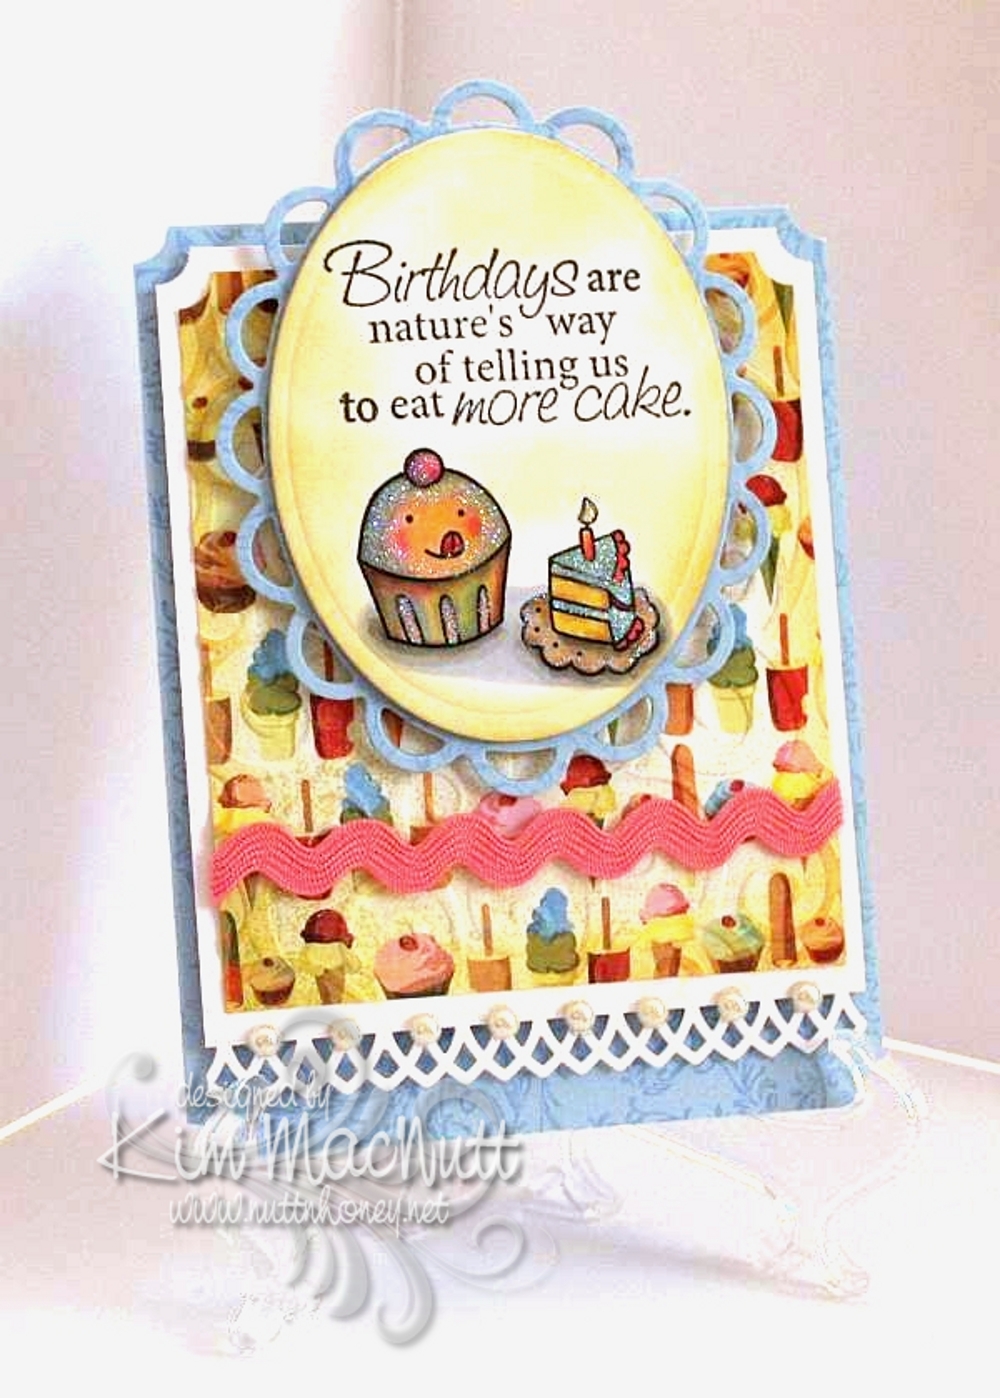
I stamped all the blue cardstock in Versamark ink with the Filigree background stamp long retired from Stampin' Up!. I used the D'Vine Swirls embossing folder on the ice cream and cake paper from Basic Grey Cupcake.

The stamps are from Taylored Expressions Sweet Celebrations and Fiskars Make a Wish Quotes.

The lace edging was done with the Martha Stewart Arch Lattice border punch. I used a Nestabilities die from the Lacey Ovals set under the cuppy scene.

The image was colored with Copics using a lot of mixing of colors to achieve the muted look. I was thinking of the artwork in the If You Give a Mouse a Cookie book as color inspiration.

I used white Art Institute Glitter on the scene to give a general glittery appearance. I sponged Barely Banana ink around both the oval and the Basic Grey paper.

Thanks for having a look! I can't wait to give this card to her. She'll flip over that glitter-covered cuppy!

Recipe:

Stamps: Taylored Expressions Sweet Celebrations, Fiskars Make a Wish Quotes

CS: SU Bashful Blue, White, Basic Grey Cupcake designer paper

Inks: Memento Tuxedo Black, SU Barely Banana, Versamark

Other: Cuttlebug D'Vine Swirls embossing folder, Nestabilities Lacey oval and regular oval dies, Martha Stewart Arch Lattice border punch, SU Ticket Corner punch, pearl gems, white Art Institute glitter, Copics, pink rick-rack ribbon, Stamp-a-ma-jig, sponge dauber, foam mounting tape

Wednesday, May 30, 2012

More Sweet Herbs

I'm just finishing up the last of the cards I made for my columbine seed recipients. I'm sorry it's taken me so long, but I hope the wait was worth it. I wanted to give each seed recipient a card, so I started looking through my stash and, as usual, took the long way round about doing things. Instead of picking already-made cards, I decided to make some new ones. I did use one I already had, but the rest are new. I just can't help myself. ;-P

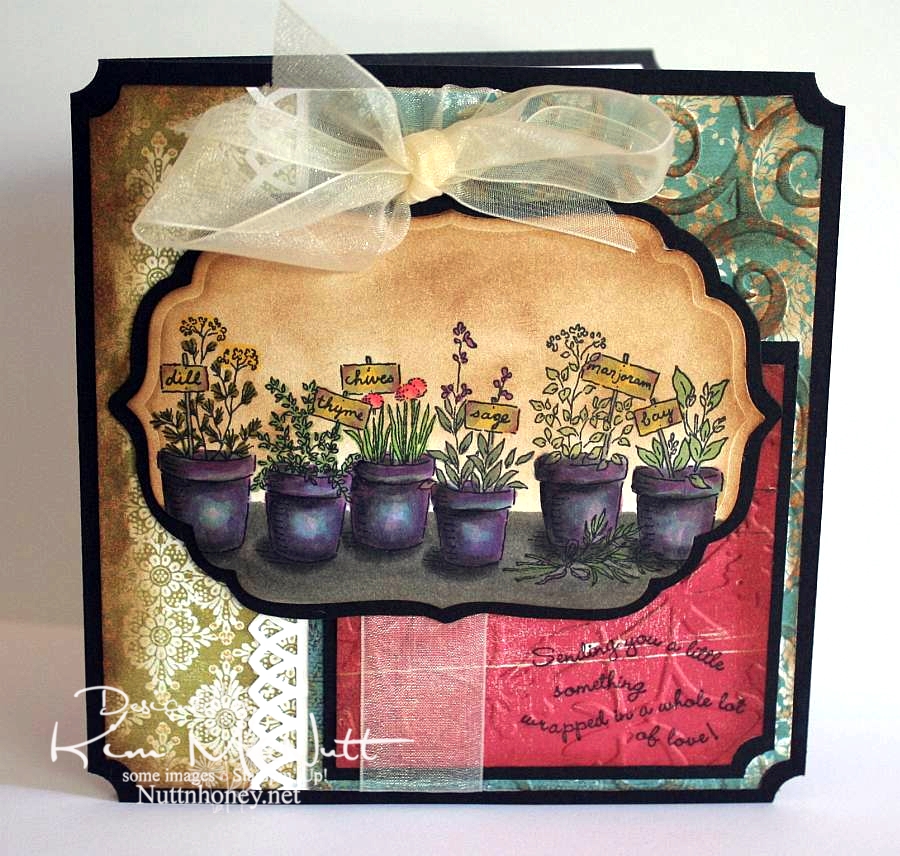
This is one I finished last night. It kind of came together at the last minute and it was a bold move that actually gave me the inspiration. I had colored the Sweet Herbs stamp and was going absolutely nowhere with it when I started sponging Vintage Photo Distress Ink on the edges. Then I messed up and just covered the whole image in Vintage Photo ink! Well, that got me going and I went wild with Vintage Photo sponging all over the card! I hadn't even intended on using it on the Sweet Herbs piece, but once I did I was thrilled with its vintage-y look and then couldn't stop.


What I thought was the coolest thing ever was the aqua blue paper done with Cuttlebug's D'Vine Swirls embossing folder and then sponged with Vintage Photo ink on the raised parts. Bam! Zow! I was happy! Gotta do more of that!

And wouldn't you say I've gotten my money's worth out of that Stampin' Up! Ticket Corner punch? I am addicted to using that thing! Isn't it funny how we keep grabbing the same things for almost every card we make, or am I the only one?

So, I think I need to get back to sponging. I love the look and it unifies the whole card.

Btw, have you seen the movie, Her Majesty, Mrs. Brown with Dame Judi Dench and Billy Connolly?


Wow! Loved that film! It's on Netflix streaming if you have it. Both actors were amazing! I always love Judi Dench in anything she does, but I had no idea Billy Connolly was so good at serious acting. I knew he was a comedian, but that's all.) This is a great story about a man's loyalty to his queen. (As an aside, there is some male nudity in one scene where Billy and his brother are rushing out in the water to swim - just an fyi.)

Thanks for looking, and seed recipients be watching your mail!

Recipe:

Stamps: SU Sweet Herbs, SU Curvy Verses

CS: Black, White, various deco papers

Inks: Memento Tuxedo Black, Versafine Onyx Black, Tim Holtz Vintage Photo Distress Ink

Other: Cuttlebug D'Vine Swirls and Floral Screen embossing folders, Martha Stewart Arch Lattice border punch, SU Ticket Corner punch, Nestabilities Labels Four die, sponge dauber, various Copic markers, dimensional stickers, cream organdy ribbon

Saturday, February 11, 2012

Mice make a wish birthday


More fun with Penny Black stamps!

This card is for a friend whose birthday is coming up. She likes pink and I was in the mood to work with pastel colors. Notice, no black paper!

I love coloring these images. Most of the coloring was done with Copics, but I used a few SU markers to do the bibs and the purple on the candle.

I had originally wanted to use eyelets rather than mini brads, but I couldn't get them to work right. Too much to go through, I guess, and my Crop-a-Dile couldn't even reach that far in. Why did I buy that thing again? Okay, it IS useful sometimes.

This card actually started out using this week's Mojo Monday sketch, but I just fought with the design so much that I tossed part of it and fudged another. In the end I was much happier with how things turned out.


My son was amazed at how I got the candlelight effect, but it's actually very easy. Once you color your design, use a medium to light yellow and color just the fronts of each character. Also, color the top of the cupcake in the center, radiating outwardly. The key is to start light and go heavier until you create the glow you want.

Hope you are having a lovely Saturday! It's cold and getting colder here in North Georgia. A front is coming in with lots of wind; and it's supposed to get down into the teens tonight with the wind chill likely getting into the single digits. I think this is the coldest it has been all winter.

Blessings to you all!

Recipe:

Stamps: Penny Black "Critter Party", SU By Definition

CS: SU Positively Pink, Sage Shadow, Barely Banana, white, Basic Grey dp

Inks: Positively Pink, Sage Shadow, Barely Banana, Memento Tuxedo Black

Markers: Sage Shadow, Bashful Blue, Lavender Lace, misc. Copics

Other: Cuttlebug Perfectly Paisley, Spots and Dots and D'Vine Swirls embossing folders. Oval Nestabilities dies, Martha Stewart Doily Lace border punch, Silver mini-brads, Pink grosgrain ribbon. Corner ticket punch, foam tape, sewing machine

Wednesday, February 09, 2011

More frogs!


These frogs are not altered much. I actually did them before playing around with the frogs for the last card.

For the stamped background I used SU Shapes & Shadows, doing the Double Time technique by overlapping complementary images and leaving some white space, then cutting a piece for my card. Then I ran it through the Cuttlebug with the D'Vine Swirls embossing folder.

I used the Swiss Dots folder on the frog pieces and the Forest Branches folder on the yellow cs. Almost everything is textured!

I colored the frogs with Copics. I just can't seem to use anything else as the Copics are so gentle and smooth on the paper.

Thanks for looking! Today is my birthday and I'm meeting a friend for lunch. This card will be for her. I hope you enjoy it!

Recipe:

Stamps: SU Unfrogettable, SU Shapes & Shadows, SU Upsy Daisy

CS: Pixie Pink, Black, Summer Sun, White

Inks: Versafine Onyx Black, Pixie Pink, Certainly Celery, Summer Sun

Other: Copics, Cuttlebug D'Vine Swirls, Forest Branches and Swiss Dots embossing folders, Nestabilities circle, inverted scallop circle and rectangle and scalloped rectangle dies, black organdy ribbon, foam tape

Thursday, April 08, 2010

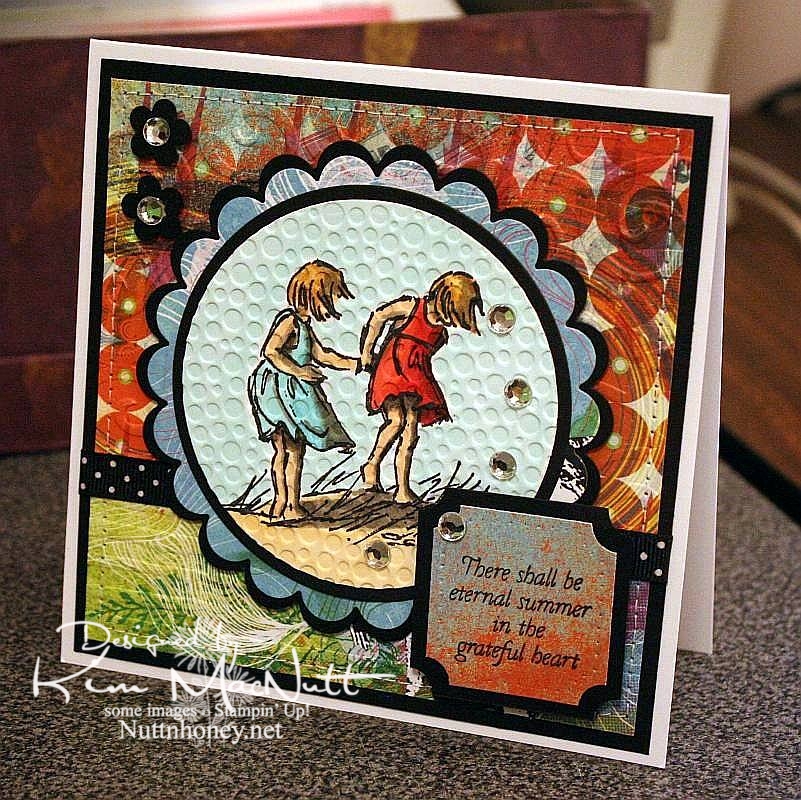
Eternal Summer even though it's still Spring


I know it's not Summer yet, but I thought this saying from Flourishes' Poppy Patch set went perfectly with this image from SU Seaside Sketches.

We had a lovely, rainy day that washed away all the pollen, praise the Lord! Oh, how gorgeous it was this afternoon! Cool, fresh and sunny. And green! No more yellow everything!

My allergies didn't get a break today, but I'm hoping tomorrow will be better. I really want to enjoy the beautiful weather while it lasts.

It's kind of hard to see, but I cuttlebugged the hooey out of this card. I used D'Vine Swirls on the top background to mimic waves, and used Distressed Stripes horizontally on the bottom to mimic the seashore. Then I used Tiny Bubbles on the main image. It mimics...bubbles. That one you probably can see.

The papers are all from the retired Basic Grey Obscure 6x6 pad. I love their vibrant, fresh colors. They really pop when contrasted with the black!

Thanks for looking. Hope your weekend is a beautiful one! My 13 yo is giving a tea party for her AHG scout friends on Saturday. I'm hanging out close by, but I'm letting her do nearly all the work. She loves it!

Stamps: SU Seaside Sketches, Flourishes Poppy Patch (saying)

CS: PTI white, black, Basic Grey Obscure designer papers

Inks: Versafine Onyx Black, Memento Tuxedo Black

Copics: W3, W5, W7, R24, R29, R30, BG10, BG11, BG13, YR00, YR20, Y21, E31, E33, E35

Other: Cuttlebug D'Vine Swirls, Distressed Stripes, and Tiny Bubbles embossing folders, Nestabilities Standard Circles Small, Standard Circles Large, Classic Scalloped Circles Small, Classic Scalloped Circles Large, Classic Squares Large, ticket corner punch, small flower punch, sewing machine, black polka dot ribbon, clear gems, 3D-Dots, foam mounting tape, SU paper piercing tool, sponge mat

Wednesday, March 31, 2010

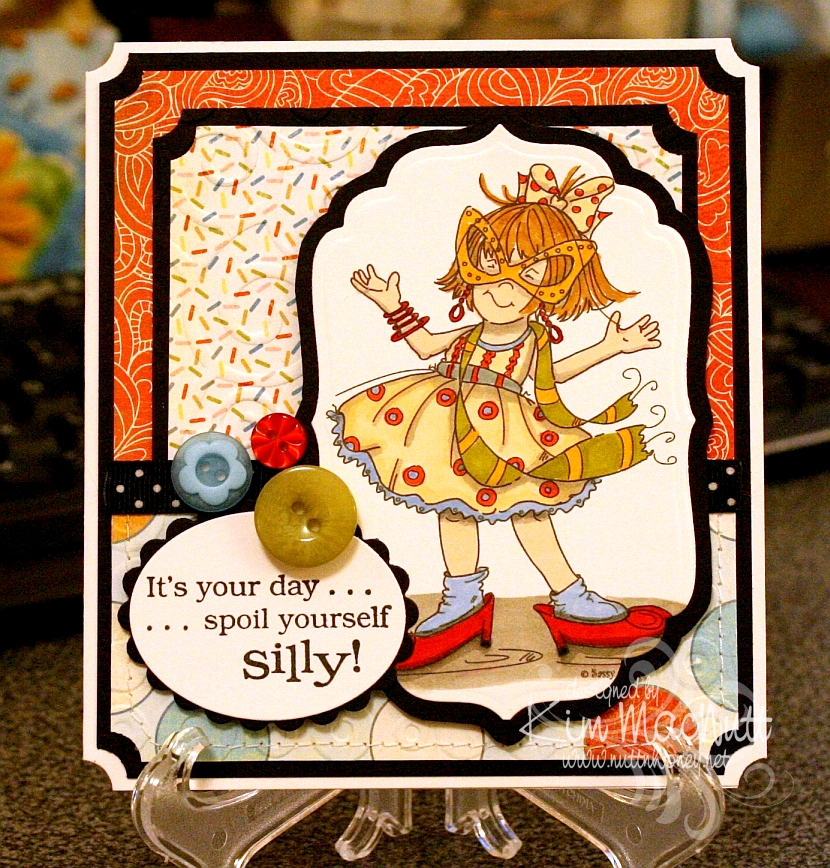
Spoil yourself silly!

I am so excited about the great illustrators I keep running across who are marketing digital stamps of their artwork to card makers. I ran across another one on Paper Craft Planet and wandered about on her site ooohing and ahhing over her wonderful images. She's Cheryl Alger of Sassy Cheryl's.


Her style reminds me of the Ramona/Henry/Ribsy books. Her drawings have such wonderful movement. I especially like her quirky/gangly children. She really captures childhood, I think.

This image was a freebie for joining her PCP group. What fun it was to color! I bought a couple more of her images and will hopefully be playing with them soon.

Goodness, I need to slow down! This is getting to be an obsession!

Stamps: All the Frills digi by Sassy Cheryl's, word saying from Penny Black Bubbly set

CS: PTI white, black, Basic Grey Cupcake collection

Inks: printer, Versafine Onyx Black

Copics: W3, W5, E000, R00, E41, YR20YR23, E35, E57, YG95, R24, R29

Other marker: SU Bashful Blue

Other: Cuttlebug D'Vine Swirls, Spots and Dots, Nestabilities Classic Oval Small, Classic Oval Scallops Small, Labels 4, ticket corner punch, black polka dot ribbon, SU Playground buttons, sewing machine, foam mounting tape, 3D-Dots

Friday, February 26, 2010

Spring!


I am desperate for spring! Are you? I'm tired of being cold all the time and having pruney, dry skin and the bleak grayness everywhere I look and the low light. I yearn for green grass and flowers, fresh air and sunshine! Since I can't have any of it yet, I picked one of the Pure Innocence digis that says "spring" to me. It also says "carefree" and "sunshine" and "warmth".

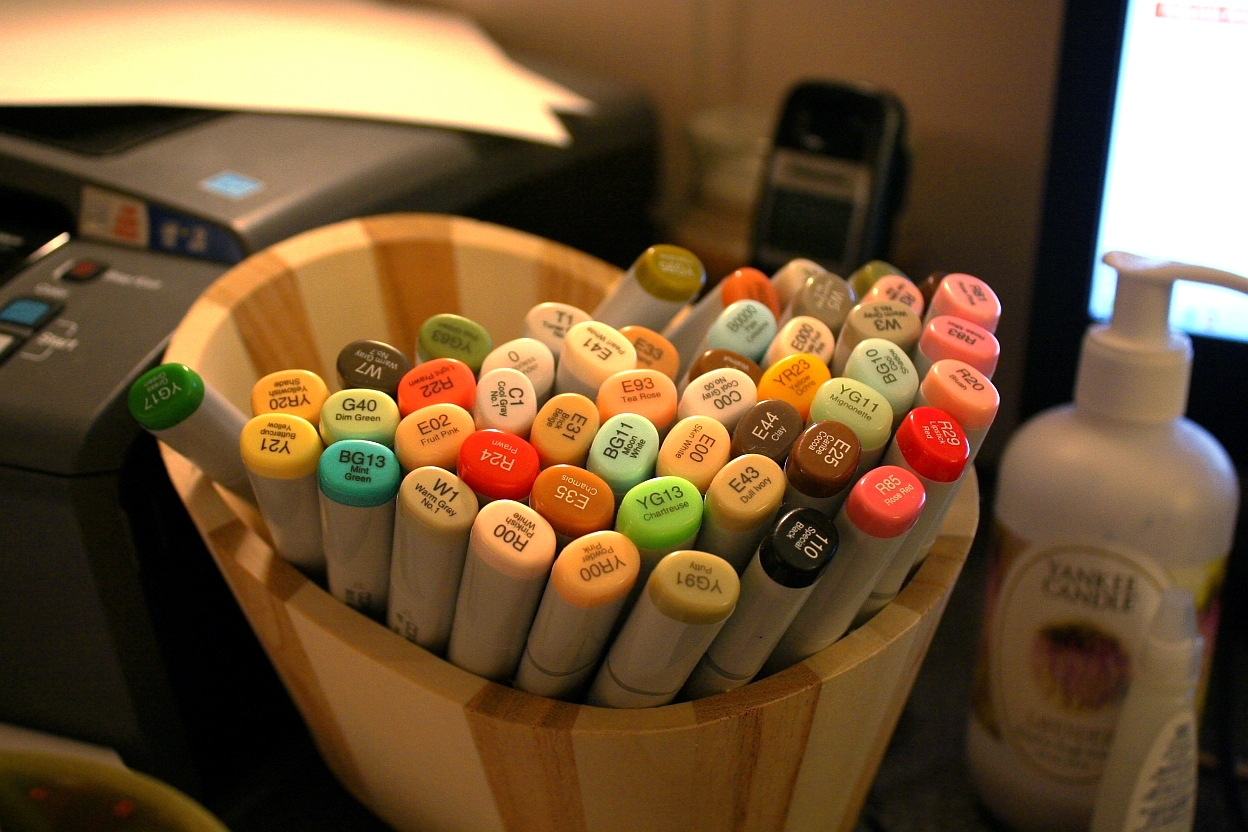
Oh, how I love my new Copics! I want to color all the livelong day. I have been so distracted trying to do my usual stuff: laundrylaundrylaundry, dishes that never end and homeschooling. I just want to PLAY! And sometimes I do play when I should be doing other things. Oh, spring, please get here soon so I can have a big dollop of you and start feeling like myself again! I'm tired of hibernating!

I think I almost used every one of my Copics on this card scene, seriously. So I am posting a pic of all of my markers. Hee! Actually, I just like looking at them. They're so pretty. *sigh* Like a bouquet of flowers.


I used my new homemade Bow Easy to do the bow. It worked great! To make it look like I tied the bow onto the ribbon that went around the card, I tied a knot in the ribbon, positioned it in place, and then glued the bow to the knot. It looks like I tied the bow right to the ribbon, or like it's all one piece.


I really wanted a fresh feel to the card. White and the pale blue from the sky were my inspiration.

I am in love with the Pure Innocence digi line! (Site is currently down for maintenance) They are just soooo precious! To this sweet little girl I added freckles and the word, "Spring" from Hero Arts CL305 and bumped up the grass scribbles a bit for added depth. Otherwise, everything else is the digi image.

Thanks for looking! I hope to be doing more coloring soon, so keep an eye out!

Recipe

Stamps: Pure Innocence 007 by Digi Stamp Characters, Spring by Hero Arts Sending Happy Thoughts (CL305)

CS: Papertrey Ink Stamper's Select White

Inks: Versafine Onyx Black, printer

Other: Cuttlebug D'Vine Swirls embossing folder, Nestabilities Curved Rectangles, paper piercing tool, sponge mat, Prima daisy, Basic Grey button, 3D-Dots, Diamond Glaze (to hold down flower, button and bow), white organdy ribbon
, Micron pen for freckles and scribbles