Saturday, January 15, 2011

Yukon Bear


Someone in my comments section anonymously requested that I do something with my SU Yukon set. I love requests like that! Thank you, anonymous person! So here goes...

...btw, if there's a stamp set you'd like me to play with please speak up. Sometimes these little nudges are what gets my mojo moving.

This card was done intentionally simply. After wrestling with that last card (thanks for the kind comments!) I wanted an easier design. No cuttlebugging, no designer papers (I skipped that on the last one, too, did you notice?), no paper piercing, just simple stamping, you know, like we used to do before accessory mania took over. It's funny, but I think I get more positive feedback when I go simple than when I doody it up.

So for this one I did direct to paper (basically rubbing the ink pad on the cardstock until it's fully saturated) on Always Artichoke cardstock with the Always Artichoke ink pad. It gives the cs a leathery or suede-ish appearance. It's wonderful for masculine cards.

Then on the More Mustard cs I used the Distressed Ink Antique Linen, direct to paper, and after that I stamped the SU Print Pattern background stamp in More Mustard over that.

For the bear I stamped in Memento Tuxedo Black ink and then colored it and the main background with Copics. I touched up the background trees a bit with an Always Artichoke marker.

Well, it was fun taking out one of my least-used sets and one of my most-used background stamps to play, so thanks again for the nudge, whoever you are!

Recipe

Stamps: SU Print Pattern, SU Yukon, SU Inspired By Nature (saying)

CS: Always Artichoke, Black, More Mustard, White

Inks: Distress Ink Antique Linen, More Mustard, Always Artichoke, Versafine Onyx Black

Other: Ticket corner punch, Nestabilities dies, Stamp-a-ma-jig, Copic markers, SU Always Artichoke marker, foam tape, gingham ribbon

Friday, January 14, 2011

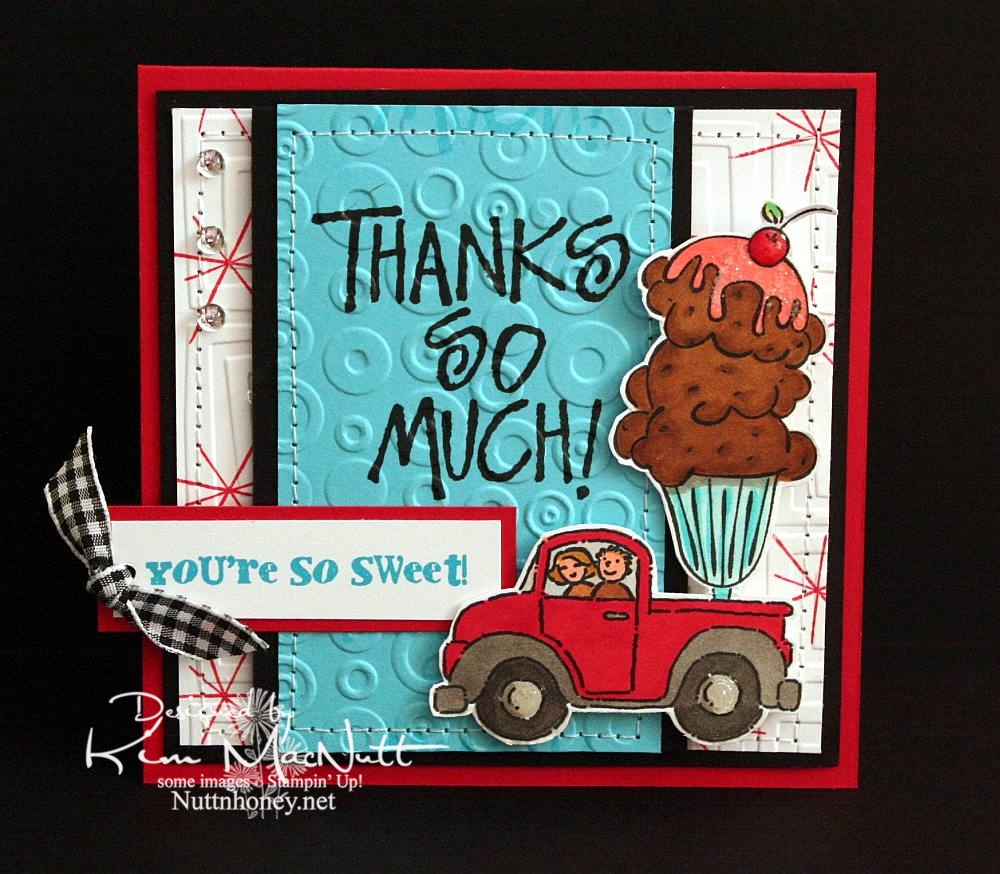
You're So Sweet!


Do you ever struggle with a card to the point of almost giving up on it, and then it magically comes together? That be my experience with this h'yere card.

To start with, I had the idea of putting the ice cream sundae in the back of the pickup truck from the SU Loads of Love set. Then I colored it without too much planning of colors in mind. Once I got to that point it got hairy. Since it was such a big "scene" I couldn't just plug it into a prefab sketch, so I just designed the card myself. First I started with a rectangular card in the standard A2 size. But it just wasn't feeling right. Then I went to a square format and that seemed the best fit for it to me.

Once that was decided I just had to decide which colors of cardstock to use and which colors to emphasize. One of my favorites is often red, but I love turquoise as well, so that's what I went with. I didn't want too much black, just accents, and that worked out really well.

I wanted a 1950's feel to the card (a la soda fountain), so I used the star image from SU All the Best as a background image. I wanted a bold word phrase to balance out the truck/sundae image, but I wanted it to be more than just the word phrase. So I used VersaMark ink to repeat the word phrase in a scroll-like fashion up and down. Then I cuttlebugged the turquoise cardstock with Spots and Dots and sewed a stitch around it. Busyness without being too busy.

For the white background I stamped the star from All the Best in Real Red ink randomly and then used the Traffic Jam embossing folder to add to the 50's look.

The "You're So Sweet" phrase was done in Microsoft Word on the computer. I printed it out in turquoise ink. I got the font from Kevin and Amanda's site, Fonts for Peas. Awesome site, btw! They're so kind to offer such a huge selection of free fonts! The font I used can be downloaded here. My font size was 8, the smallest it could be. You can learn how to use their fonts here.

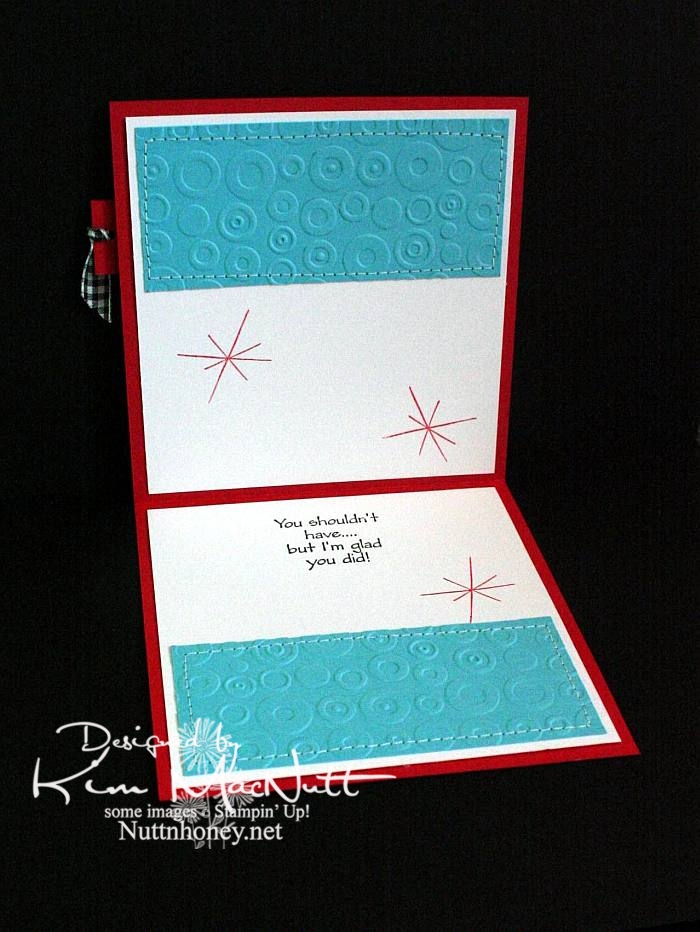
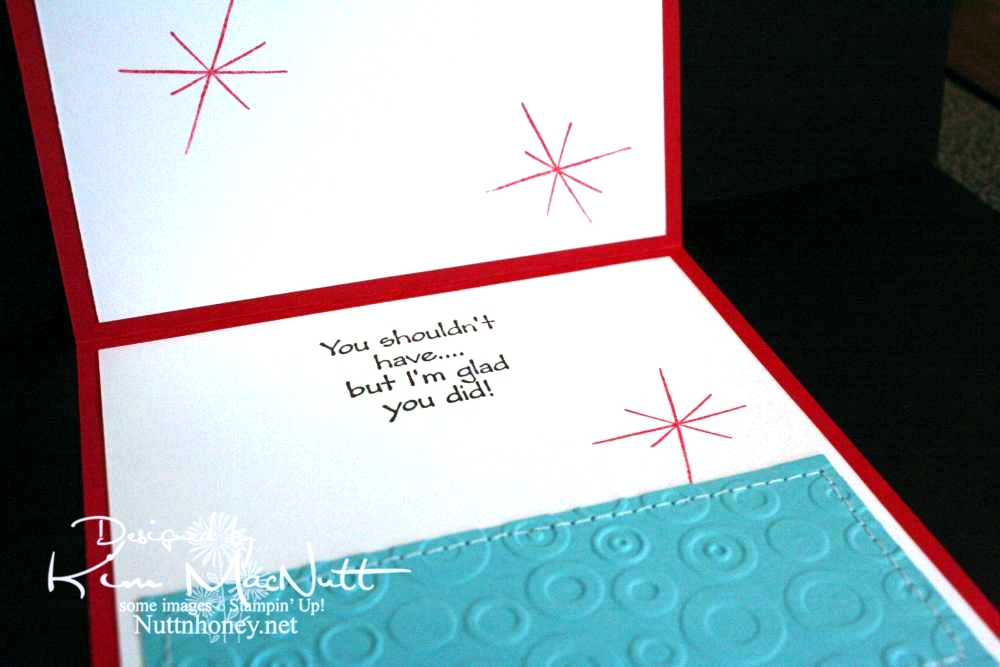
As you can see, I did the red stars inside the card, as well, and I also repeated the turquoise, Spots and Dots, and sewing theme from the front.


Both outside and inside phrases are from the SU Many Thanks set.


Most likely all the stamps used are now retired. But I still enjoy them. They're still current and fresh.

I wanted to mention that I did not do what I encouraged you to do. These are not my most well-loved stamps. But I do love them. They are stamps I doubt I'll ever sell.

Did you pull out any well-loved stamps recently?

Recipe

Stamps: SU Loads of Love, SU Loads of Love Accessories, SU Many Thanks, SU All the Best, SU Sweet Treats, "You're So Sweet!" phrase from computer

CS: Real Red, Black, White, Tempting Turquoise

Inks: Versafine Onyx Black, VersaMark watermark ink, SU Real Red

Other: Cuttlebug Traffic Jam and Spots and Dots embossing folders, sewing machine, Various SU and Copic markers
, clear gems, black gingham ribbon, clear glitter, Diamond Glaze, Stamp-a-ma-jig, foam tape, 1/8" circle punch

Wednesday, January 12, 2011

Frustration

Well, I am working on a card for my last post. It's just not going as smoothly as I'd hoped. Do you ever have that experience? Naaaah. lol

Tuesday, January 04, 2011

Budget woes

I asked Hubs the other day, when we were talking about our budget (as we usually do around the end of the year - woe!), how much money I have in my spending account. We each have a "fun money" account that we can spend on whatever we like.

Well! I was not given the good news I had hoped for. Believe it or not, I've not spent anything from my fun money since May! Seven months of being a good girl! I had run up a stamping debt and was determined to pay it off by avoiding spending on anything until it was gone. And typical of me, I wasn't looking too hard at the balance because I wanted to believe it wouldn't be too long before it was paid off (I get $40 a month).

But I was informed that my account right now has over $700 in debt!

I can tell you that I was totally, TOTALLY bummed hearing this, but that has been the way it is when it comes to stamping and me. Spendspendspend into oblivion.

So it looks like I won't be buying anything new for around 2 years! Woe is me! Hubs could wipe it out with some money from our emergency fund, and that is what it's floating on right now, but I want to do my part in paying it down, and that means learning to love what I already have. So I'd better get used to it, huh? It'll be awhile before I can smell new rubber or open a new shiny thing to play with.

But I'm okay with that.

Mojo Monday week 172

Wow! Week 172?!? Time flies, doesn't it?


I was in the mood to do a whole sheet of some stamped images as a background for a card, kind of a lighter version of the Double Time technique. So I used Stampin' Up!'s Doodle This set, which I think is retired. They retire stuff way too fast these days!

I used a mixture of Copics and SU markers to color the images along with a water brush, and I used an air art gun with a (SU) Basic Black marker to get the sprayed black splotches.

There is clear glitter on the main flower element and I glued a gem to the center to give it some wow.

This card has lots of cuttlebugging on it. I used the Tiny Bubbles, Mesh and Forest Branches embossing folders.

The "Thanks!" stamp is by PSX.

Thanks for looking and have a lovely day!

Friday, December 31, 2010

Coffee lady


Oh joy! I stamped! The desire to stamp has been coming back to me and I put together a card the other day in honor of me being sick and reading Julia Child's My Life in France book. Ha! A good book to read while sick, IMHO.

This card is nothing special, but I think it's okay for someone who hasn't stamped in a ridiculously long time and is also under the weather. The coffee lady looks how I feel these days. I've had a lingering cold for weeks now and I have near me my trusty cup of PG Tips tea to console me.

I hope you enjoy my coffee (or tea) lady, and have a Happy New Year!

Sunday, December 05, 2010

Free Christmas printables

Hello, my stamping friends! Hope all is well with you! I ran across something I thought you'd like. How about some free Christmas printables??

Go get 'em!

Sunday, October 24, 2010

Free digiscrapping kit from Shabby Princess

Forgive me for being neglectful of this blog, but life is too full right now for me to even be thinking about stamping. It's way down on my list of things to do. But I was cleaning out my inbox and discovered this little tidbit that I thought was worth sharing.

Check out The PLENTIFUL Collection over at Shabby Princess. It's FREE! How nice of them!

Friday, October 22, 2010

Getting dusty around here

Wow, has it really been a month and a half since my last post? I'm so sorry that I'm not actively stamping right now, nor even doing much at all that pertains to stamping. The most I've done is update some things on my website. I went through the mountain of links on my Great Tutorials page and that was almost more than I could stand. What a lot of links I've found! And there's no easy way to check them other than clicking on them.

I had found out that SCS had changed every link to every tutorial at some point recently (probably during the owner change or whatever), and every link I had from them was no longer working. Thanks SCS!!! So I had to go in and manually change

Thursday, September 02, 2010

For You


I am still without my beloved Canon Rebel so please forgive the slightly gimpy picture. A good camera is priceless.

This card is for a friend whose birthday is coming up in a week or so. I'll admit that this image isn't really a birthday image, per se, but I think it can pass as one with the "card" and all. It can, can't it? I'll also admit that I already had this image printed out and decided to use it rather than print out something else.

I wanted to try using only (or mostly only) colors in the warm neutral Copics to see how it would turn out. I love it! And I also wanted to try that shiny black hair tutorial I posted recently. Pretty cool, I think, but a little harder than I expected since I tend to overdo, and under-doing is better in this case. My inspiration for this coloring job came from this artist's style. Maybe a little Tim Burton-ish. Unfortunately, the camera couldn't pick up the more subtle shading I did on the face and the envelope doesn't even look colored, but it is. Also, the flowers are redder than they look. *sigh* I miss my good camera.

Thanks for the comments on my last post. When I think of competitiveness in the card-making community, I think of how many of us feel the need to use the latest stuff or we think our cards aren't worthy of posting, or something like that. At least, that's my problem. This happens to me all the time: Just when I start collecting the latest Spellbinder dies I find out they're yesterday's news and all the cool stampers have moved on to the new sets...and they all seem to know what are going to be the most popular dies. The same with stamps and inks and embellishments. They must have a money tree in their back yard or they're being given free stuff. I don't know.

I know it's childish of me to struggle with this stuff, but I do. And I doubt I'm alone. It's the main reason I avoid going on too many blog hops. I just can't take how behind the times I am and I feel constantly tempted to buy more stuff to keep up. Yes, big confession. So I stay in my own little corner and try to be content with what I have. It's the best way for me to deal with it. My budget groans when I try to keep up, doesn't yours?

Please forgive me for ever feeding the spending frenzy by what I've posted here. Perhaps I should do more to encourage using what you have rather than point you to yet another thing to buy. These days I am far less "stuff-oriented" than I used to be. Maybe it's the memory of all that money I've (over) spent over the years on this hobby. It makes me afraid to step foot in a crafting store! I keep thinking of all the other stuff I already have. I should not be buying more.

Okay, back to the card. One thing I want to mention that I did differently is I distressed both the inside and outside edges of the blossom. You can use a scissors (hold scissors open with the sharp edge exposed - rub the scissors along the edge while holding the paper firmly or vice versa - whatever works for ya) or a thread cutter to achieve that look. Also, it's hard to tell from the pic, but the girl image is under the blossom die cut. I cut a hole in the center of the blossom and used foam tape snipped into tiny pieces around the "petals" of the flower to raise it up.

Hope you have an inexpensive, fun-filled evening! ;)

Stamps: Pure Innocence 004 digi stamp, All Year Cheer I word saying

CS: White, black, PTI Pure Poppy, Basic Grey Granola, Stampin' Up! Swirl vellum

Ink: Versafine Onyx Black, computer ink

Copics: W00, W1, W3, W5, W7, 110, R29

Other: Martha Stewart Doily Lace border punch, SU! spiral punch, Spellbinders Nestabilities Blossom die, Standard Circle Large die, Cuttlebug Script embossing folder, sewing machine, clear gems, red gingham ribbon, foam tape