Hey everyone! I'm pulling my hair out trying to pick Copic markers again, and I thought it would be wonderful if someone hand colored a chart with the actual (Sketch) markers and sold it. But I can't find anything like that out there. Do any of you know of such a thing? Or could I get someone with all the colors to color me a chart? I'd be willing to pay you for your time. It would be a lot cheaper than buying markers I'm not happy with!
I love organizational tools. Enough, in fact, to spend precious birthday money on them.
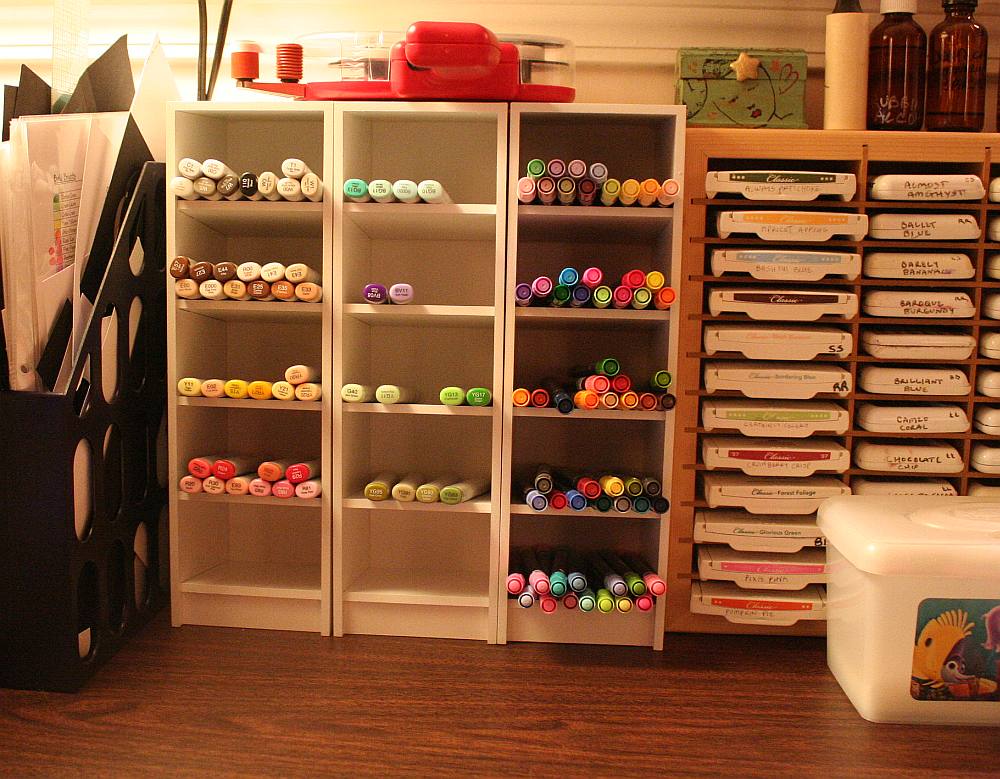
I had been drooling over the Color Cubbies that I've seen around the stamping blogosphere and knew that someday I would have some of my own.
At first I was only going to buy 2 as I don't have a very big Copic collection yet and I thought I could use them for my SU and CTMH markers, as well. But the shipping was pretty high on 2. So I put one more in the cart just to see if it would change by much. Well, 3 was barely more in shipping than 2! So I figured I'd just bite the bullet and get 3 now even though it meant I'd have less to spend on other things.
I LOVE them!
They're really well made and packaged. Good and sturdy. And I don't think they're too expensive. It is so easy to see all of my markers at a glance now, and it's so easy to remove and replace them.
Now I just need to decide which Copics to buy so I can start filling 'em up!
Oh, you guys, I have very generous parents and a mother-in-law and now I have some cash to spend on myself! I'm thinking that more Copics is a must because I use them pretty much every time I stamp now and my collection has some bare spots to fill in.
But otherwise, is there anything new coming out that is a must-have in your mind? I've not been keeping up with the trends since I've been avoiding spending money until my past stamping debt heals. And no, birthday money will not go toward my debt. It is off limits! ;)
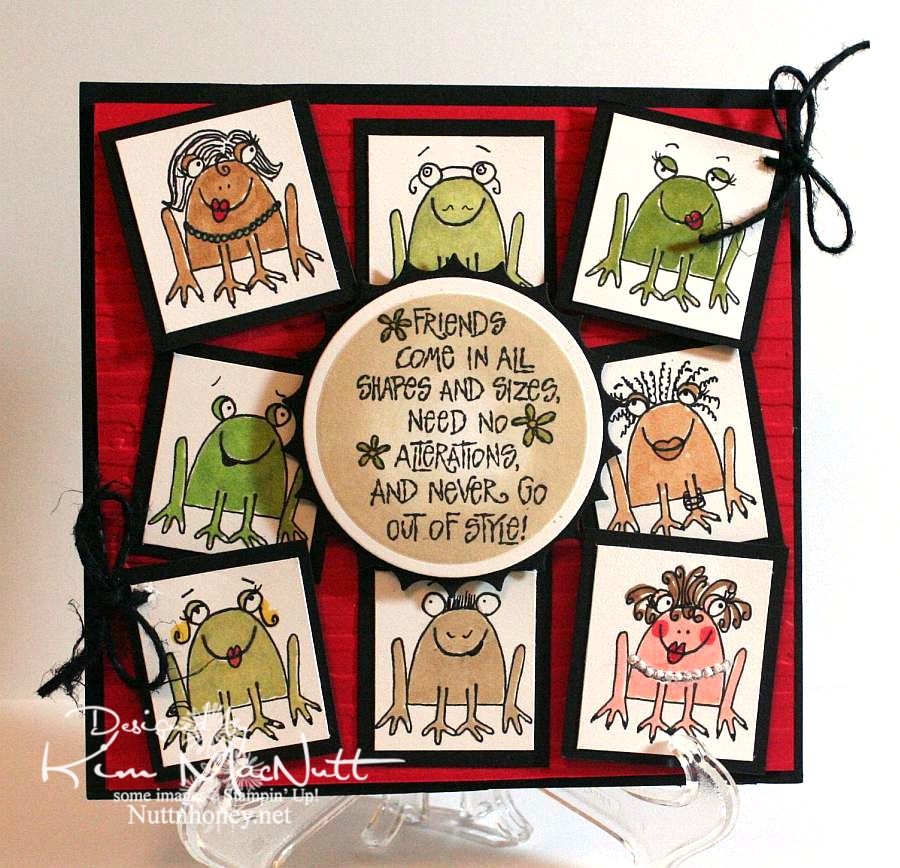
These frogs are not altered much. I actually did them before playing around with the frogs for the last card.
For the stamped background I used SU Shapes & Shadows, doing the Double Time technique by overlapping complementary images and leaving some white space, then cutting a piece for my card. Then I ran it through the Cuttlebug with the D'Vine Swirls embossing folder.
I used the Swiss Dots folder on the frog pieces and the Forest Branches folder on the yellow cs. Almost everything is textured!
I colored the frogs with Copics. I just can't seem to use anything else as the Copics are so gentle and smooth on the paper.
Thanks for looking! Today is my birthday and I'm meeting a friend for lunch. This card will be for her. I hope you enjoy it!
Recipe:
Stamps: SU Unfrogettable, SU Shapes & Shadows, SU Upsy Daisy
CS: Pixie Pink, Black, Summer Sun, White
Inks: Versafine Onyx Black, Pixie Pink, Certainly Celery, Summer Sun
Other: Copics, Cuttlebug D'Vine Swirls, Forest Branches and Swiss Dots embossing folders, Nestabilities circle, inverted scallop circle and rectangle and scalloped rectangle dies, black organdy ribbon, foam tape
I never realized how versatile the sitting frog from SU Unfrogettable was. It was so much fun playing around with the features using just the thin end of an SU Basic Black marker. Now I need to see what other stamps I can embellish like this!
I had to be careful not to touch the black ink with the Copics as I colored them. The Copic ink makes the SU marker ink run, unfortunately. And the Versafine ink I stamped with also is not Copic-friendly. So you have to be careful. But I liked the more cartoonish way I colored the frogs. I meant them to show a little white here and there. It looks more whimsical, I think.
I used puffy fabric paint for the girl on the bottom right's pearls.
Nifty tip: To switch the direction of the eyes, draw eyelid lines over the pupils. Then redraw the pupils in a new spot.
I saw this post at a new-to-me creative blog. I thought her idea of making such simple cards with just a couple pieces of cut out cardstock on a white background was pretty cool. These make me think of Julie Ebersole's style (JulieHRR).
I'm in the process of making a card using SU's Unfrogettable set (retired) and I thought it'd be fun to play with the sitting froggy a bit. So I made a few changes to the frog's appearance. How fun is that!
You can see in this pic what the original frog looks like:
And here are some new characters I came up with:
The possibilities are endless! Do you ever alter your stamps for certain effects?
This card is, once again, not what I had originally planned. I was inspired by Donna's Tiddly Inks challenge card that is all white except for the Tiddly Inks image (and the sentiment), so I was going to do this week's Mojo Monday sketch in all white using a Tiddly Inks image as my focal point. Except it didn't look as good as I'd hoped. So as I often do, I just made my own design for the image I chose.
I was originally going to have the Thanks stamp (an old wood-mounted stamp by D.J. Inkers) going vertically along the right side and the fairy also vertically in front of the small white rectangle. But the balance seemed off and I turned the card to the right and had the fairy perpendicular to the white rectangle with the sentiment horizontal. That felt better! Then I popped the Thanks sentiment after coloring a second copy and that made things even better.
Oh, the fun and frustration of designing a card!
Btw, I colored the images using these Copics:
Mentioning the whole vertical/horizontal thing reminds me of a skit by my favorite comedian, Brian Regan. Here's a clip about Pop Tarts where the vertical concept comes into play. Enjoy!
Recipe
Stamps: Tiddly Inks Spring HuggaBugg digital stamp, Thanks sentiment by D.J. Inkers
CS: White, Real Red, Black
Inks: Versafine Onyx Black, computer ink
Copics: E00, E93, YR00, R29, BG13, 110
Other: Cuttlebug Traffic Jam, Swiss Dots, and Forest Branches embossing folders, Nestabilities rectangular dies, clear glitter, glue pen, red gem, black polka dot grosgrain ribbon, white grosgrain ribbon, foam tape
Just wanted to put the word out that if you have a stamping blog you'd like listed on my Other Stamping Blogs page on my website, please leave your blog address in the comments and I'll add you. I'm happy to promote anyone who loves the paper arts!